Week 1: Bathhouse Project
This semester we have been asked to design a bath house located in the basement of the WW building. This bath house must have a major bathing space for 5-10 people as well as two smaller complementary bathing spaces for 1-2 people. The space also needs changing rooms, lockers, showers, toilets and a place for eating and drinking.
This week we were split into small groups to work with to construct a model of the WW building. Throughout the week our group has started to plan things such as materials for the model as well as thinking about our favorite bathing experiences.
What is Bathing?
Bathing is the washing of the body with a liquid, usually water or an aqueous solution, or the immersion of the body in water. It may be practiced for personal hygiene, religious ritual or therapeutic purposes.
Bathing can take place in any situation where there is water, ranging from warm to cold. It can take place in a bathtub or shower, or it can be in a river, lake, water hole, pool or the sea.
https://en.wikipedia.org/wiki/Bathing
Bath House Site:
Outdoor courtyard space 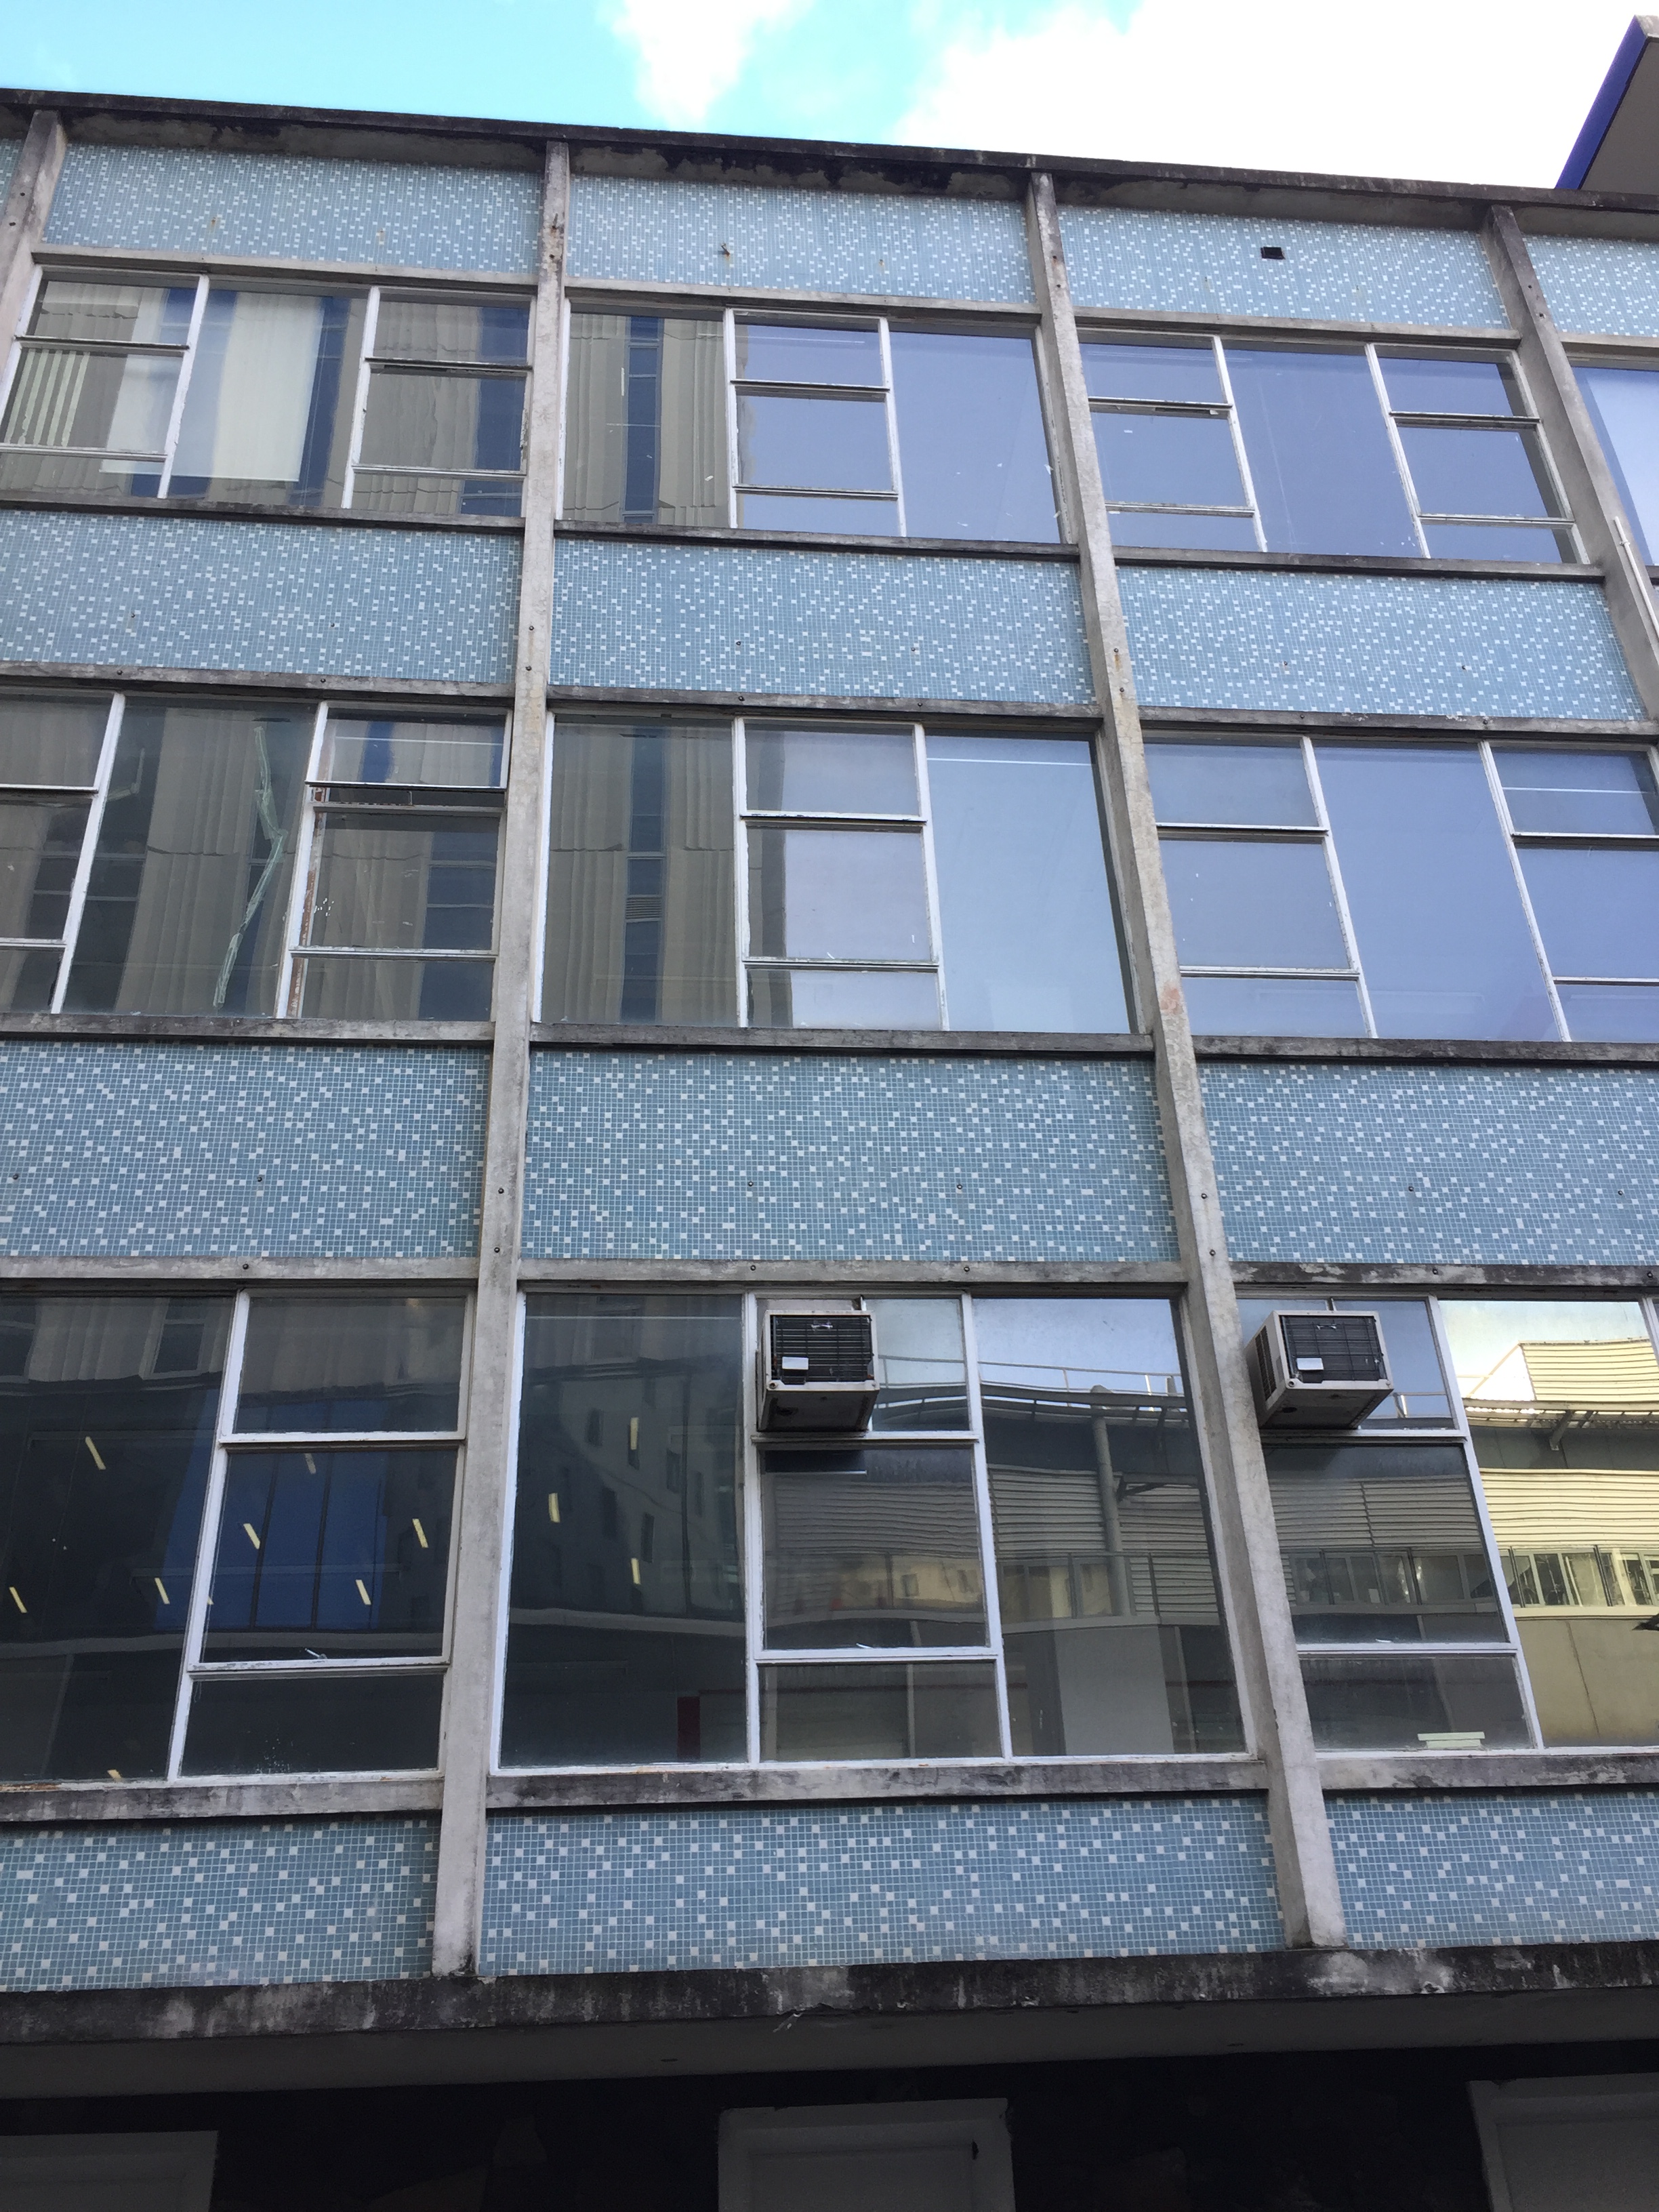
Windows of higher levels 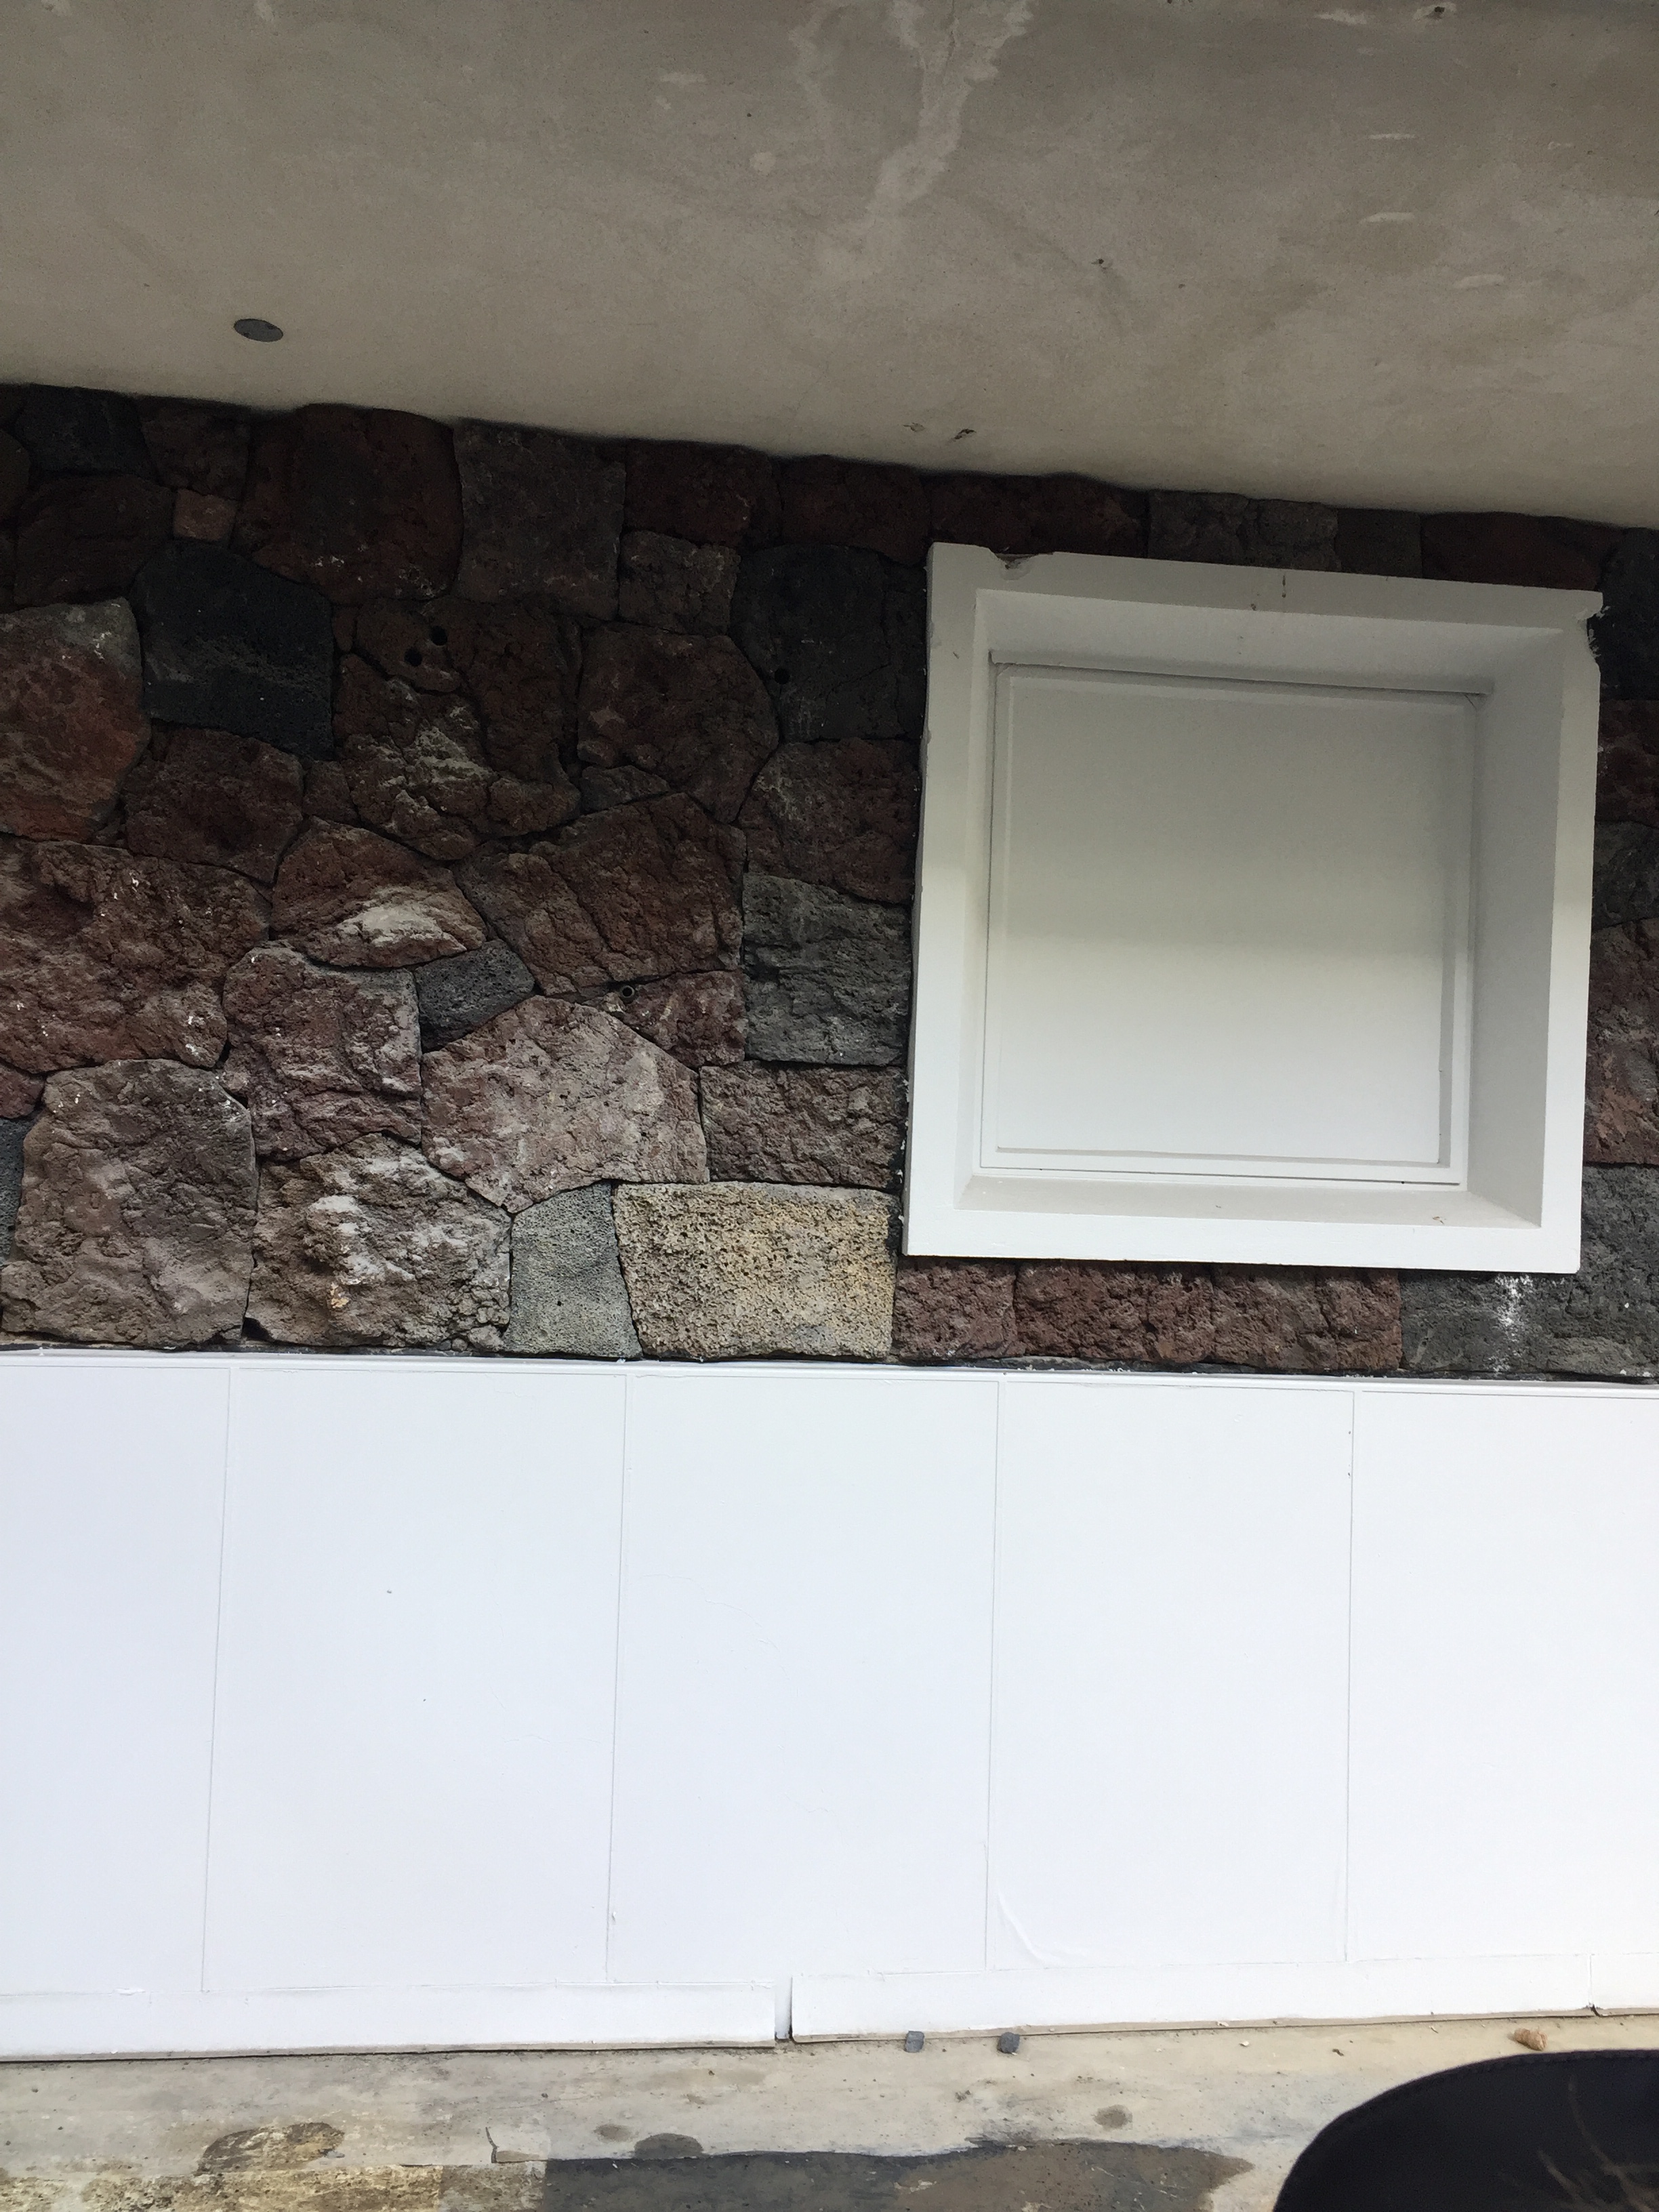
Volcanic stone wall on exterior of basement 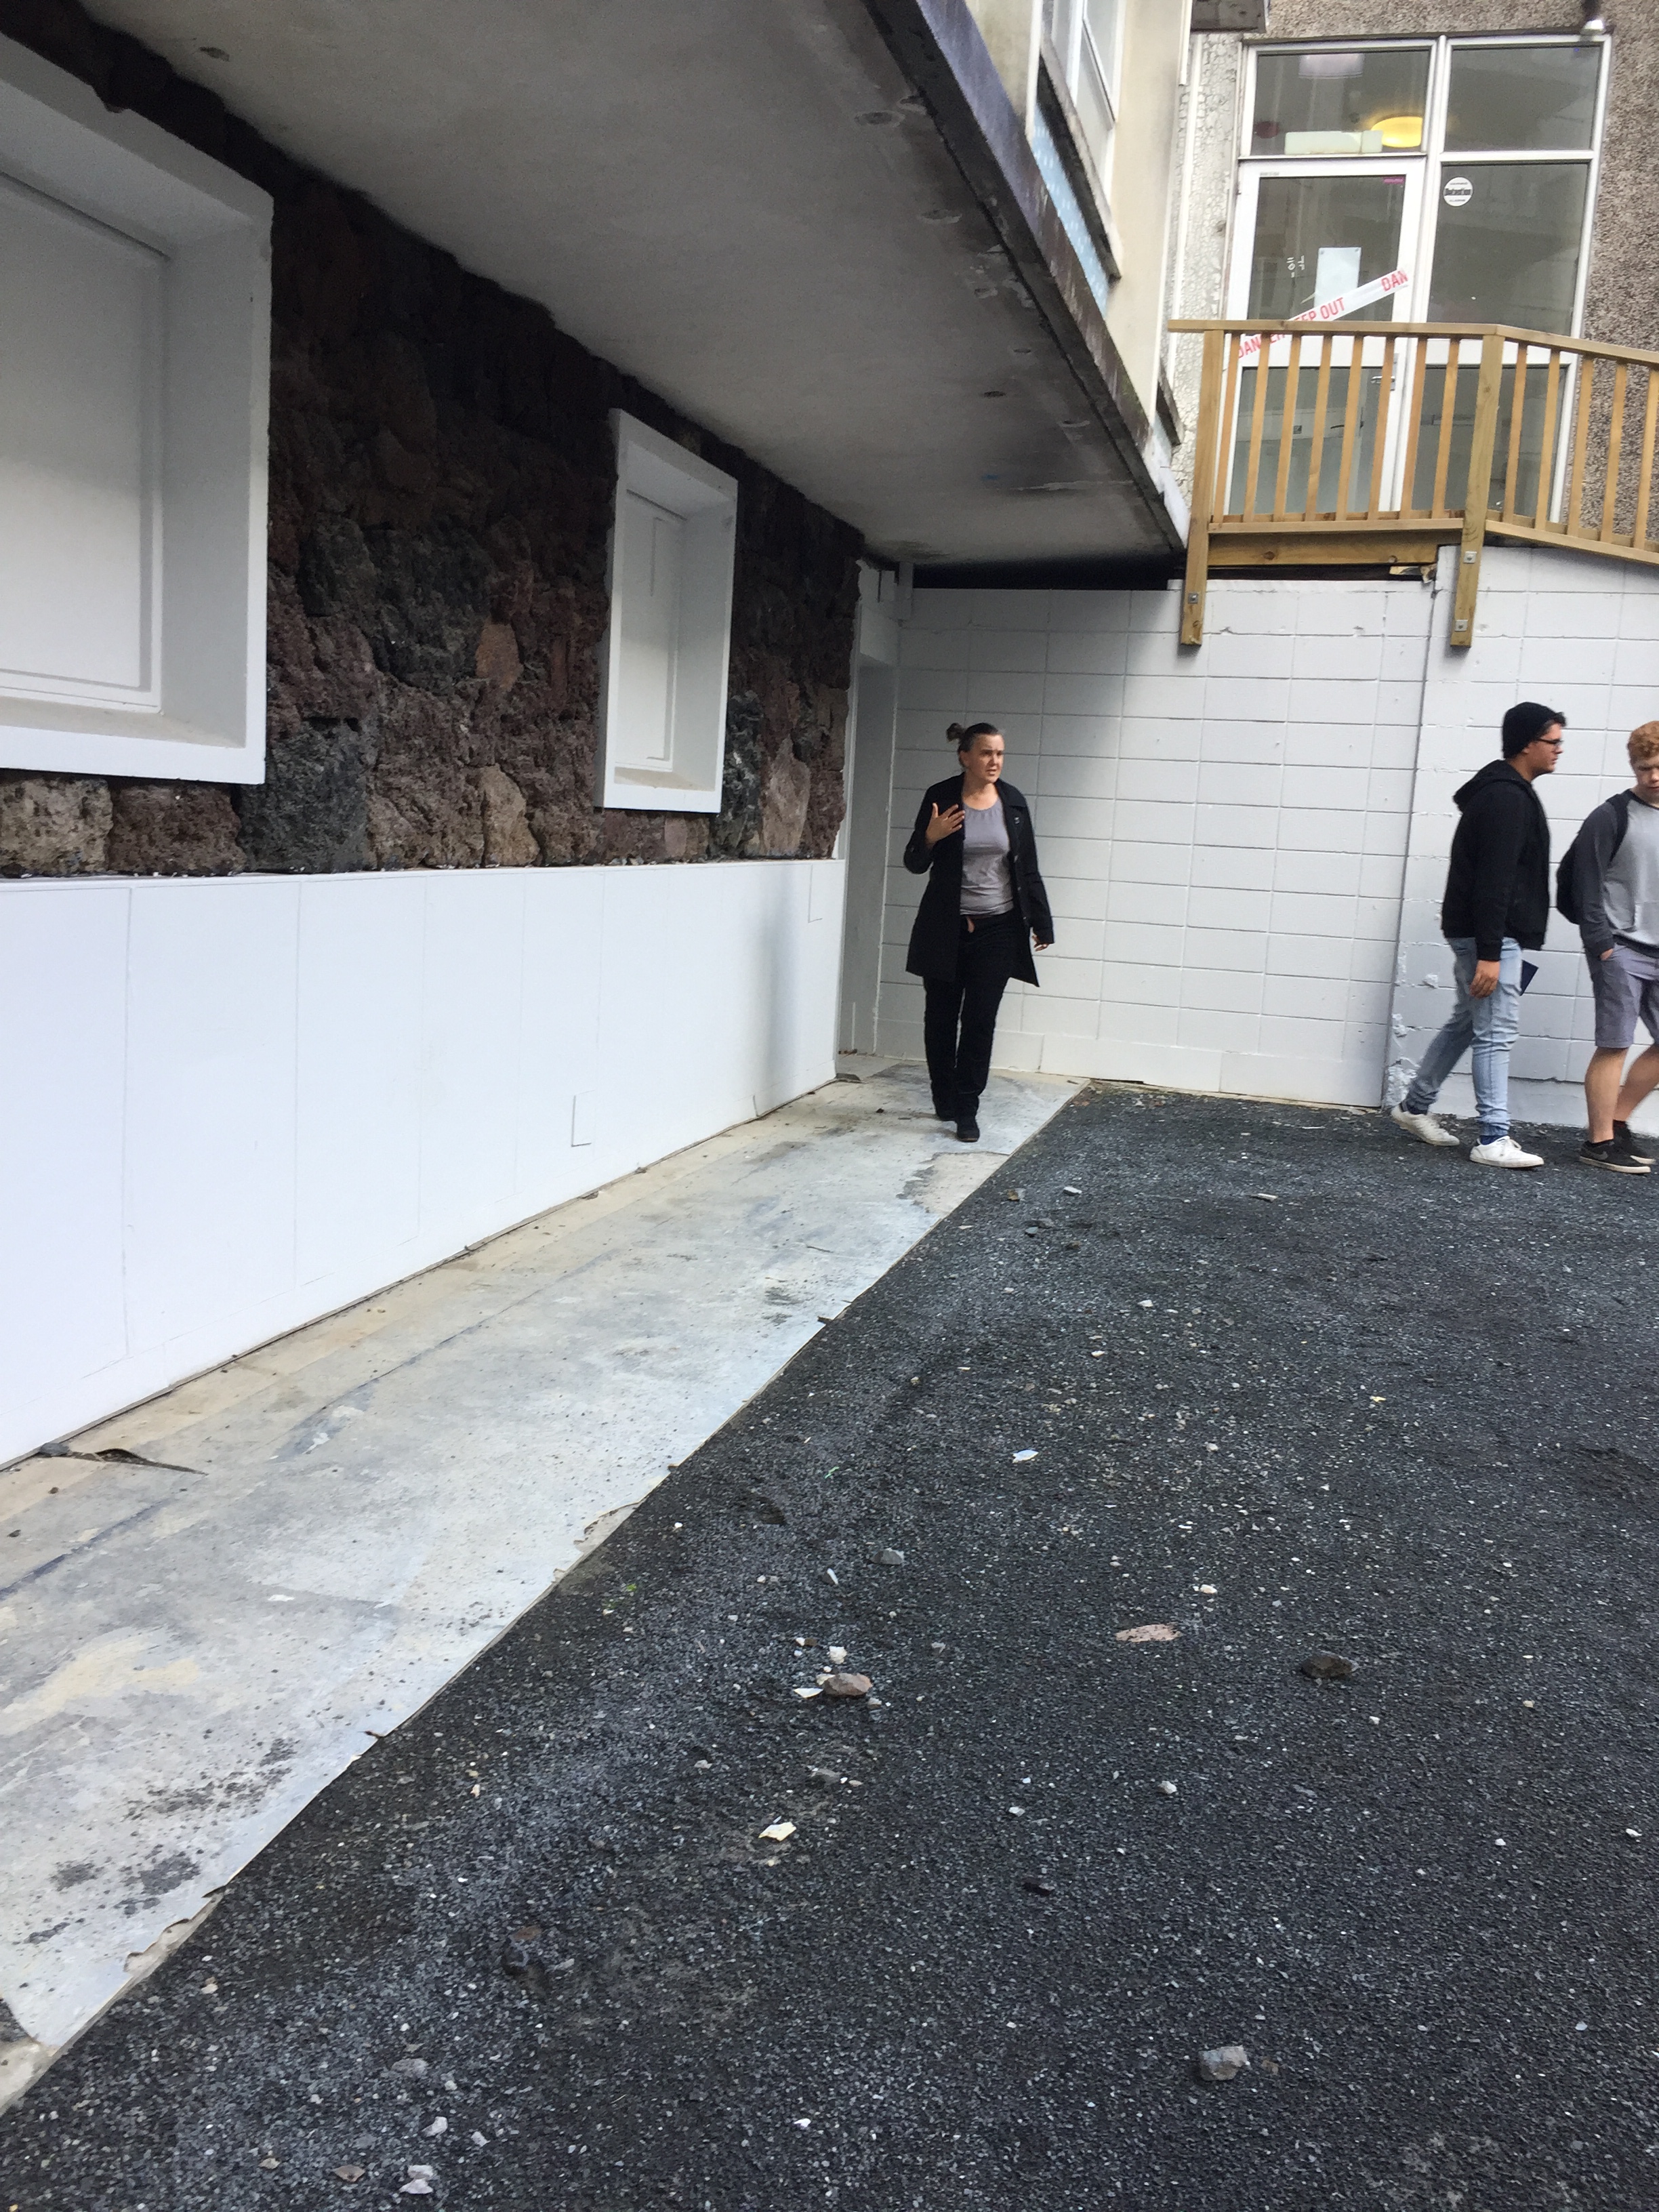
entrance way 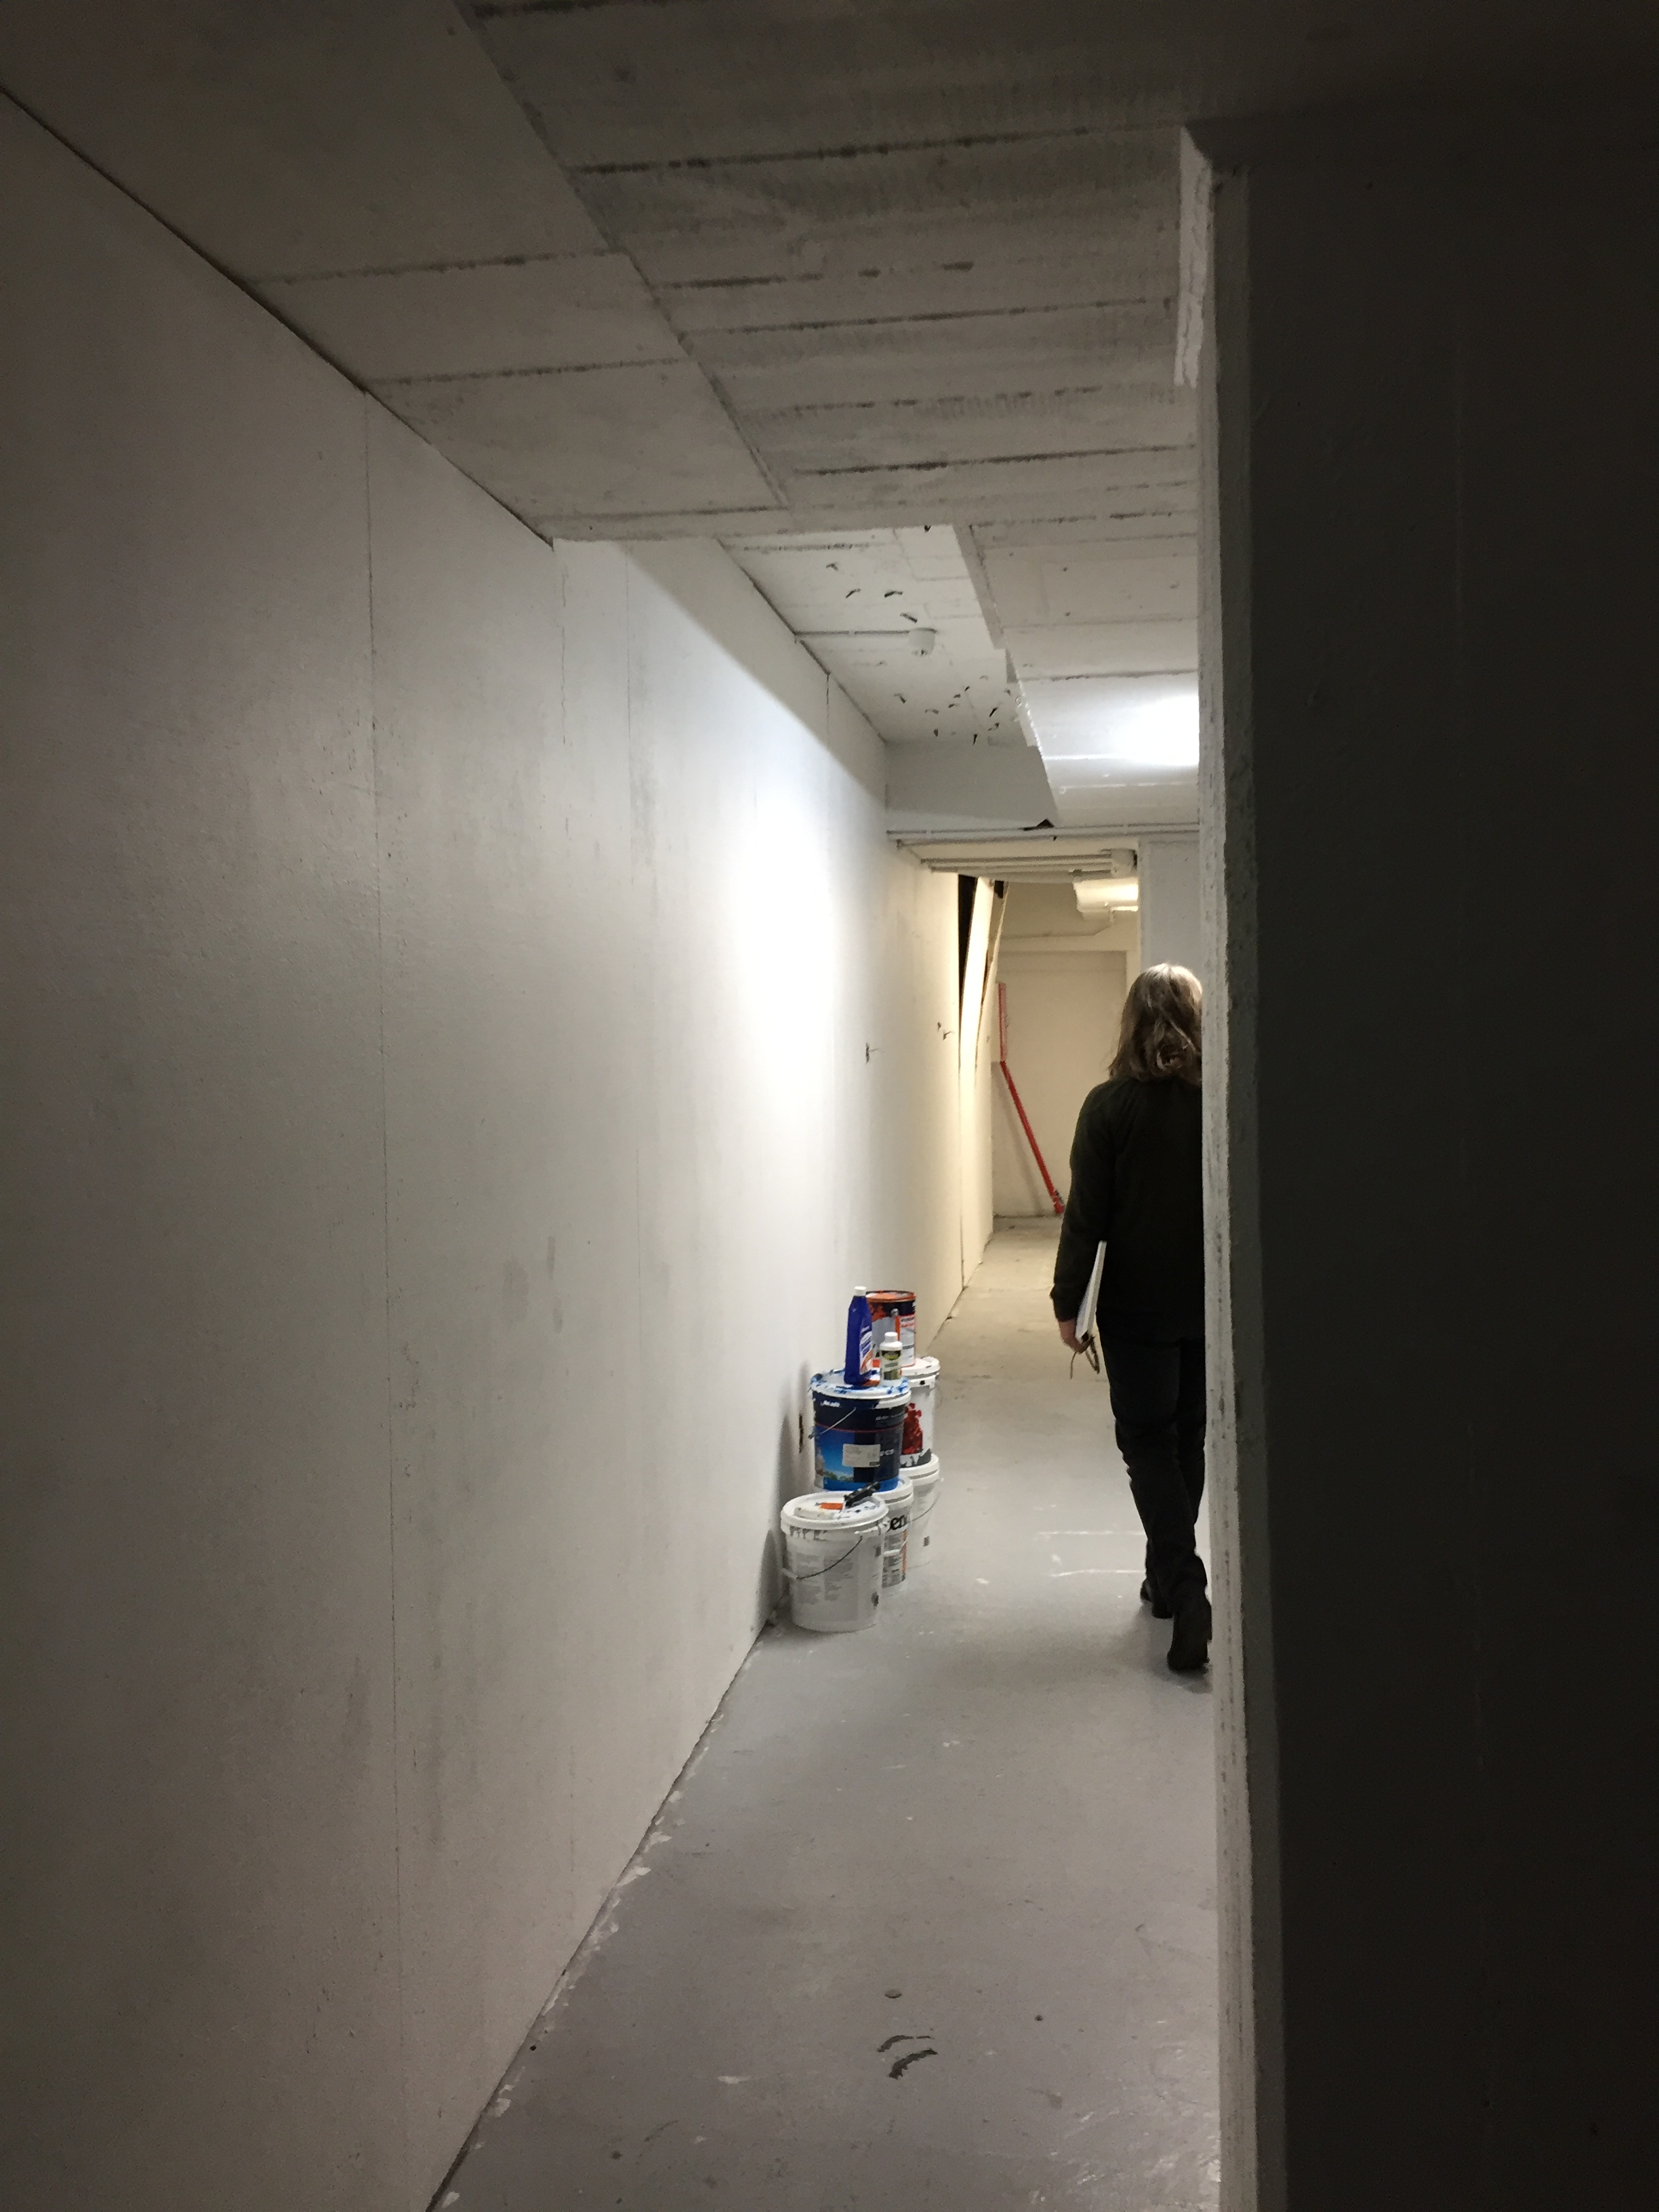
space between column and wall 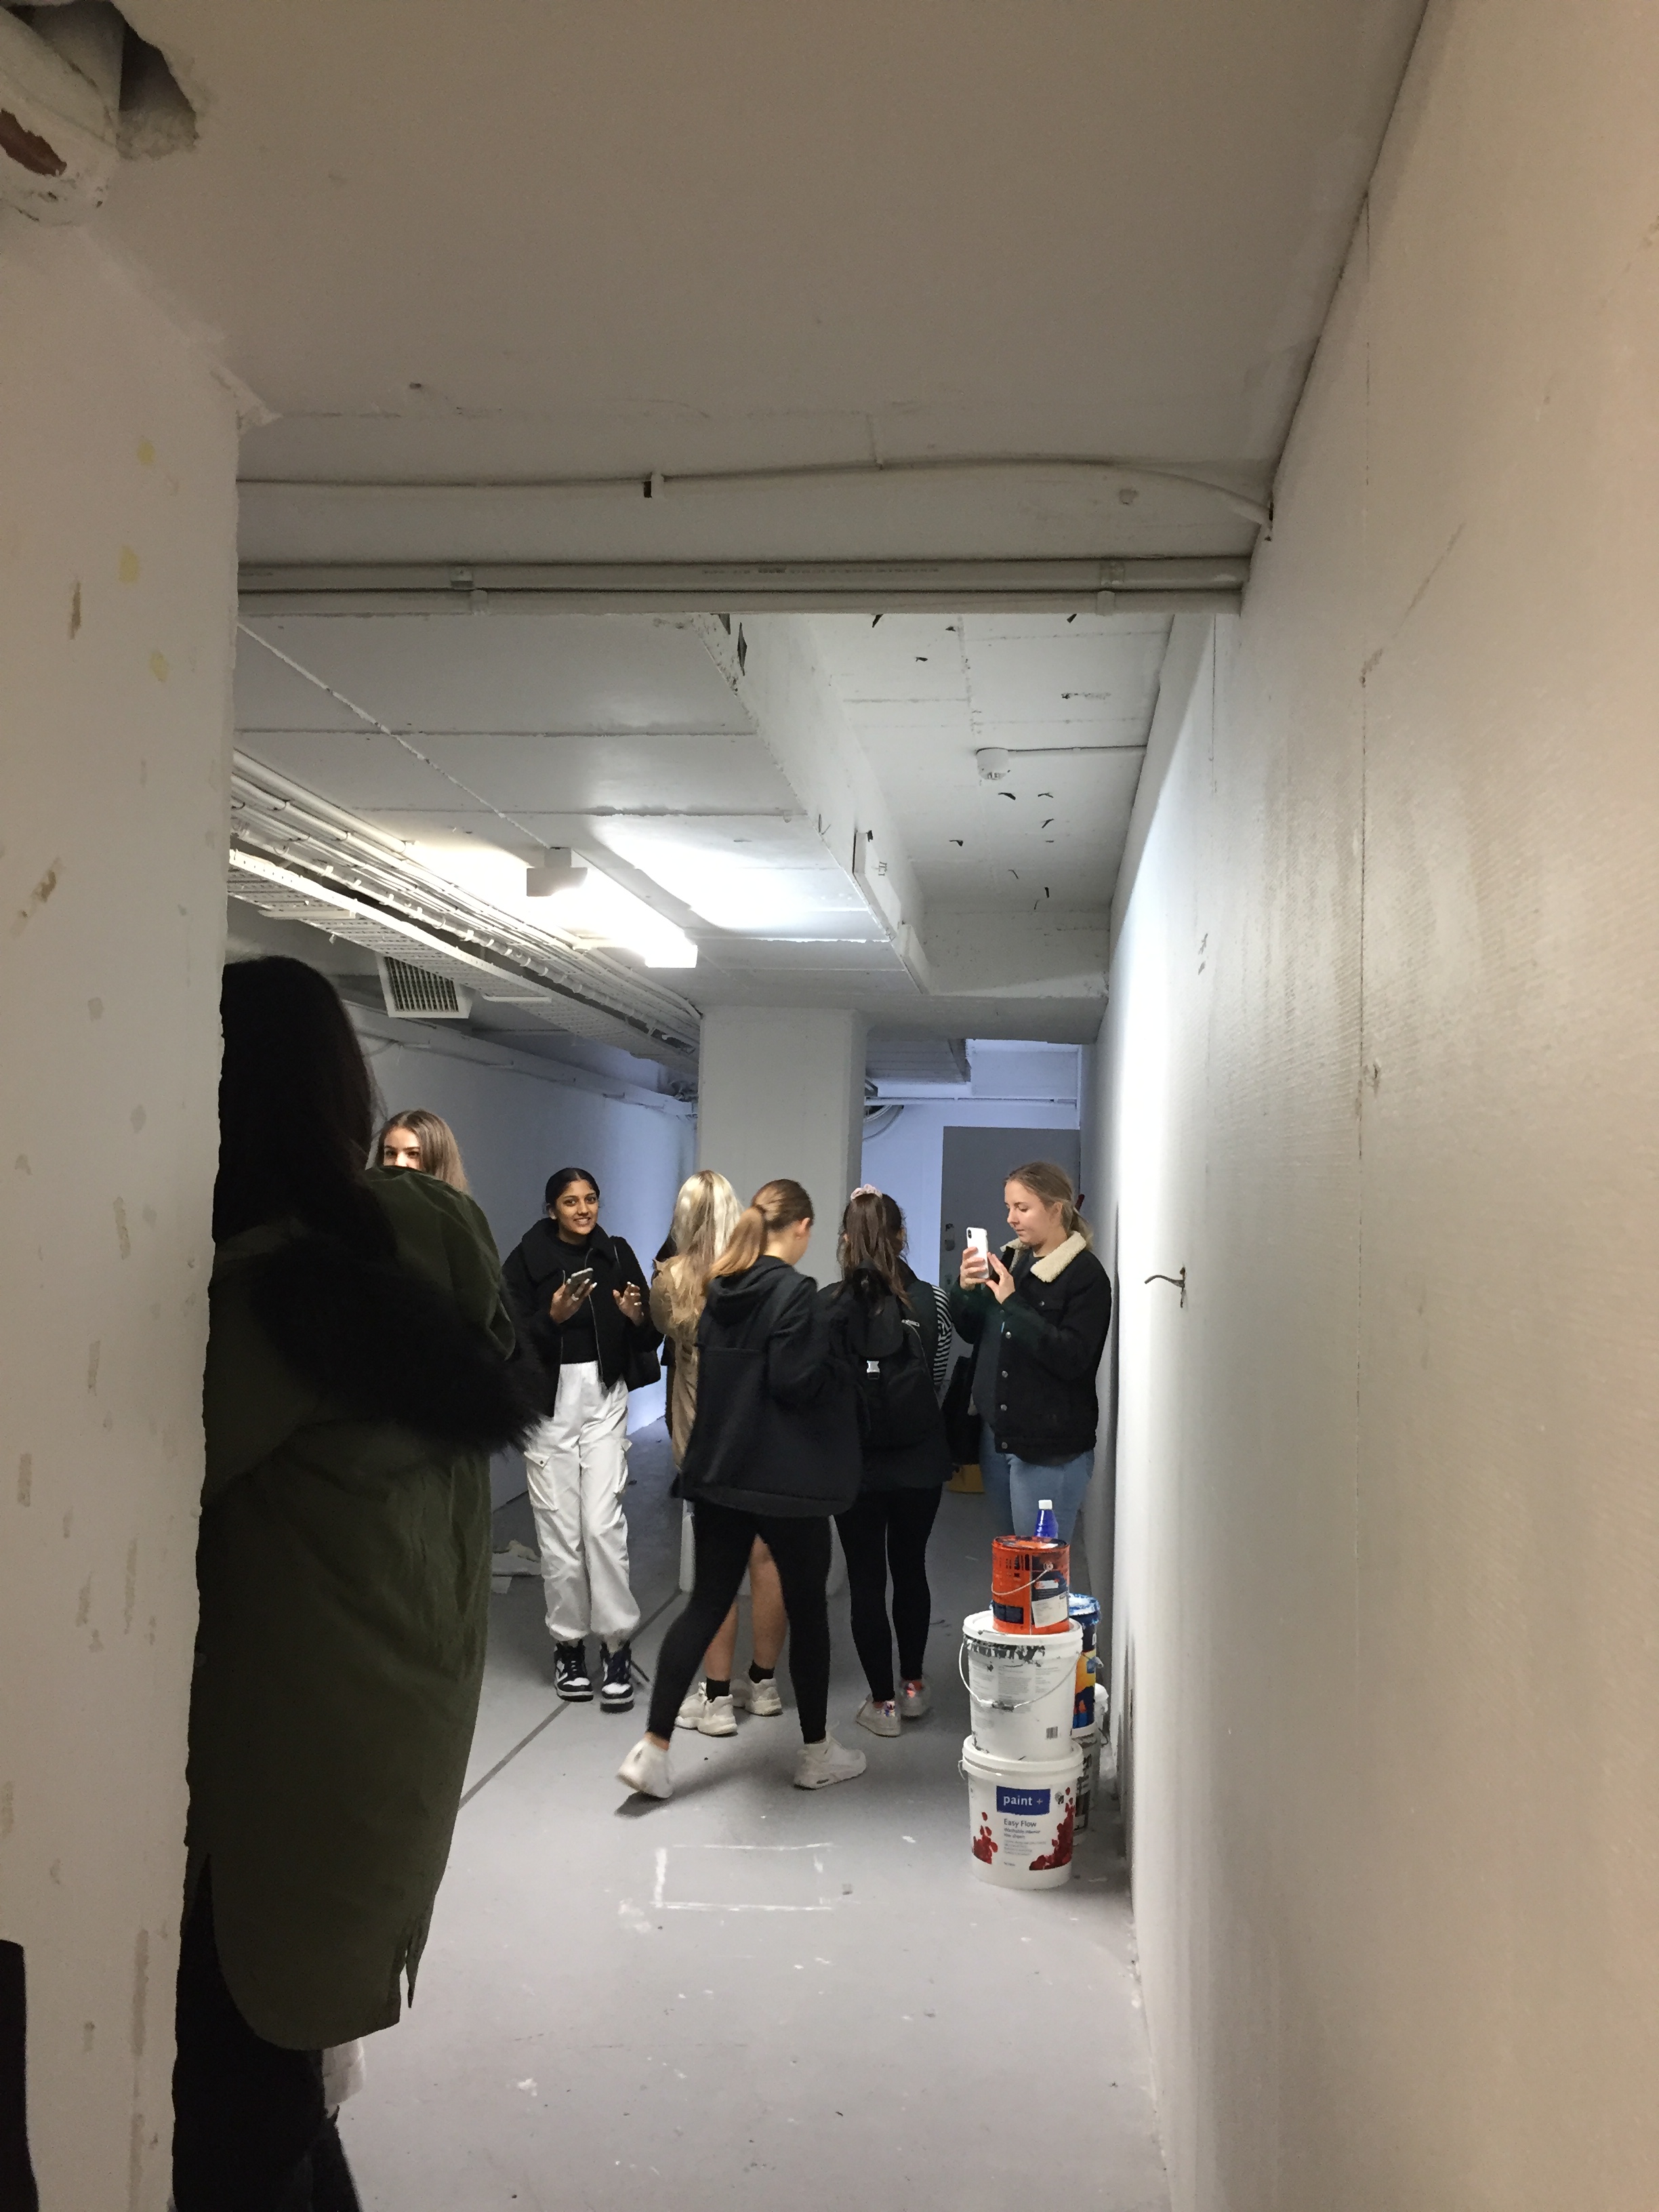
interior view 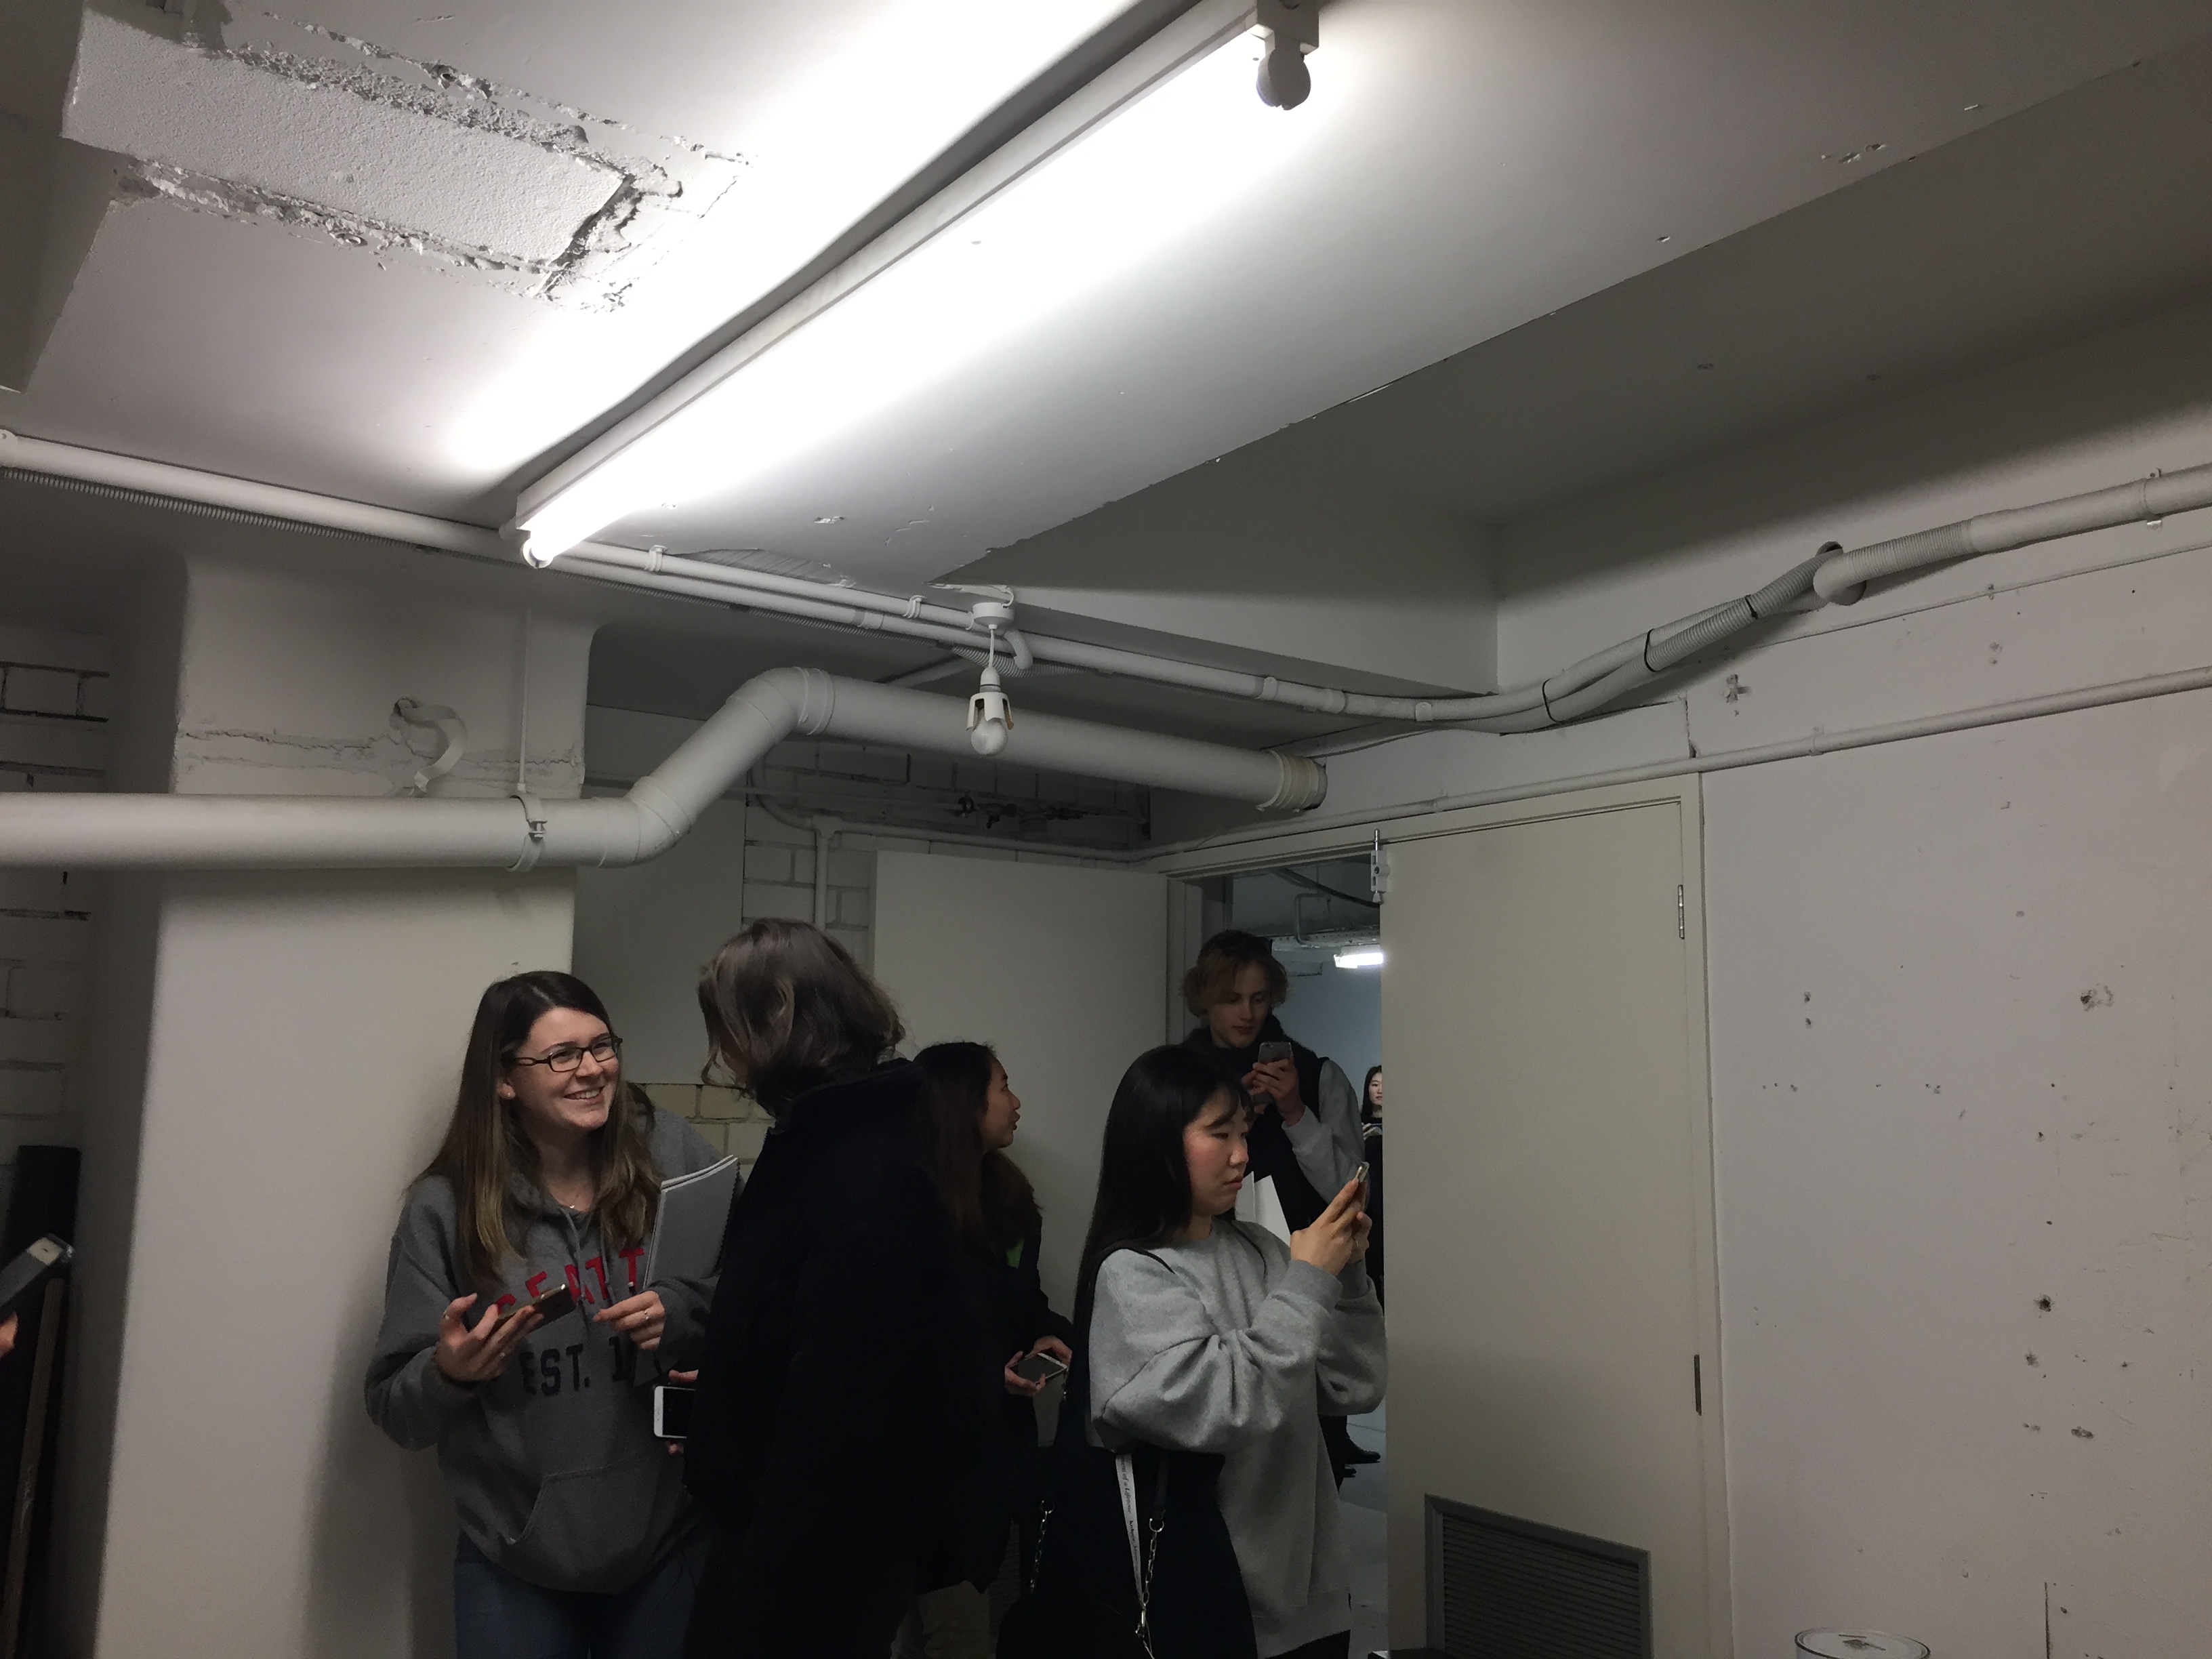
ceiling pipes 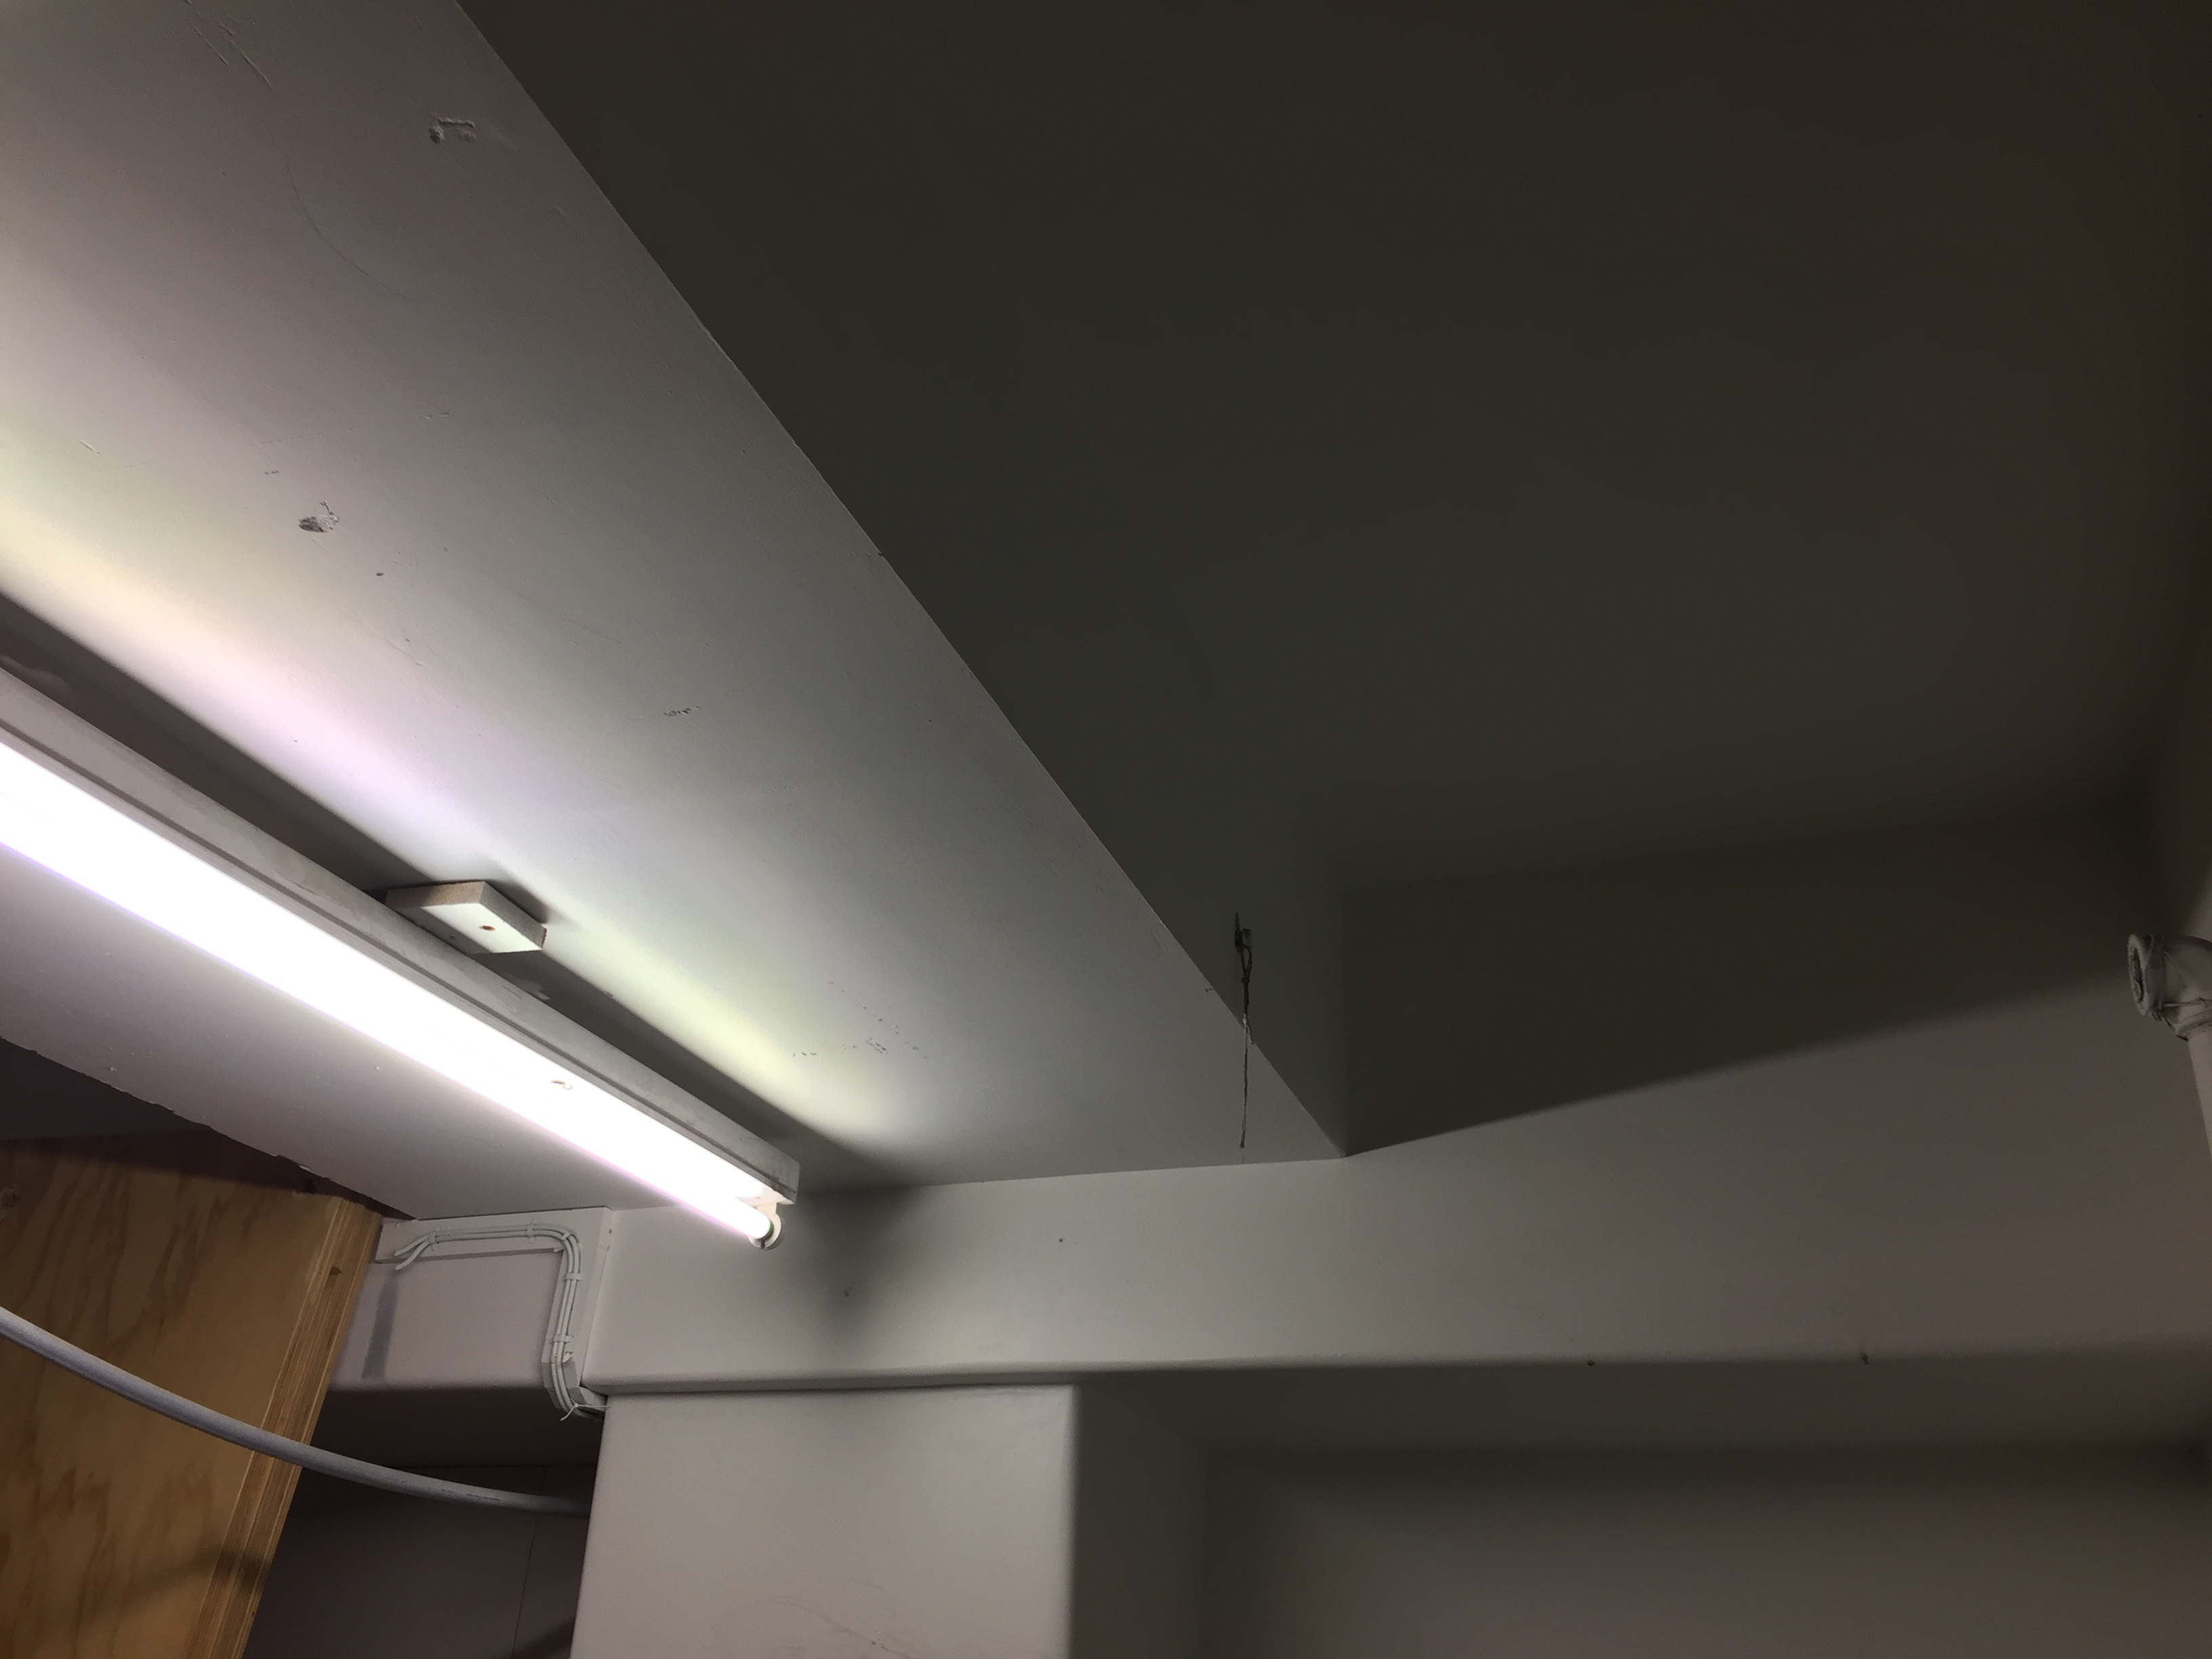
uneven ceiling
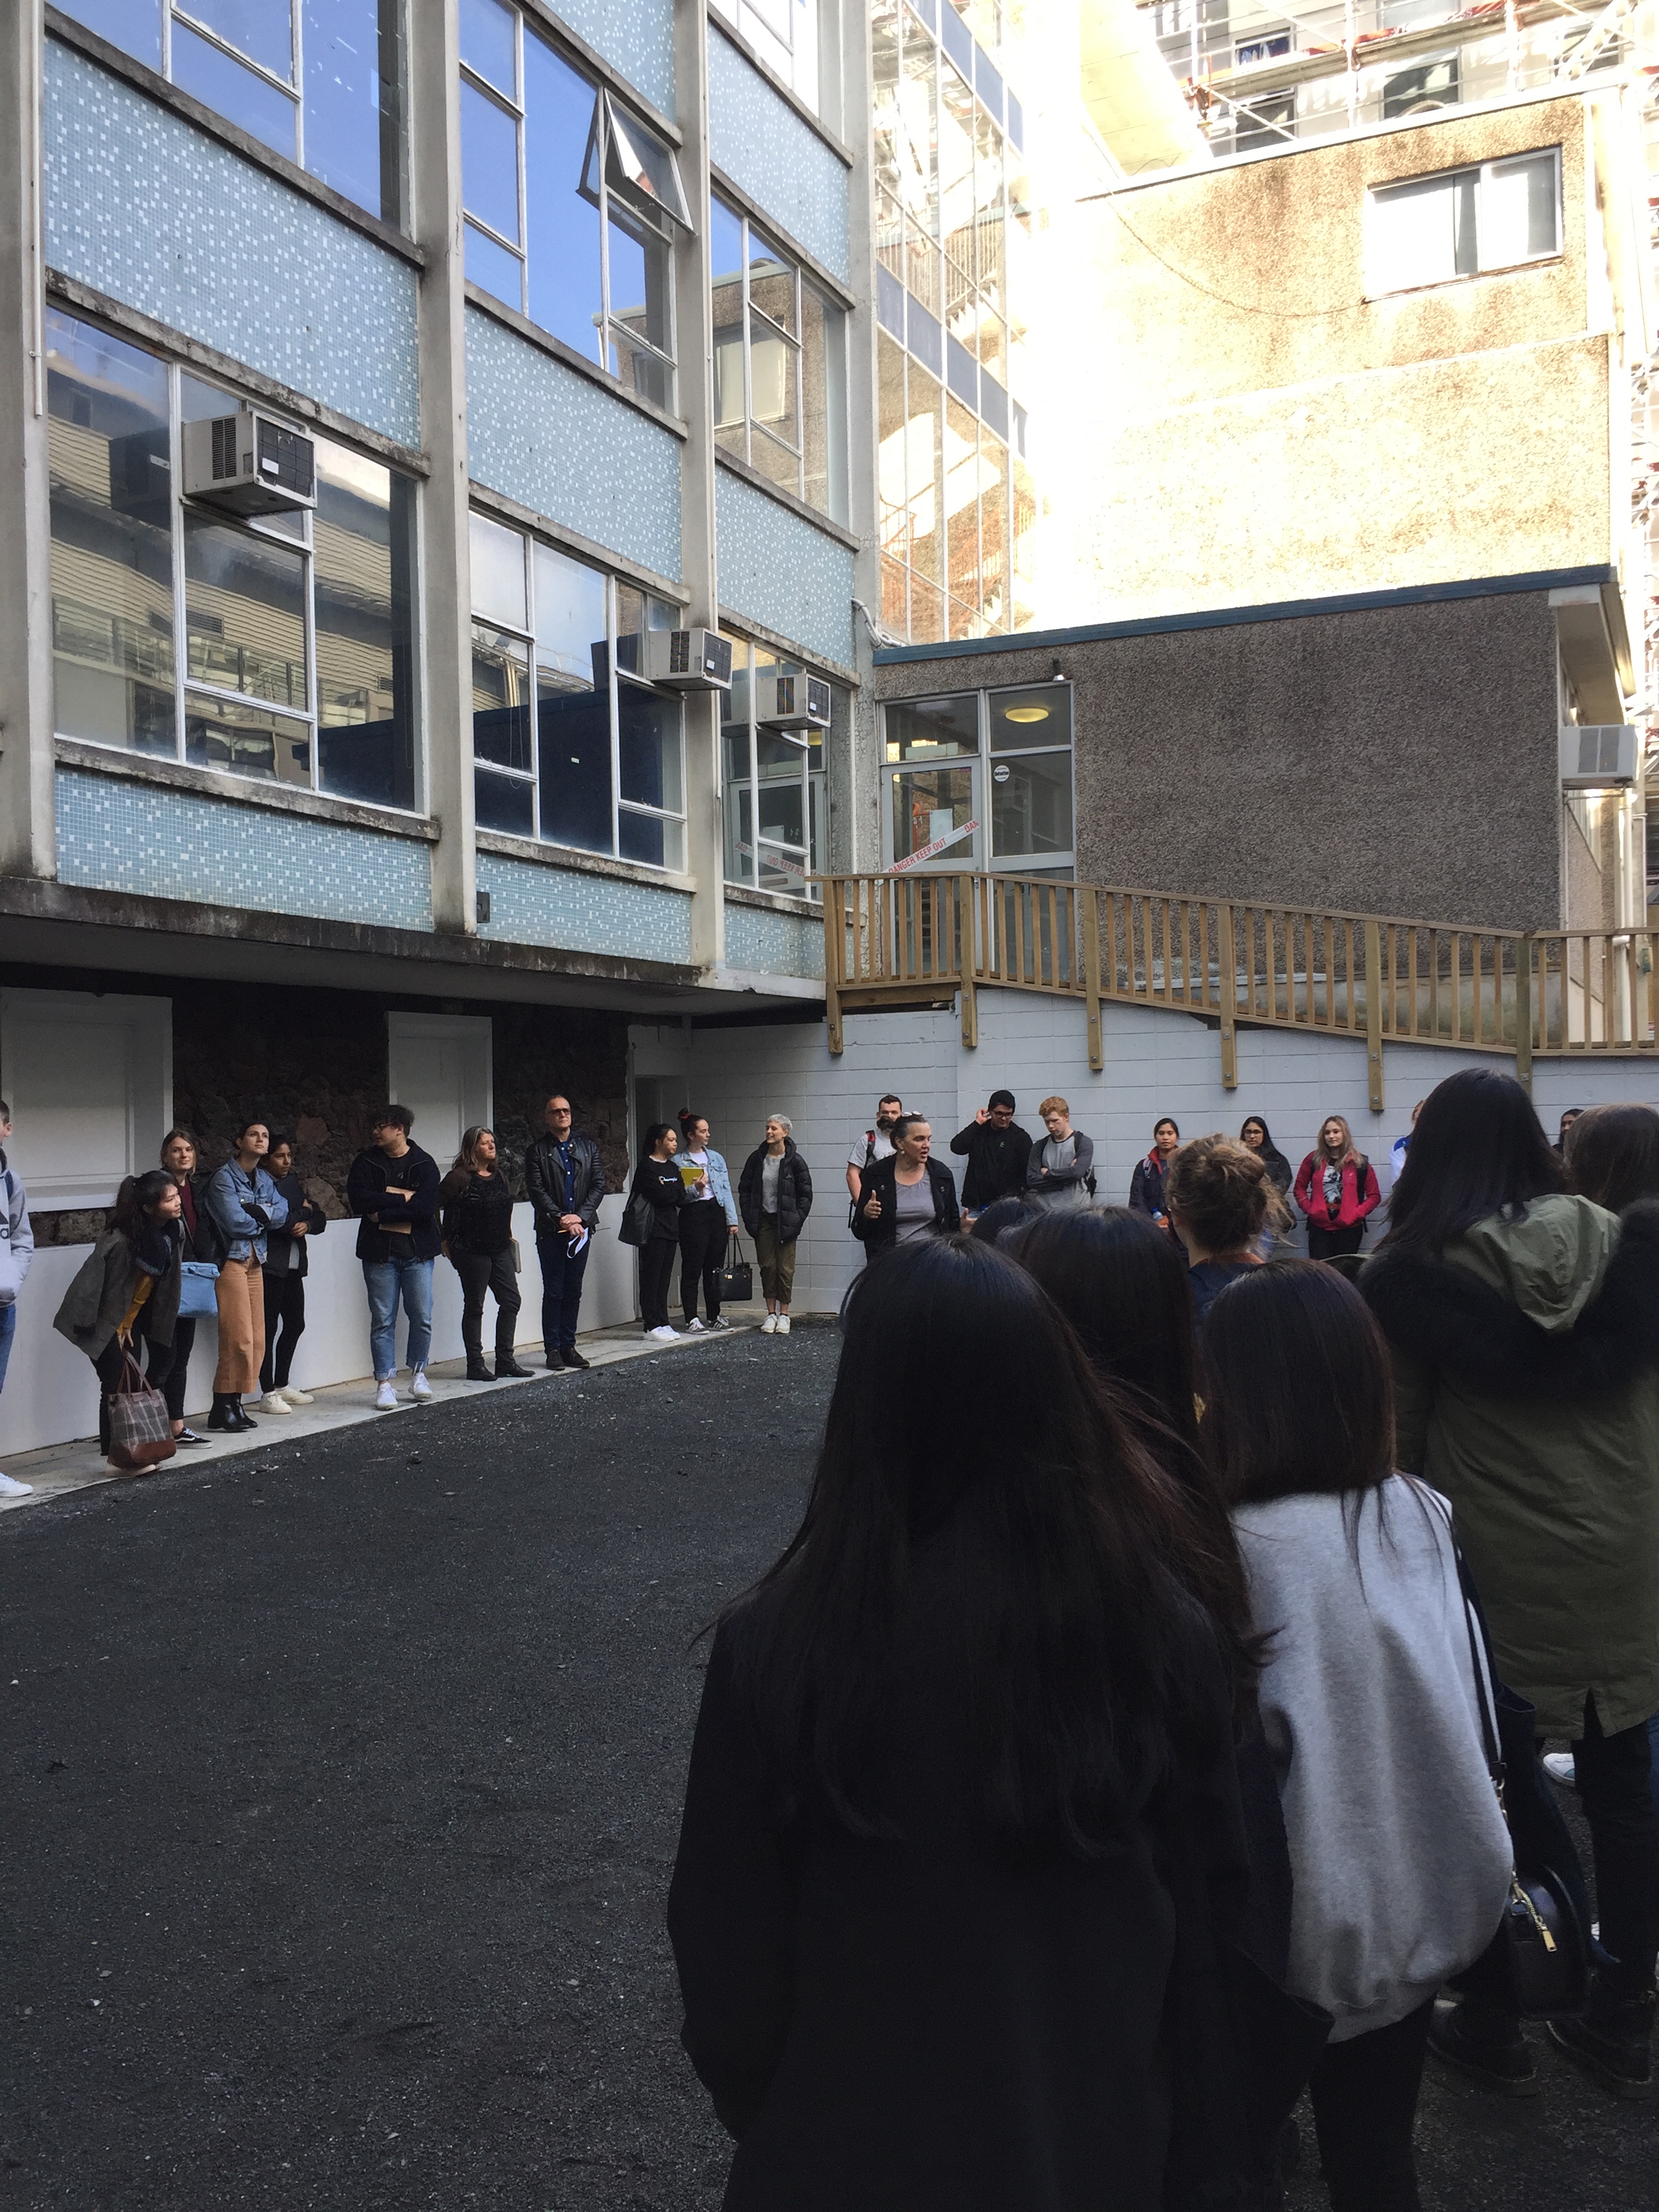
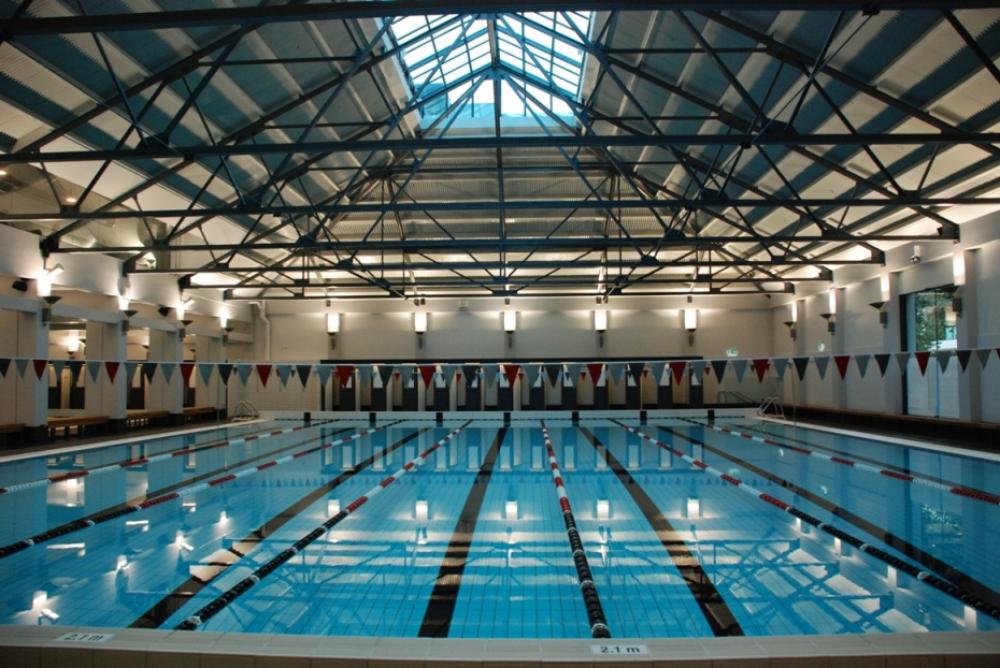
The Dadley Foundation building now known as AUT’s WW building was originally a hospital and live in care facility for disabled children. It included many spaces for the children such as classrooms, speech therapy and physiotherapy. Located in the basement was a swimming pool which is also the space we will be working with for our bath house. The original pool was lost in 2018 after a part of the building was demolished for AUT’s WZ building development. The remnants of the pool are now covered by a gravel courtyard where our pocket forest will be designed. As for the basement space, it now consists of small rooms and enclosed spaces boarded up with plywood.
My first impression of the space was that it felt cold and lifeless as well as being rather small. The plywood walls that divided the room made the space hard to move around in. I immediately knew that I would plan to open the space up as much as possible and work to create an illusion that the space is bigger than it seems. A feature than was hard to miss was the large structural columns placed in two rows running the length of the building. We have been told that these must stay in place as they help to hold the building up. This means I will need to design with these columns in mind, somehow making them a more interesting feature. There were no natural light sources in the space so I will defiantly be finding a way to bring as much natural light in as possible as I want to stay away from harsh interior lighting options.
Research:
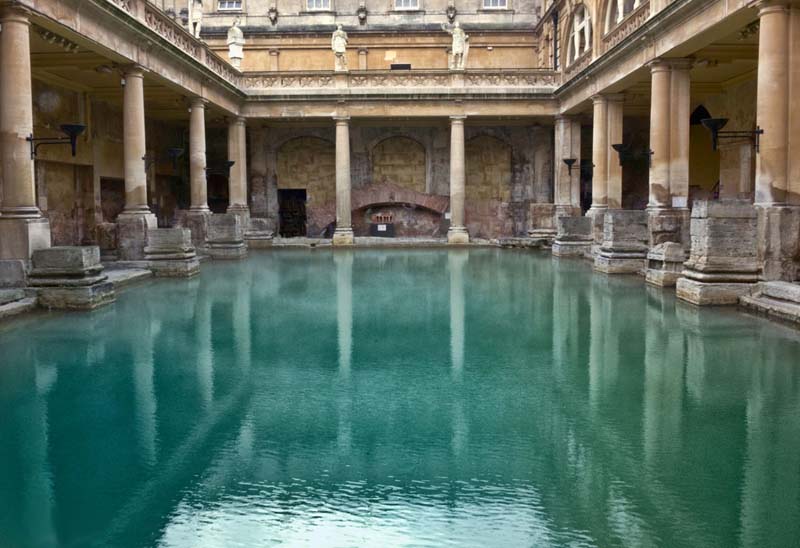
Over the week I have been collecting images of bath house designs that interest me. Originally I was drawn to the ancient roman bath houses due to the use of arches and columns. I really like the dominant use of stone throughout each of the designs. Since there are many columns located within our space it is nice to see how they have been incorporated into other designs.
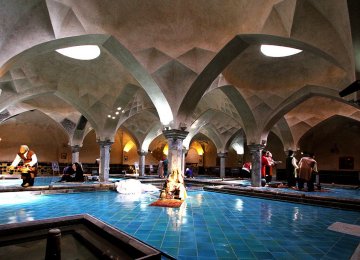
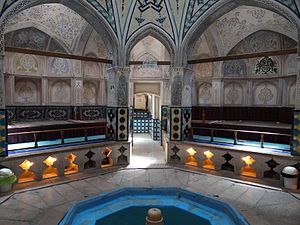


I then began to look at the Japanese bath house designs and immediately loved the choice of materials. The use of natural materials such as wood can have many benefits on your mind, body and environment. I think that the natural feeling will create a nice cohesive feeling between the interior and exterior spaces.
For my design I will definitely be looking into the type of natural materials available for use.

I have also been looking into more modern bath house designs as we are designing the space for modern day people. There is a clear difference between the modern bath house deigns and the ancient Roman bath houses. These modern designs have very few curved lines and most have large windows making the most of the natural light. These modern designs also play with bold lines and many angles creating aesthetic geometric shapes.

At this stage I think I will be designing a modern take of the Japanese style bath house. Taking elements of each design style to create a overall relaxing space.
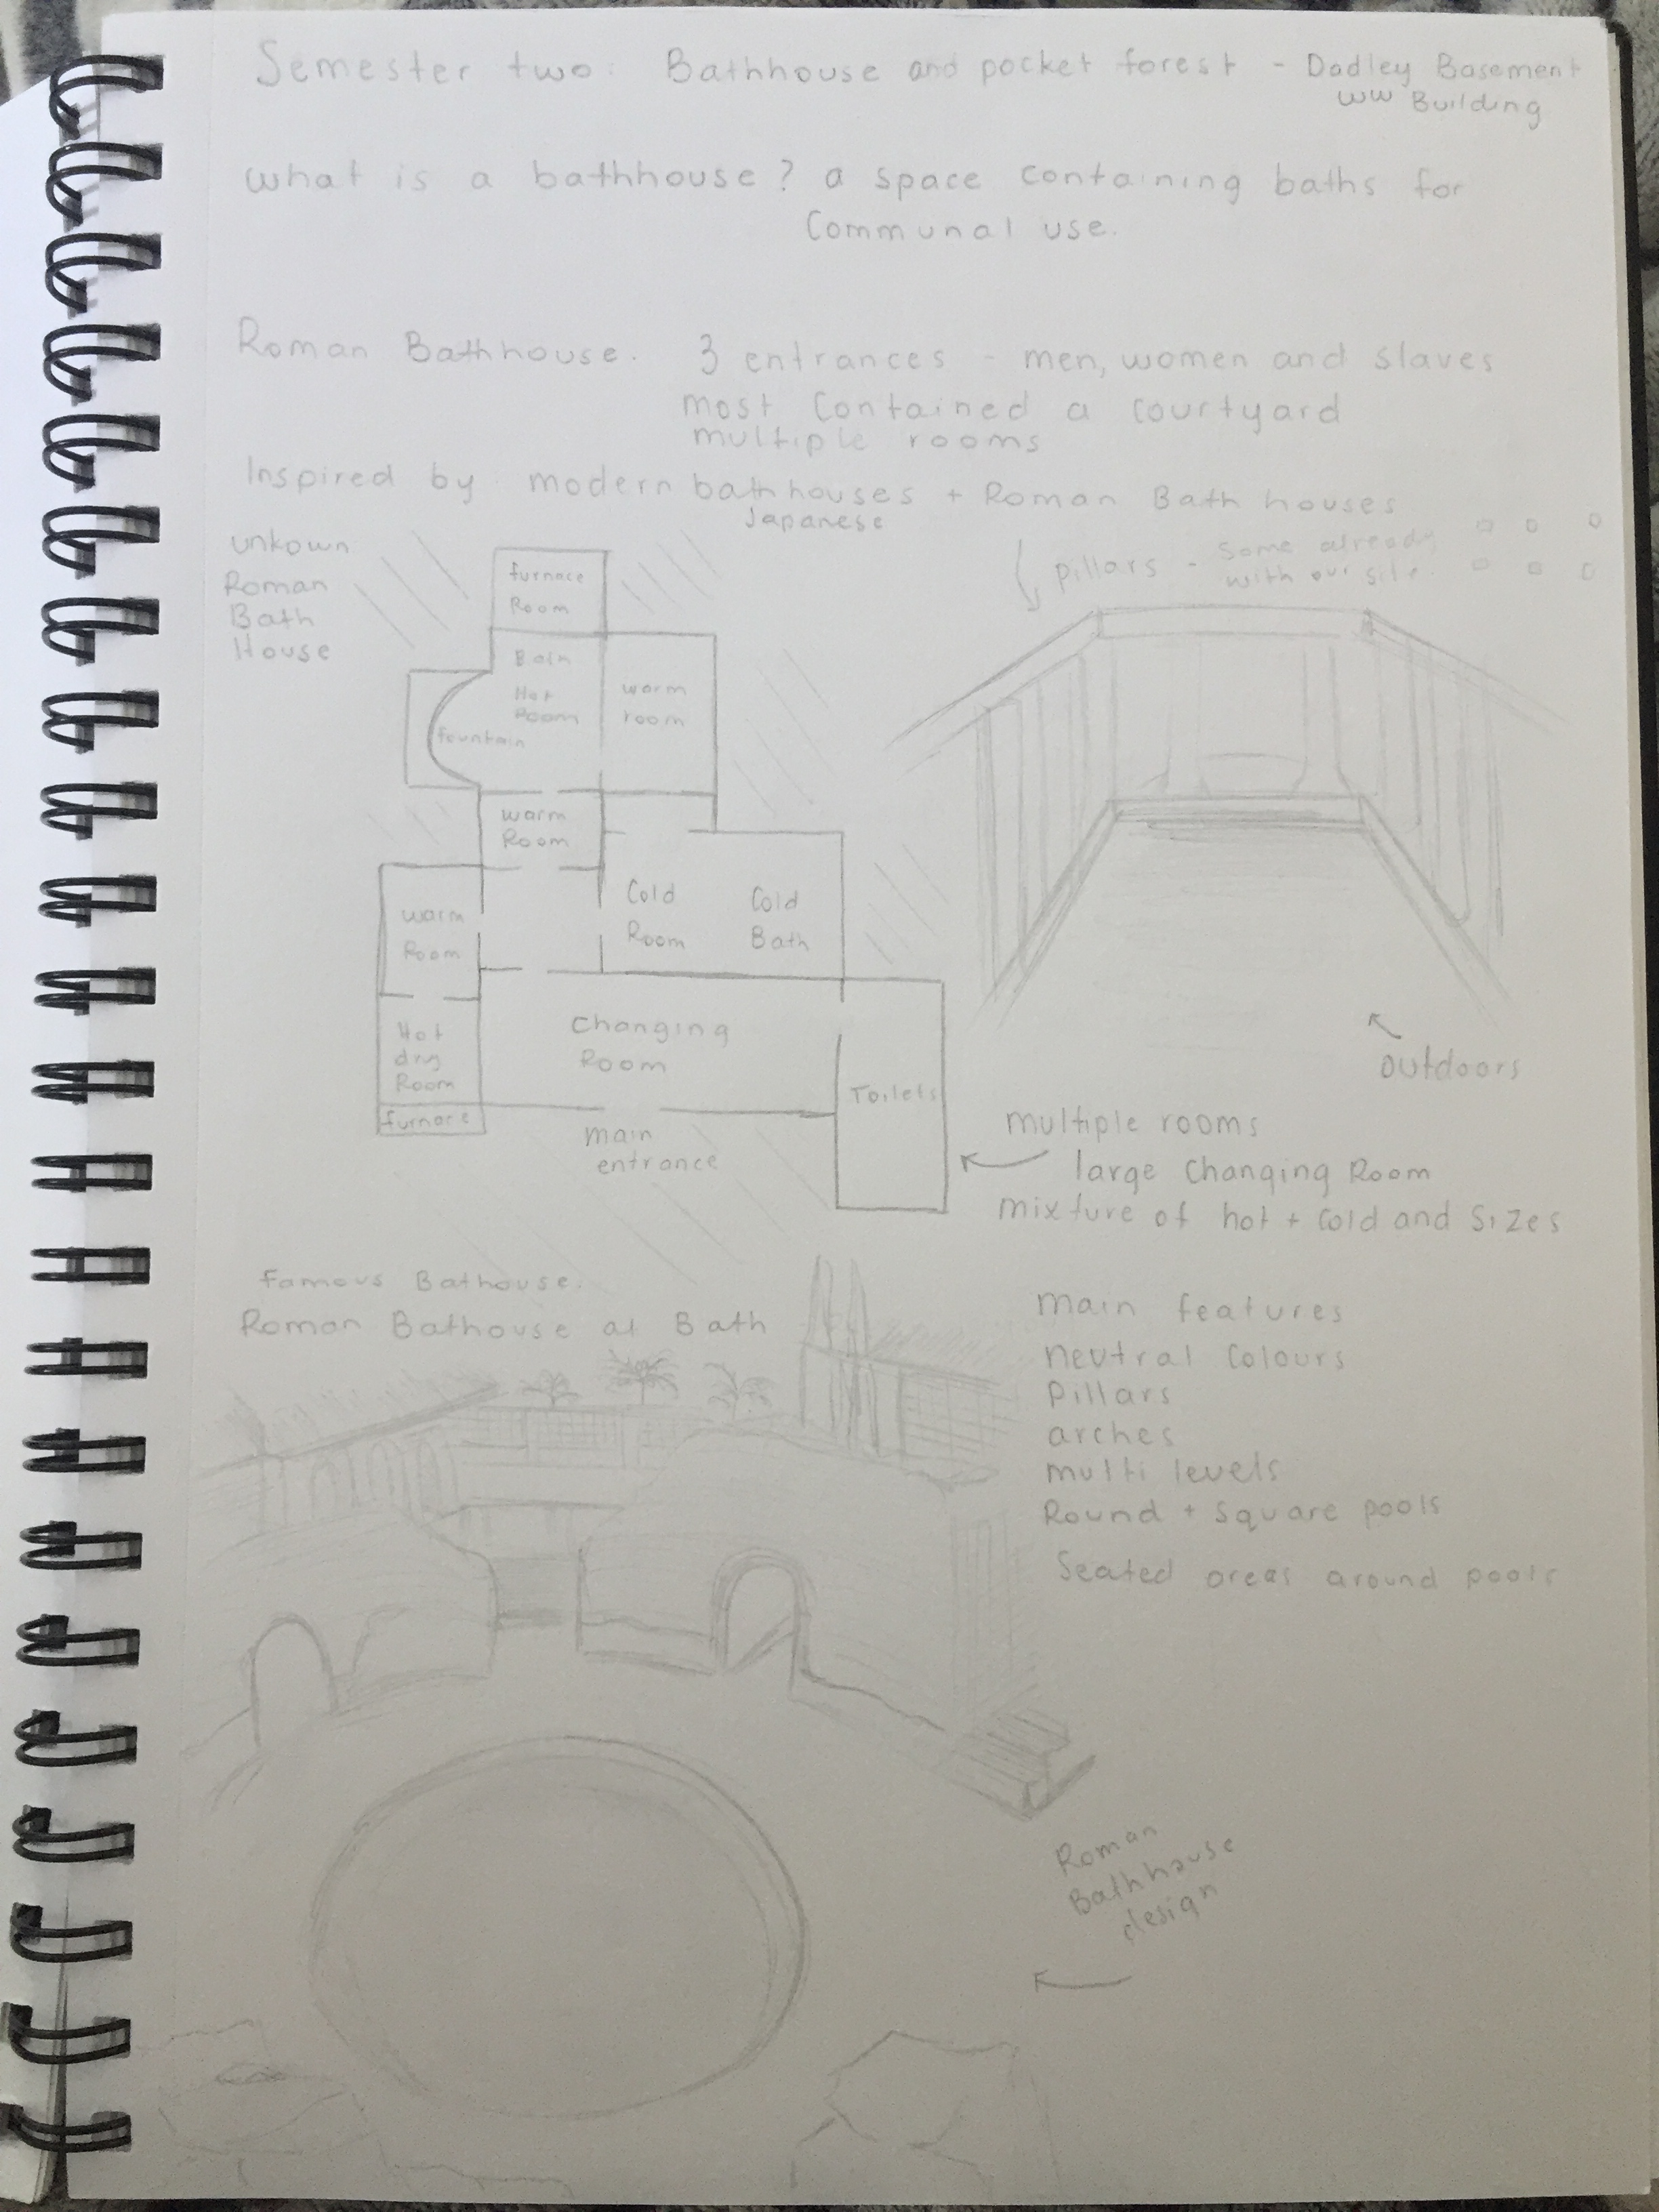
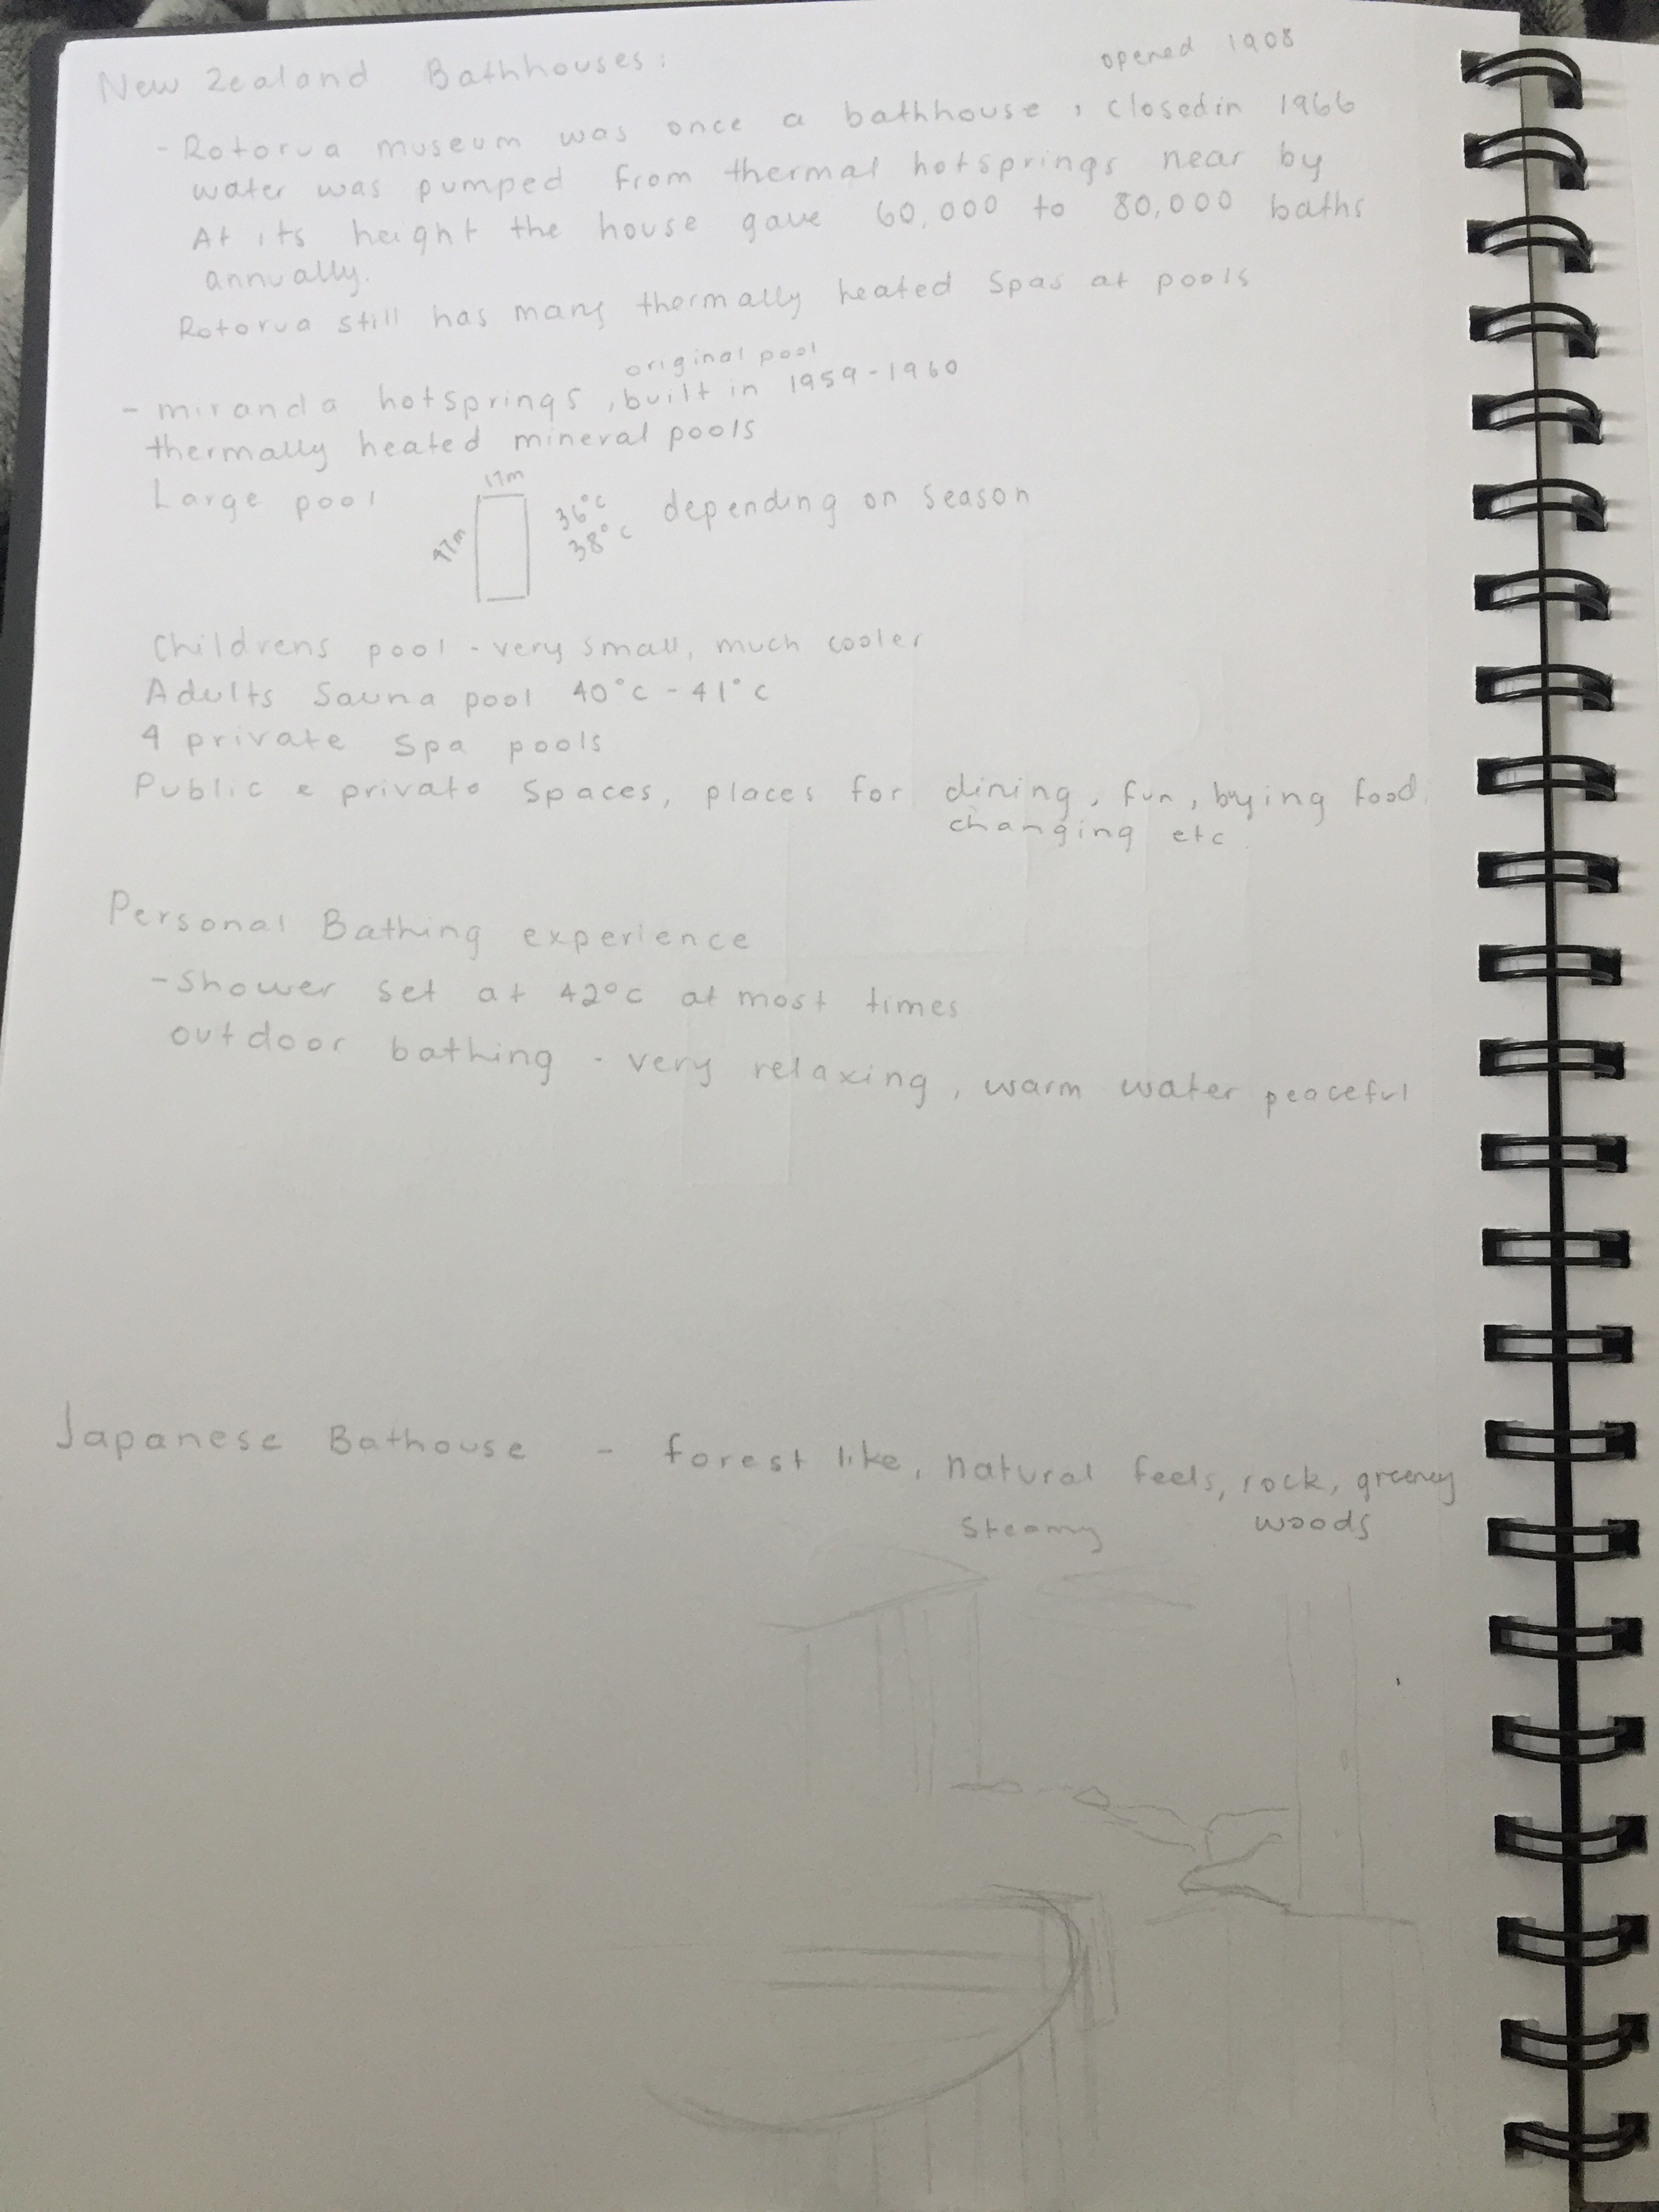
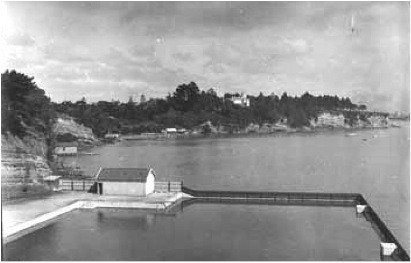
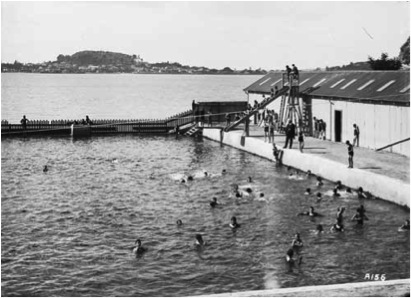
Above are images of a few notes I have taken this week. I have looked further into what it is I like about the Roman and Japanese bath houses as well as main features both cultures incorporate into each design. I looked into different floor plans of bath houses and took notice of the different room temperatures. I researched more about the history of bath houses in New Zealand and discovered that the Rotorua Museum was originally a bath house that opened in 1908.
Miranda Hot Springs is a thermal mineral pool that I have visited many times. Thinking back to the time I have spent there I realised that this place has many features that are also included in our brief for a bath house. In the future I am planning on looking at how each space is used and how I could potentially design a both practical as well as more aesthetically pleasing version of spaces found at Miranda.
Auckland Bathing History:
Parnell Baths
The development of the historical Parnell sea salt water swimming pool dates back to the 1880’s. Over the years, Parnell Baths has encouraged sea swimming in the Auckland community.
The baths were amoungst the new buildings established during the early 1900’s. Over the years of 1914-1915 the Parnell Baths opened for their very first summer season.
The baths developed over the years as recognition of the site grew. The space encouraged sea swimming amoungst most adults and the water slide provided innovative and fun entertainment.
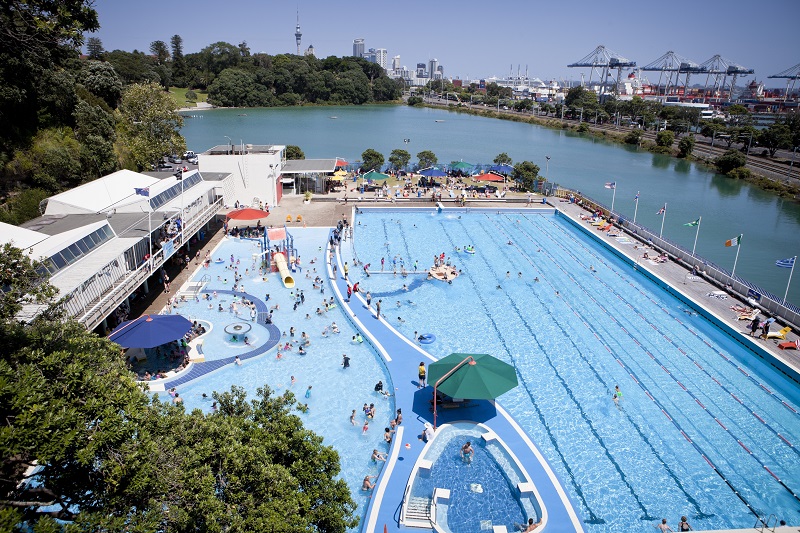
A major redevelopment of the Parnell Baths took place during the 1950’s, creating a lido atmosphere – a glamorous seafront bathing resort. The design was inspired by the Californian resort city of Palm Springs while still celebrating the classic nautical style.
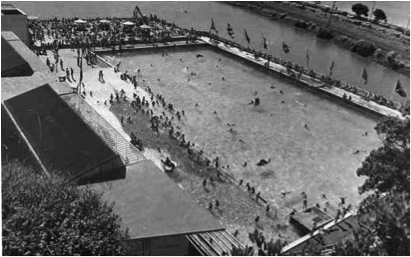
Today the historic Parnell Baths are still the largest salt water pool in New Zealand with the large pool measuring 60m in length. There are now both adult and family spas as well as an interactive aqua playground for young children.
https://www.clmnz.co.nz/parnellbaths/aquatics/parnell-baths-new-zealand-landmark/
Tepid Baths
The Tepid Baths are historical indoor public pools located within the Auckland CBD. The baths were constructed in 1914 on the previous site of a small drydock. The public quickly approved of the space, with 30,000 visitors in the first two months. In mid 2012, the baths re-opened following a major rebuild.
Originally the bath house contained to separate pools, a “male” (25m, 6 lanes) and “female” (18m, 4 lanes). The male pool was the largest in New Zealand at the time. The Tepid Baths were heated with hot water from the nearby tramways power plant, the system was considered an engineering masterpiece at the time. The sea water was used to cool the machinery, the heated water was then pumped to the Tepid Baths.
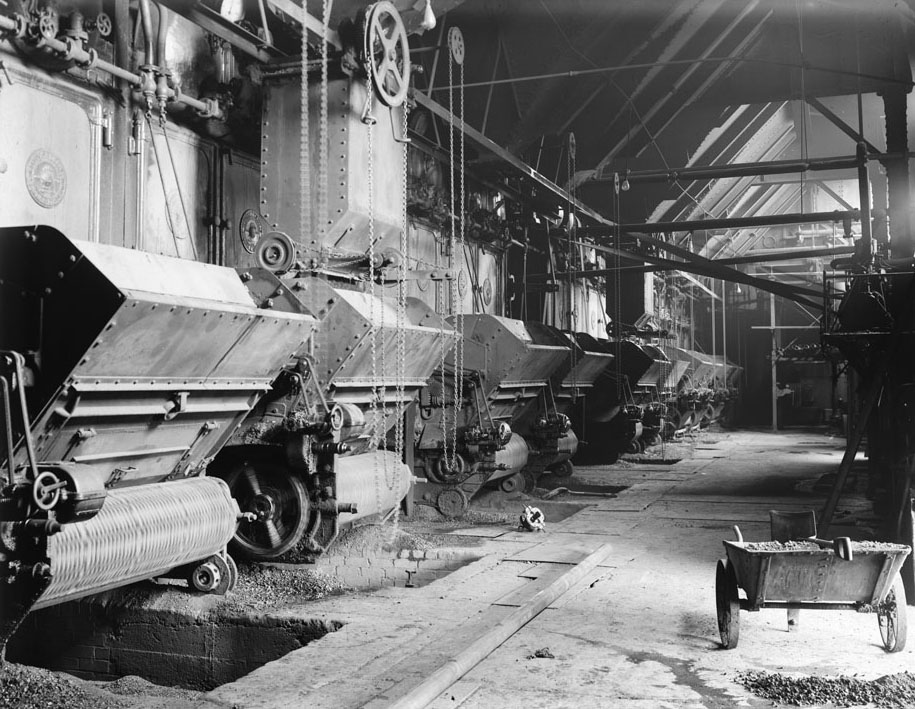
Interior of the Tramways – 1922 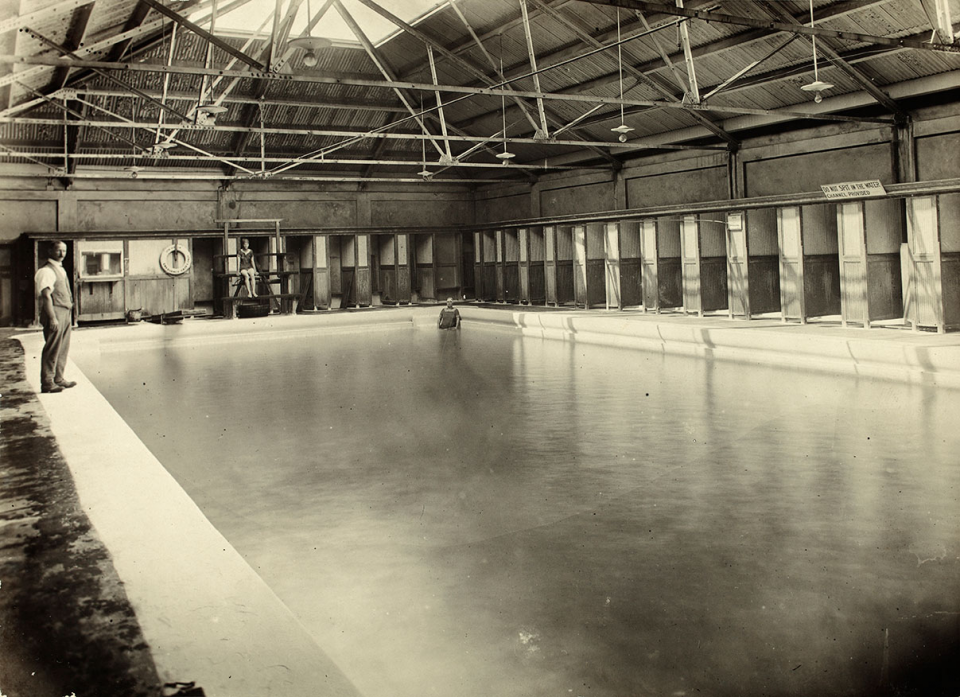
Interior of the Tepid Baths – 1914
The baths were not only used for both recreational and competitive swimming, but also other uses. For example, in 1931 the space was once used by a Pentecostal minister who baptised a hundred new faithful in the pools.
In 1974, the salt water pools once fed from the Waitemata Harbour were transformed into fresh water pools. The facility was refurbished in 1986 and again in 1977. Renovations included a new sauna and steam rooms, and a gym on the upper level. Nowadays, a large part of the Tepid Baths customers are people working in the Auckland CBD who swim before or after work.
In November 2009 it was announced that the Tepid Baths would close for a period of up to four years for a $12 million restoration project to address structural issue caused by the effect of saltwater. The costs later rose to approximately $16 million and the pools later re-opened in 2012.
https://discover.stqry.com/v/tepid-baths/s/af2001663ecbd07b4a91362f92e496d8
https://en.wikipedia.org/wiki/Tepid_Baths
Week 2: Continued Research
We began this week by going over the Te Aranga Principles. Below I have written down some key points on how these principles can be applied to our current project.
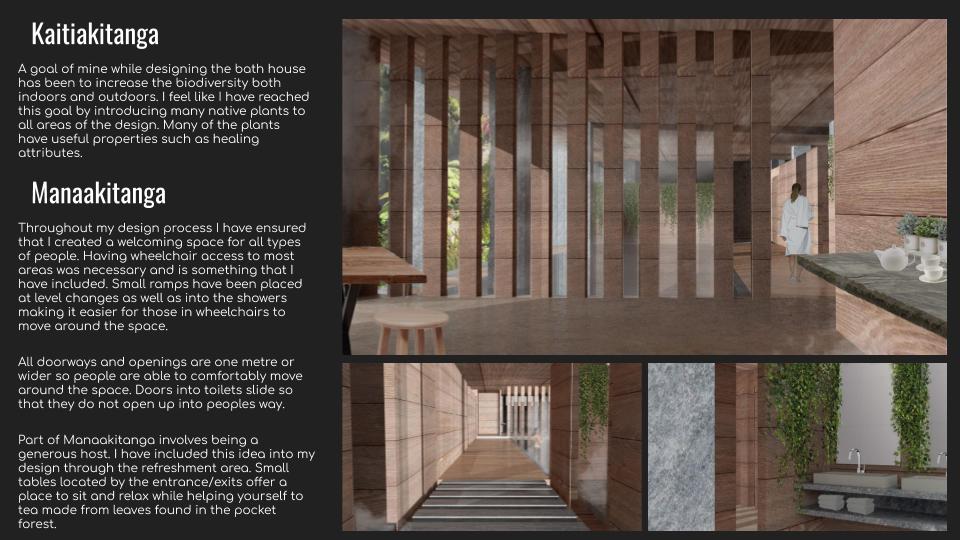
Manaakitanga
- To create a welcoming and inviting space for all ages, genders and religion.
- Hospitality.
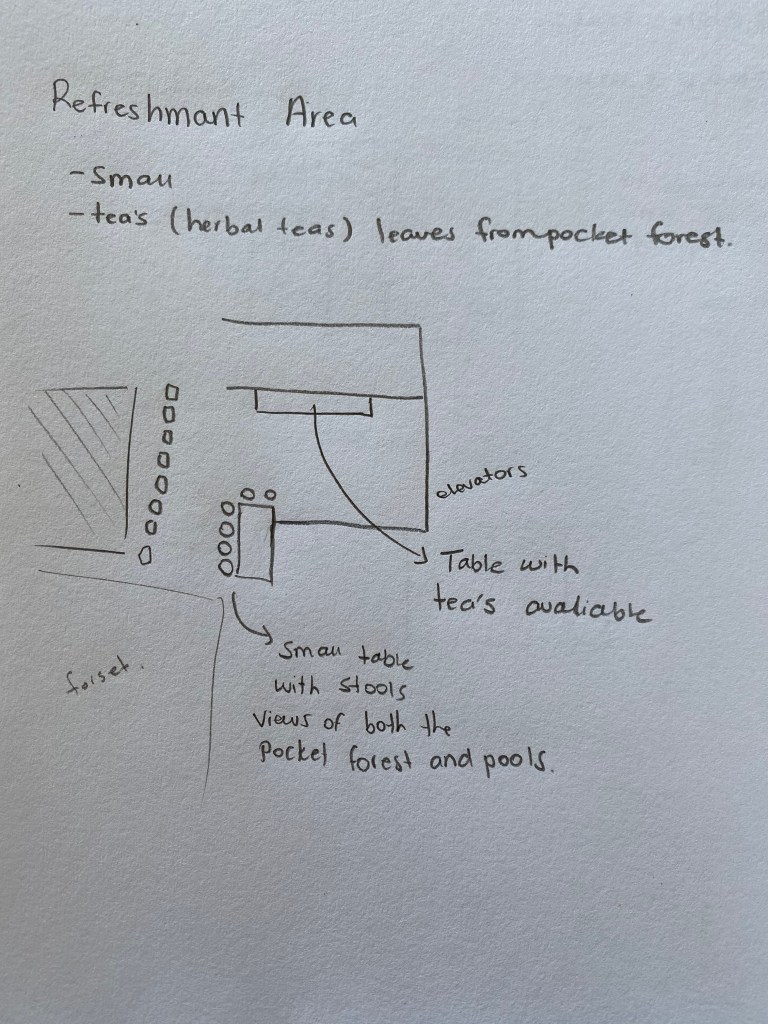
- Refreshments available.
- Being a generous host.
- Host to support more than human life, to think about other forms of life such as birds and wider ecology.
Kotahitanga
- Collaboration of design.
- Thinking about how each group can approach research.
Kaitiakitanga
- Enhancing the biodiversity of the space.
- Researching native plants and animals that could be used.
- Using plants that have natural healing attributes.
- Using natural springs, pure water.
Mauritanga
- Consider what is used and the effects it may have on the environment. Most pools need many chemicals.
- Where does the waste go?
- Thinking about air flow, stopping condensation, mold growth and build up of chemicals.
- Research possible plants and volcanic soils that could be used as filtration devices.
- Think about the temperature of the space, both in and out of the water.
- Salt water pools.
- Material choices.
- Think about the transition space between pool and forest. Considering the impact each space could have on the other.
New Zealand Forests:
The importance of forests cannot be underestimated. We depend on forests for our survival, from the air we breathe to the wood we use. Besides providing habitats for animals and livelihoods for humans, forests also offer watershed protection, prevent soil erosion and mitigate climate change. Yet despite our dependence on forests, we are still allowing them to disappear.
80% of trees, ferns and flowering plants found here in New Zealand are endemic (found only in New Zealand). About 10–15% of the total land area of New Zealand is covered with native flora, from tall kauri and kohekohe forests to rainforest dominated by rimu, beech, tawa, matai and rata; ferns and flax; dunelands with their spinifex and pingao; alpine and subalpine herb fields; and scrub and tussock.
Native New Zealand Trees
Nikau Palm 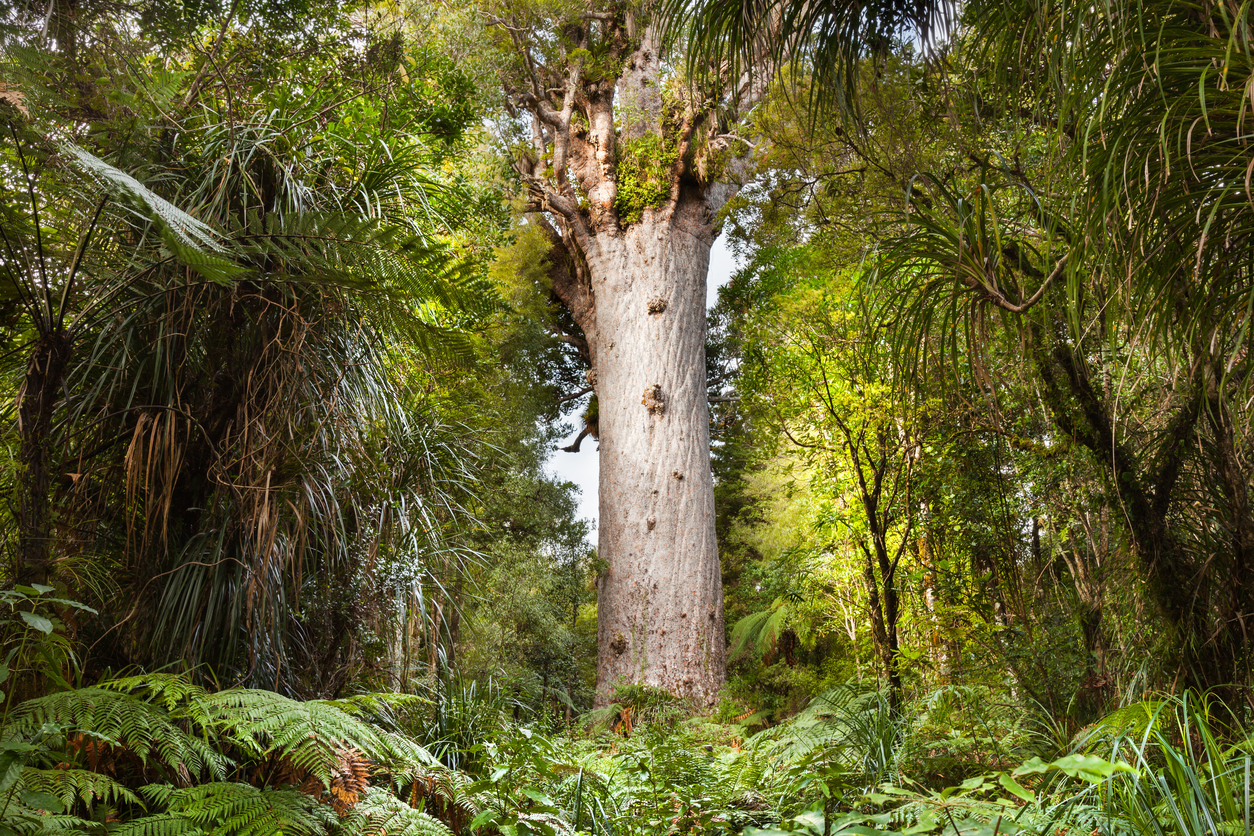
Kauri Tree 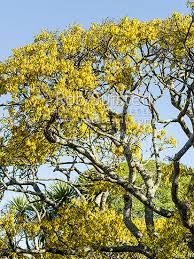
Kowhai Tree 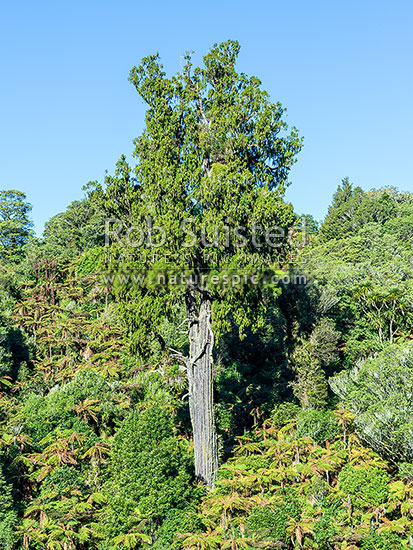
Rimu Tree 
Totara Tree 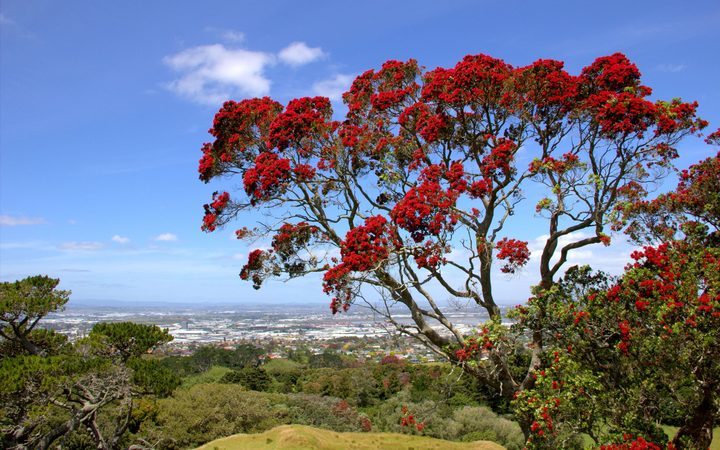
Pohutakawa Tree
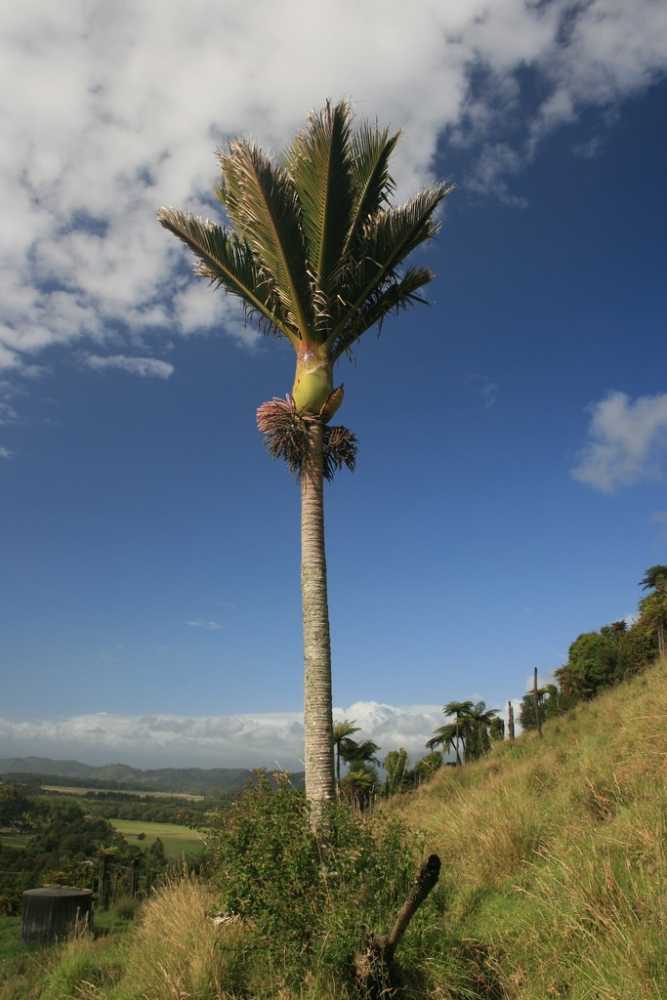
Nikau Palm
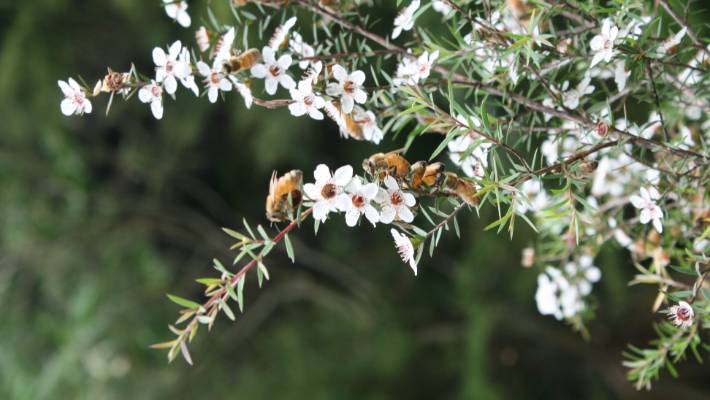
The nikau palm is the only palm native to New Zealand and is the worlds most southerly growing palm. The nikau grows up to 15m tall meaning that at its tallest will stand at the same height as the WW building. I personally like the look of the nikau palm as it would bring a tropical feeling to the pocket forest. The small flowers that grow all year round on the palm are sticky and sweet with nectar attracting many insects, especially bees. While insects are the main pollinators the trees also attract birds such as tui, bluebells and silvereyes.
Kauri Tree
The kauri is amoungst some of the worlds mightiest trees growing up to 50m tall. The trunks can reach a girth of up to 16m and the trees themselves can live for 2000 years. Although the tree does attract a range of birds due to the berries it produces I think that kauri trees will be to big for the space we have to create the pocket forest. With roughly 26m x 10m for the forest having a kauri tree would take up a big chunk of the space. The WW building itself is only around 15m tall meaning that if the kauri tree reached full height it would tower of the building.
Kowhai Tree
The kowhai is one of the best known native trees in New Zealand. They are best known for their vibrant yellow flowers that appear throughout the spring months. The tree grows up to 25m high and attracts many native birds such as tui, kaka and kereru. Maori also hold this tree in high esteem, valuing the durability of its hard wood and its many medicinal properties. I think a kowhai tree would be a beautiful tree to have within the pocket forest. Throughout spring the yellow flowers would give the area amazing colour and the tree does not grow to tall for the space.
Rimu Tree
Rimu is a very tall canopy tree found in forests throughout the North Island and coastal areas of the South Island. The tree grows very slowly reaching an age of around 800-900 years, growing up to 20-35 meters tall. Rimu produces small fruits and seeds attracting native birds such as the Kaka and Kereru. I personally think the rimu tree is an amazing tree and would bring a lot to the forest space.
Totara Tree
Totara is commonly found in low lying areas where the soil is fertile and well drained. The tree is tolerant to both wet and dry conditions and is able to withstand windy sites. Totara is able to reach a height of 30m although this takes over 100 years
Pohutukawa Tree
The pohutukawa is known as New Zealands native Christmas tree due to the bright red blooms that decorate the tree throughout Christmas season. Pohutukawa can live for hundreds of years depending on where they are planted. In a very fertile environment with good moisture the tree can grow 30cm per year in height and around 5-10mm in thickness. The tree is able to spread by branches that touch the ground sending out roots and forming new trees. Because of this I am unsure that the pohutukawa tree would be a good fit for the pocket forest space.
Natural healing/ Rongoa Maori:
Rongoa is the Maori term for medicines that are produced from native plants in New Zealand. Use of these medicines prevented many sicknesses and provided remidies for the sick.
In traditional Maori healing, diagnosis involved a holistic approach that included mind, body and spirit – mauri (spark or life force). Whakapapa and genealogy was also considered.
Harakeke (Flax) – The sticky gum is used as an external treatment for boils, toothache, wounds, burns, eczema and scalds. Leaves can dress broken bones.
Kowhai – All kowhai parts,bark, inner bark, flower, leaves and juices can be used as rongoa. The tree has toxic alkaloids so careful preparation of rongoa must be observed. Bark-infused liquid treats internal ailments, colds and sore throats. It is also used on cuts, bruises and swelling. Boiled and crushed bark treats sprains, alleviates broken limbs, bruises, infected skin, wounds and skin diseases. Kowhai ashes are used to treat ringworm.
Puriri – Infused puriri leaves treat ulcers, sore throats and are used for bathing sore muscles. Having this type of tree planted in the pocket forest would be beneficial as people could use the space for recovery.
Overall both the nikau palm and the kowhai tree both bring interesting elements to the space. The tropical feeling the palms bring along with the vibrant yellow of the kowhai creates the perfect start for the trees I would want to be used for the pocket forest. The kowhai also brings many medicinal properties that would benefit the design. Adding puriri trees and flax to the forest would bring a more diverse range of plants as well as medicinal purposes. Native insects, birds and animals will also find new homes in the forest increasing the bio diversity.
Personal Bathing Experience:
My favorite bathing experience was in the Hilton Lagoon at Waikiki Beach in Hawaii. We have been asked to identify qualities of each of the 5 senses to help us create a similar feeling within our bathhouse designs.
See – Palm trees (nature), natural colours (earth tones, blues, greens), ocean/waves, clear blue skies, sun reflection on water.
Touch – Warm temperature, sand, rough edges.
Smell – Salt water, natural scents
Hear – Waves crashing, wind moving through the trees, splashing, peaceful.
Taste – Salty
Pocket Forest Draft:
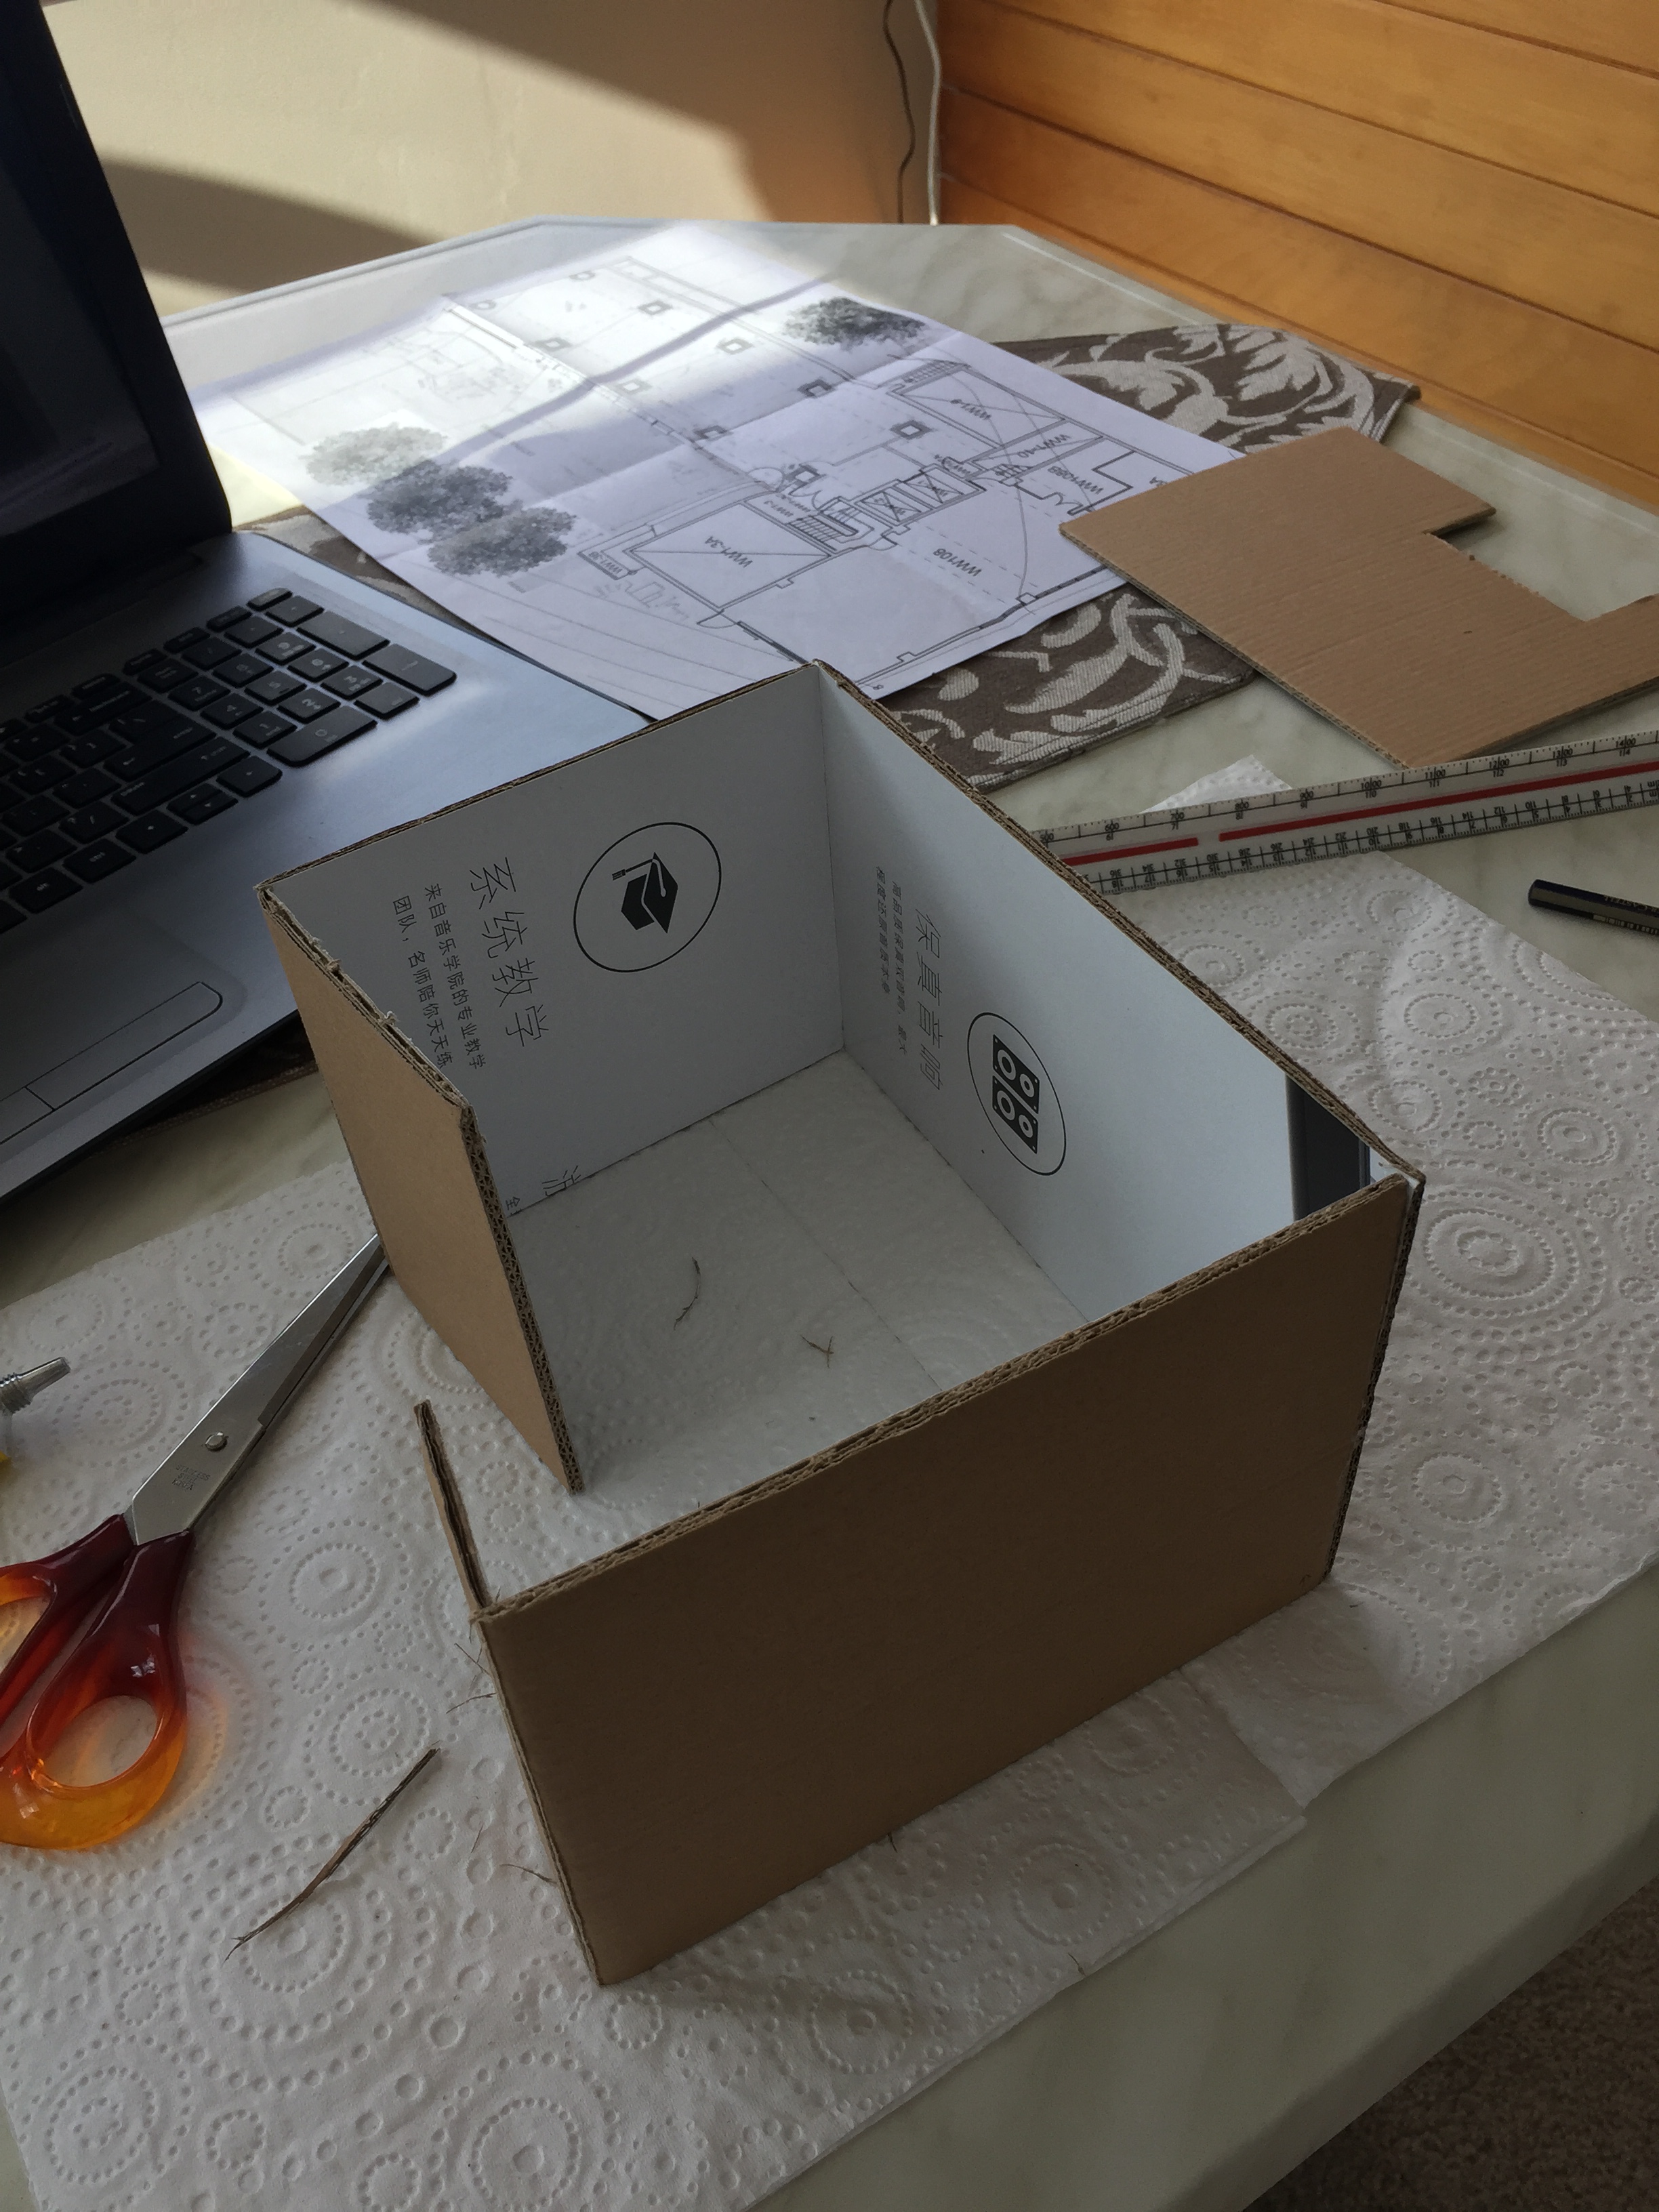
Week 3: Group Model + Research
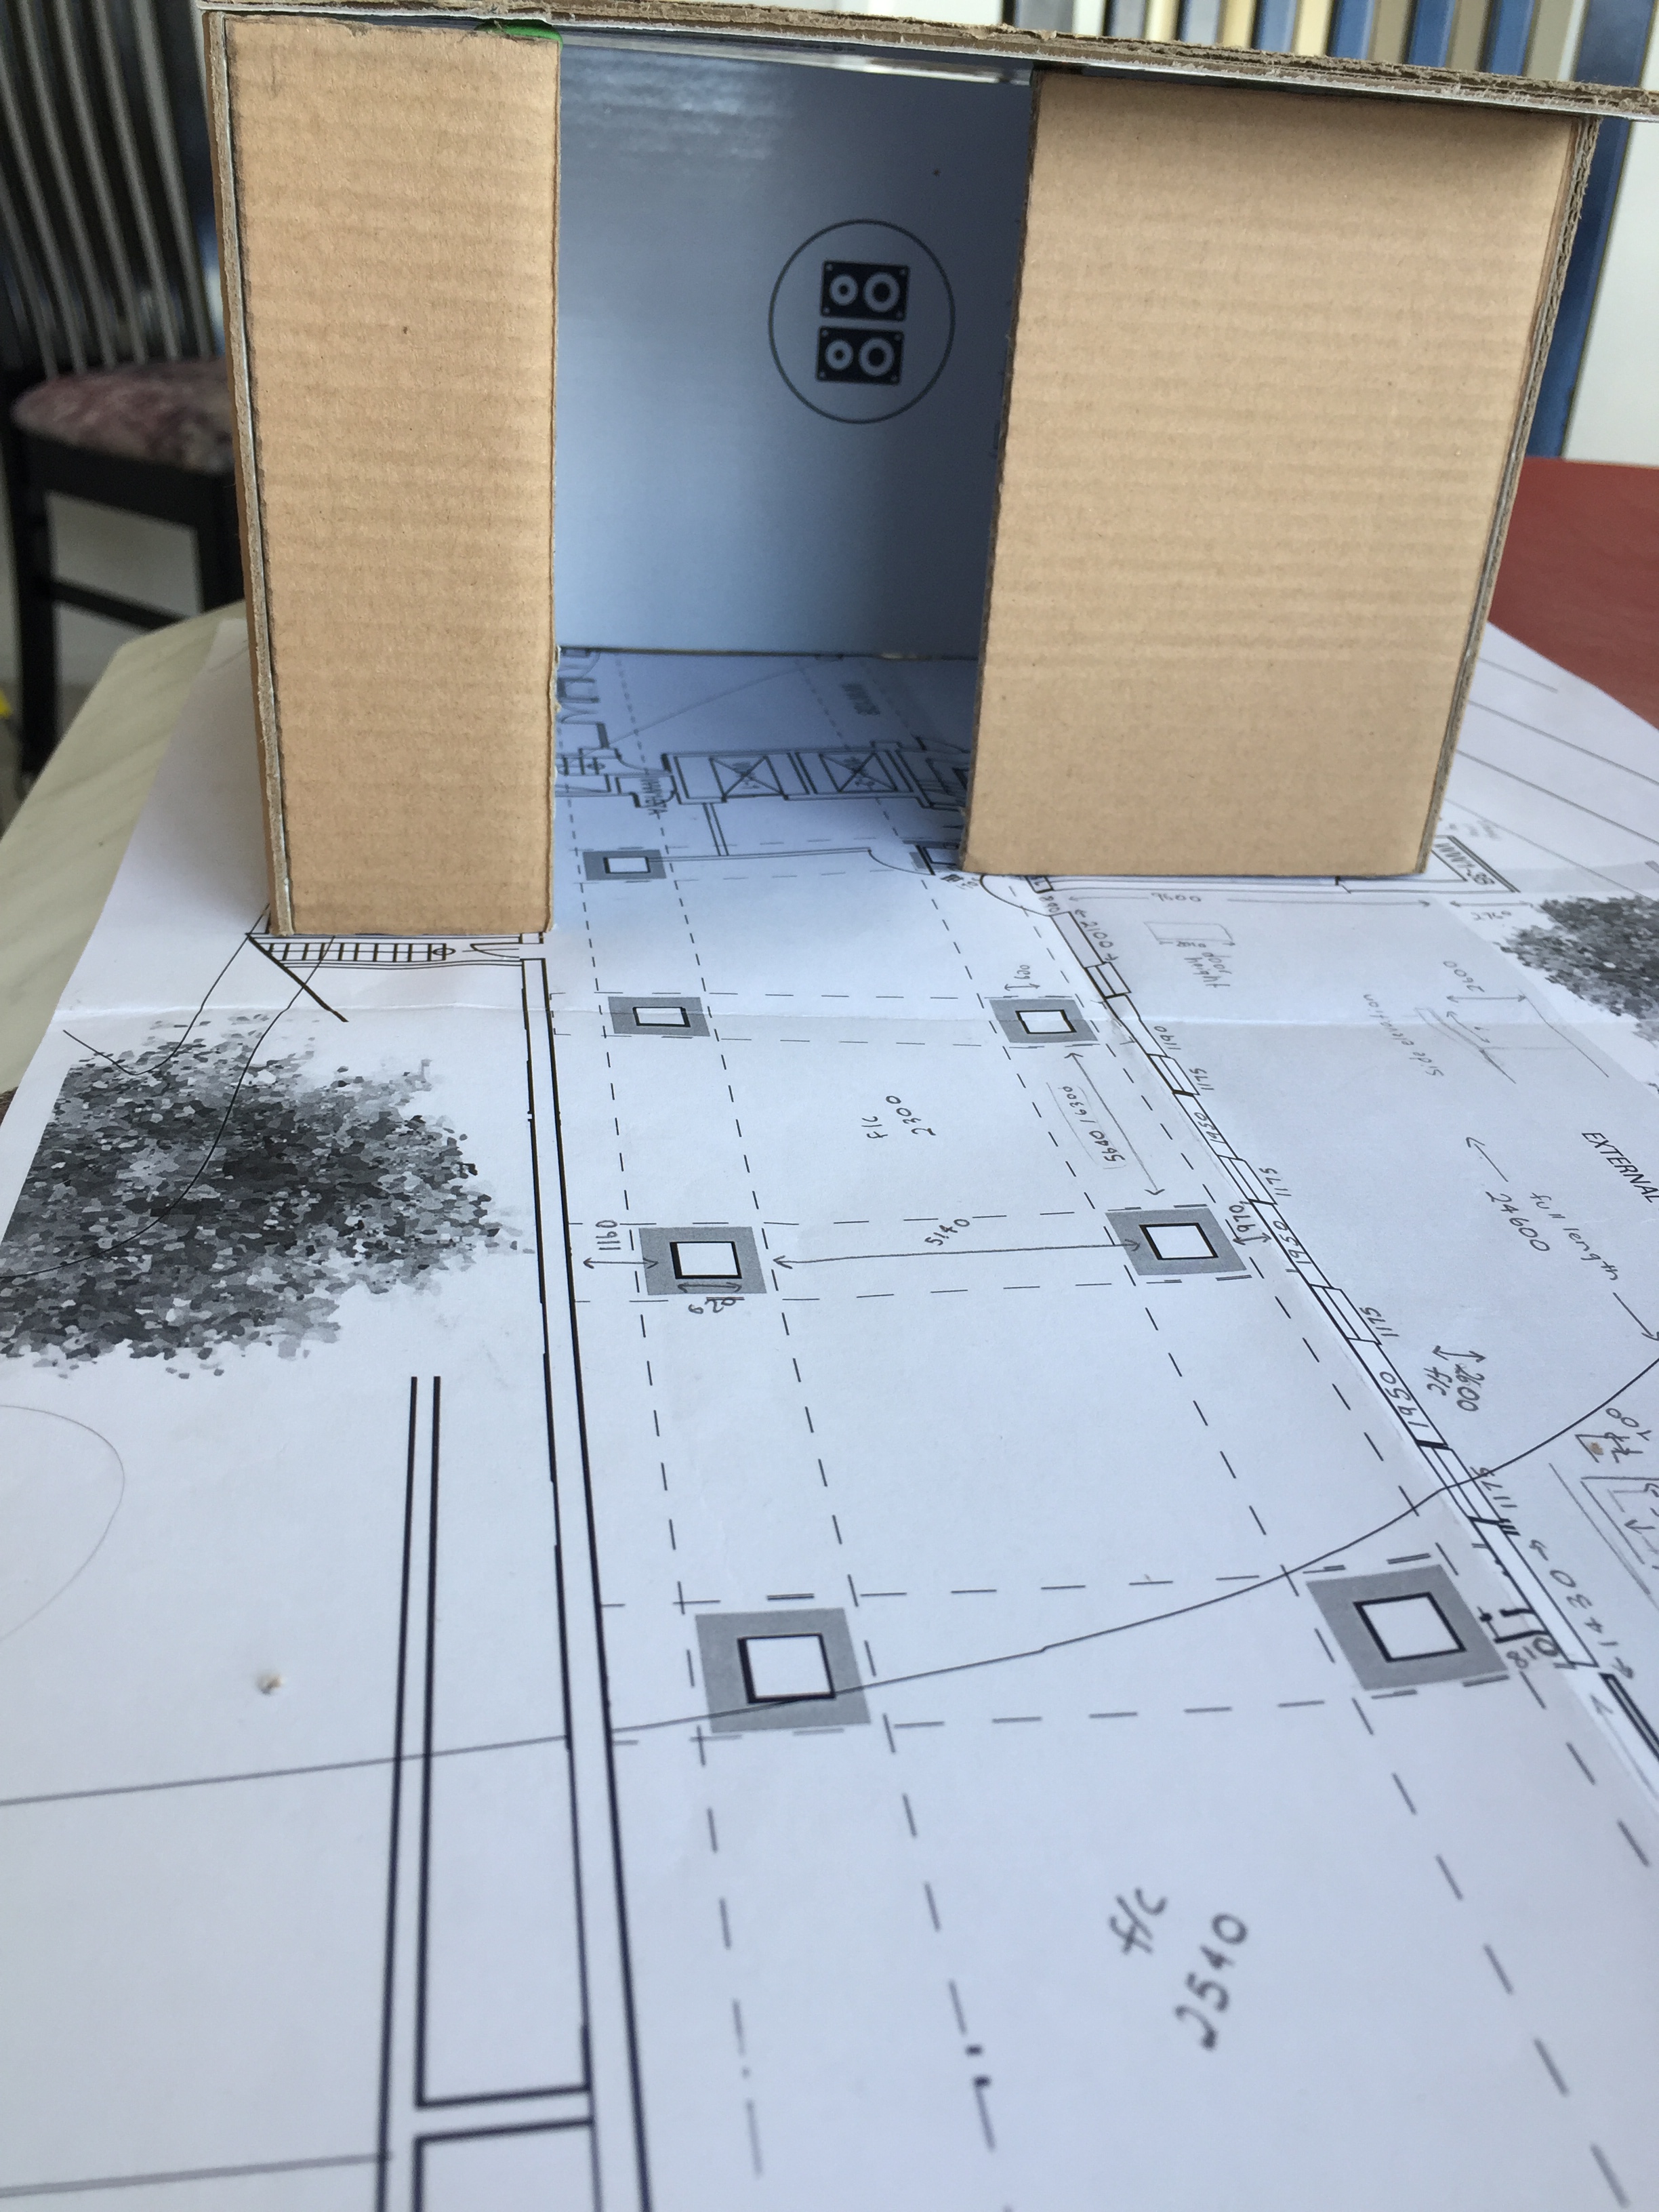
At the beginning of this week my group completed the building of our site model. We all worked together completing parts of the model that fit together in the end. I worked on the part of the building that would be stuck to the ground as well as helping with the overall completion of the model.
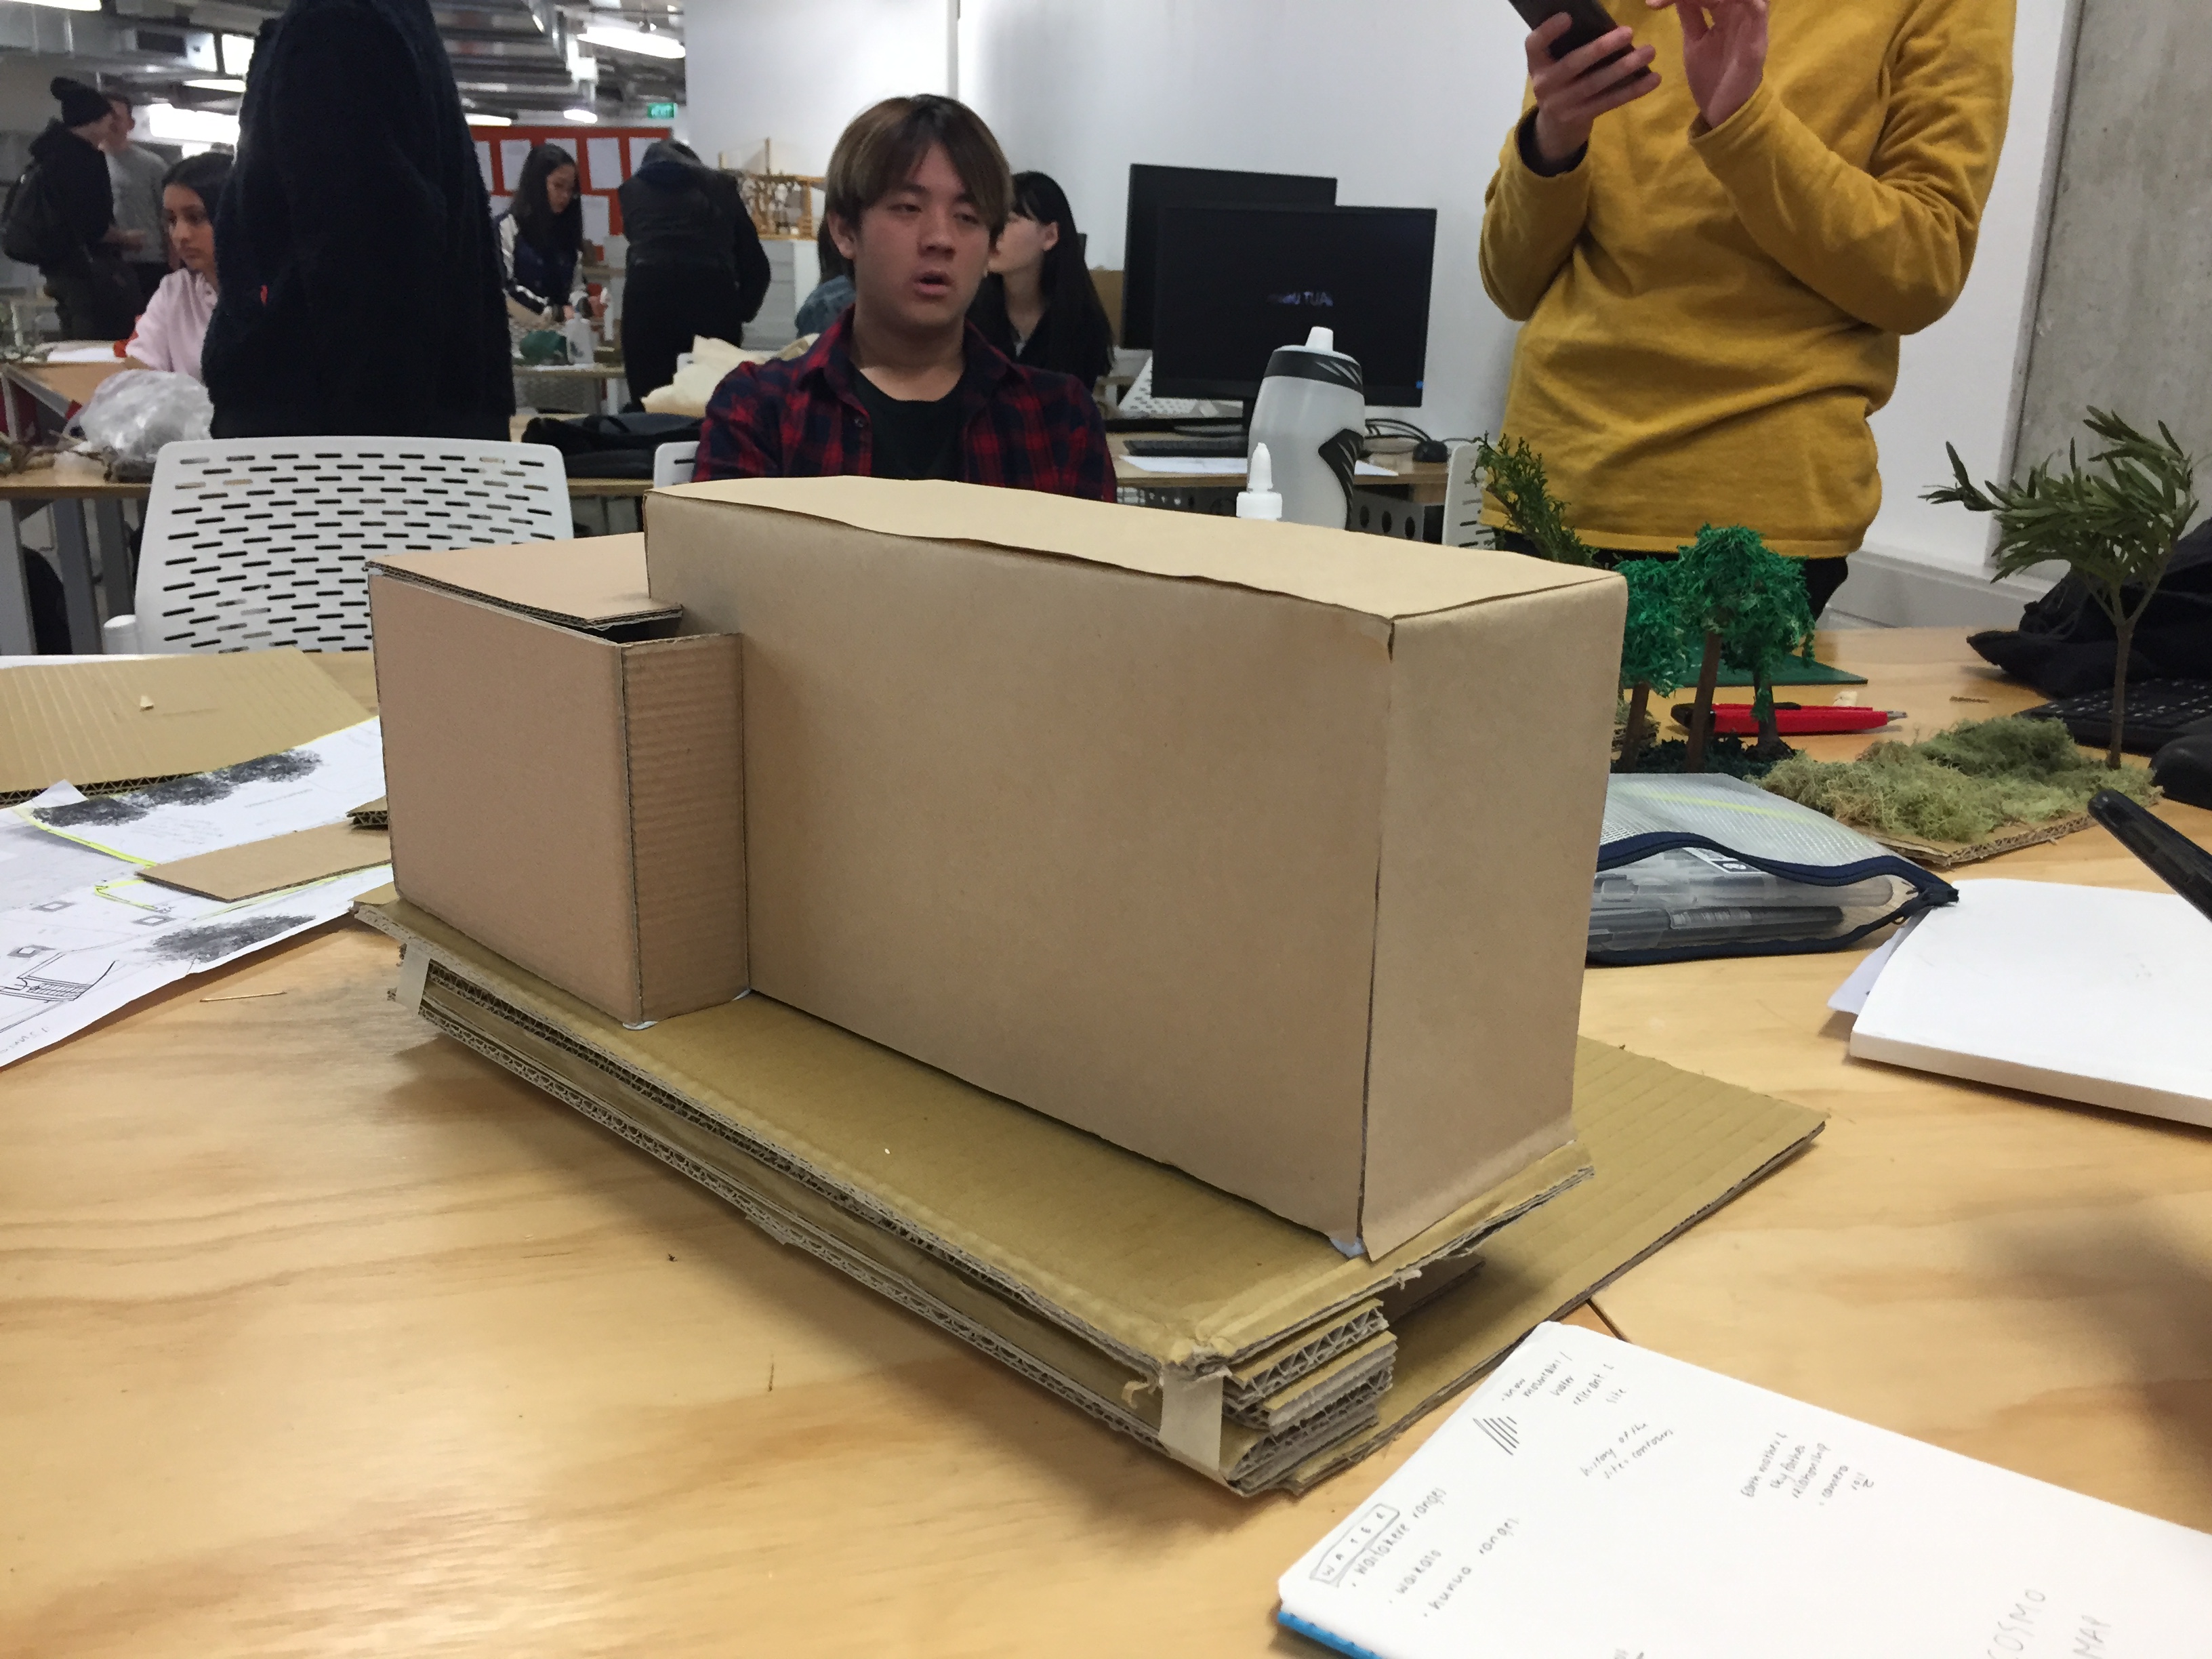
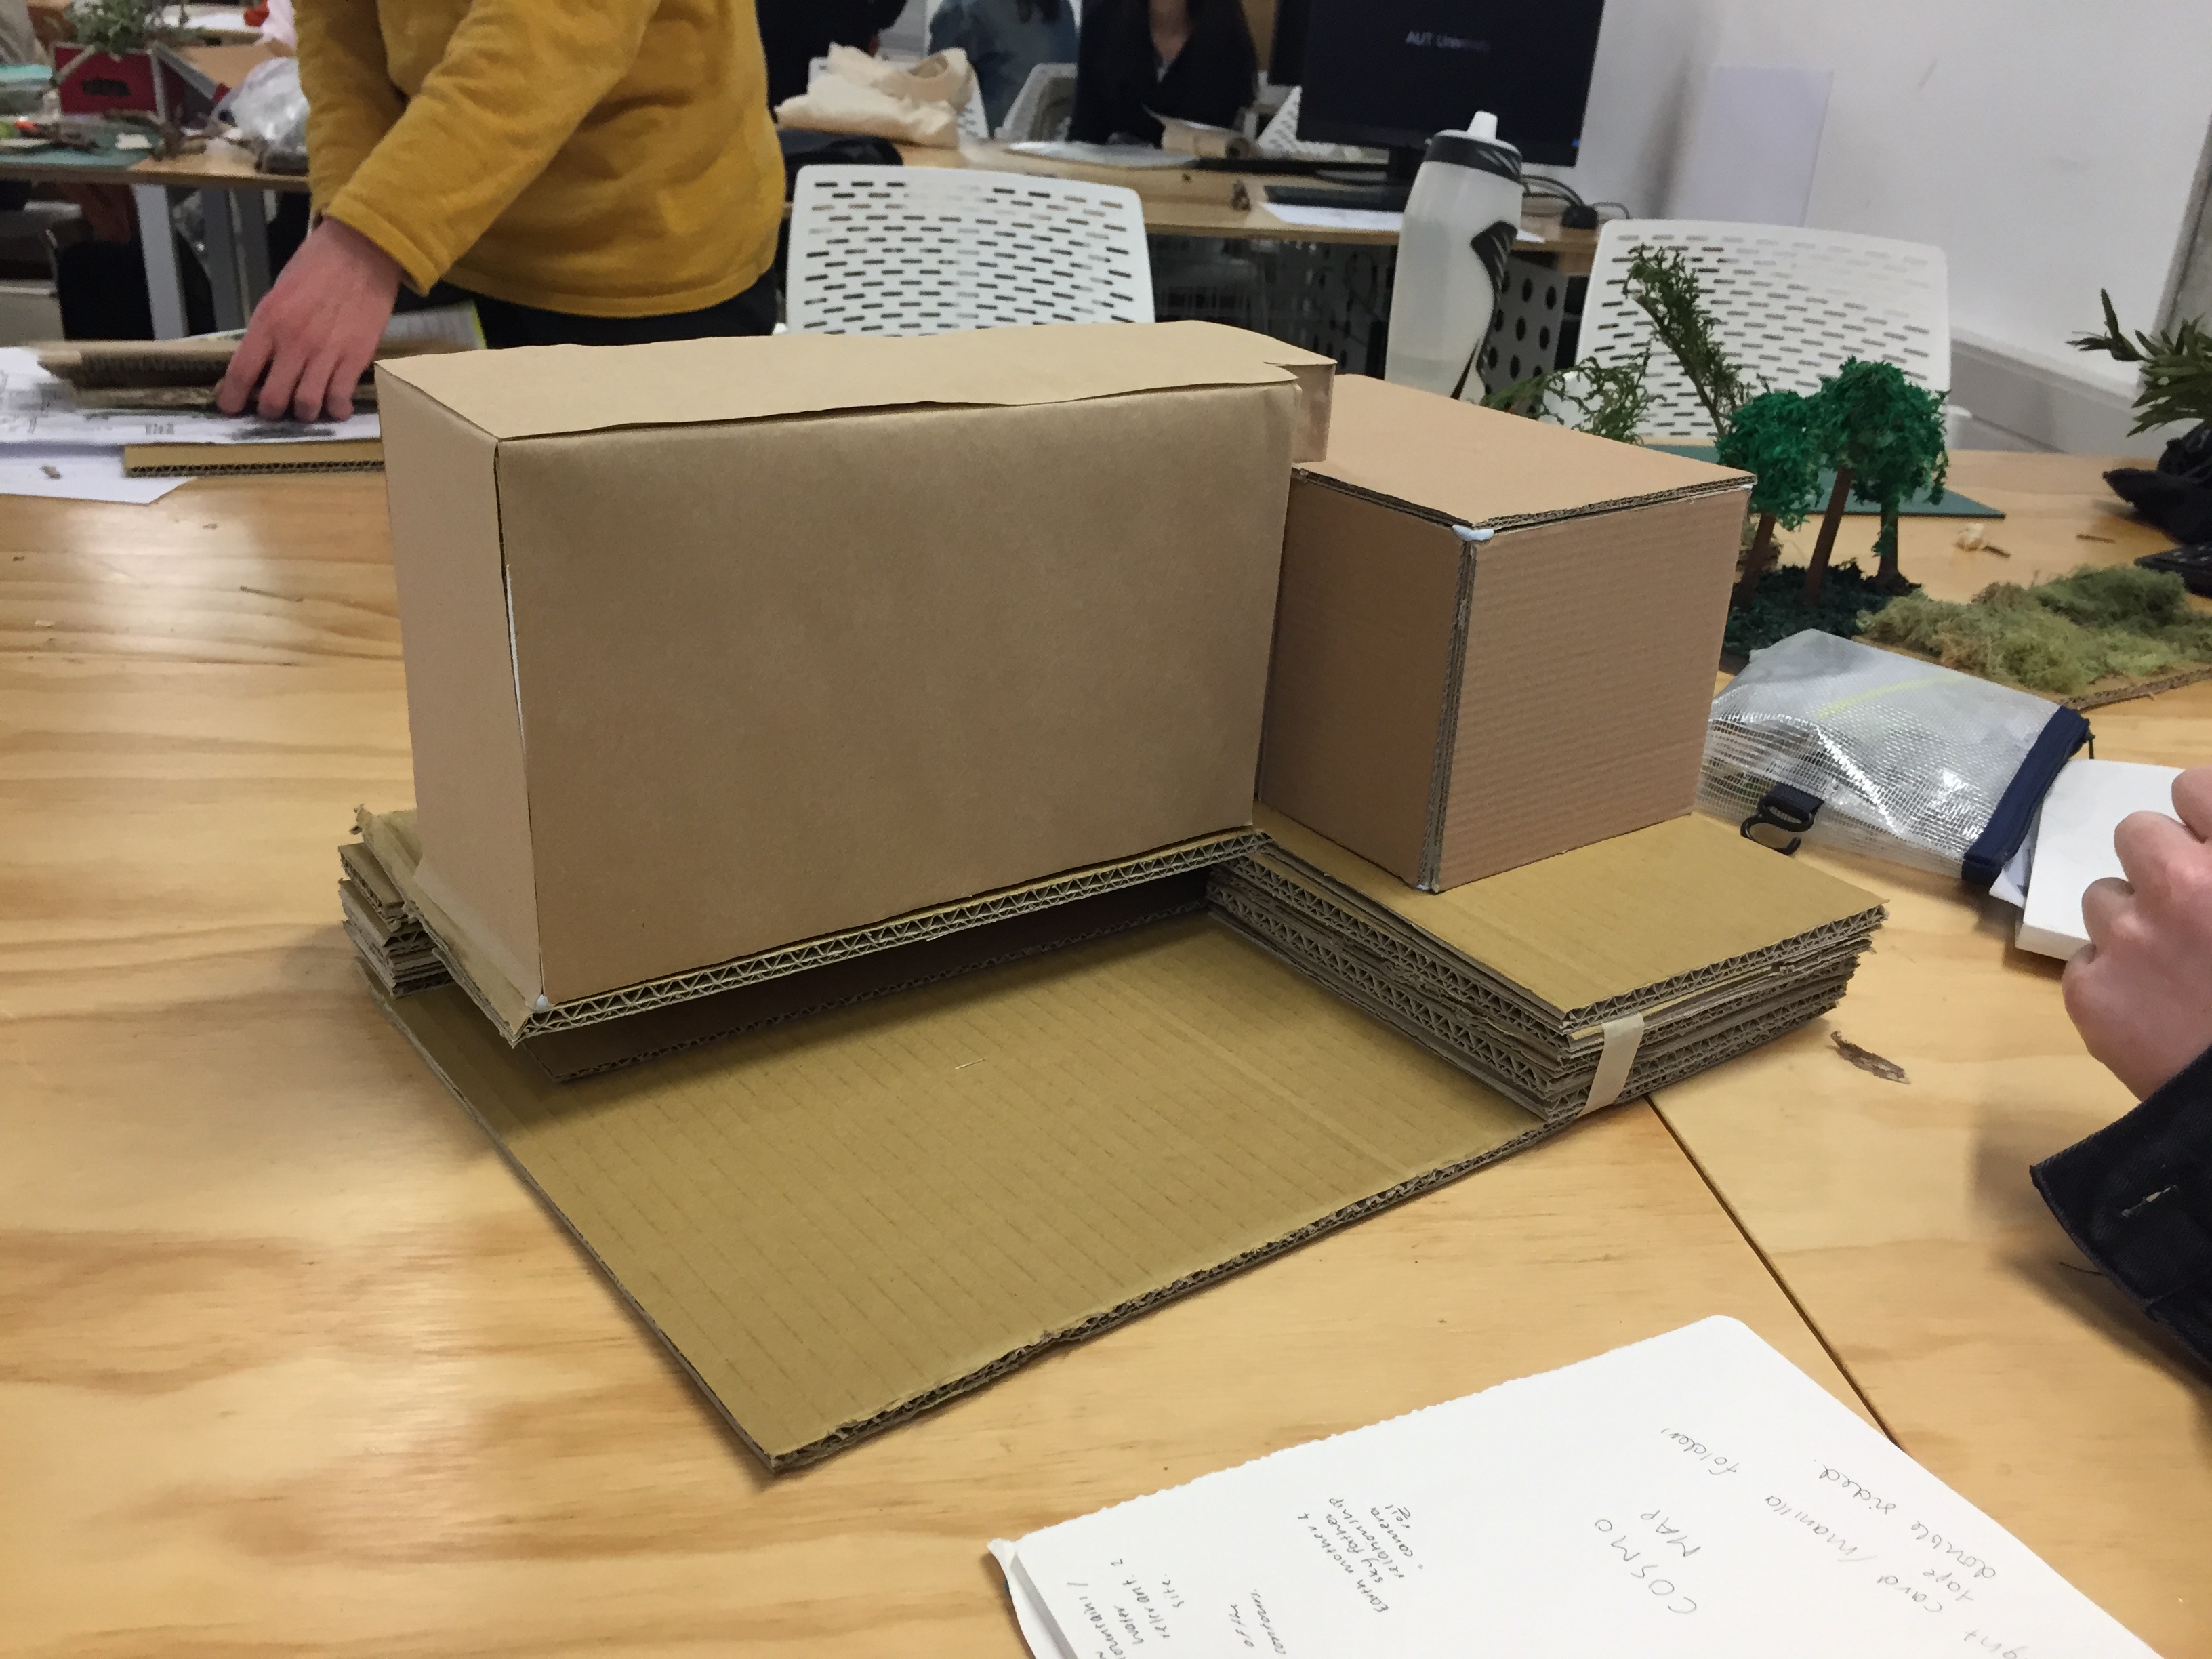
I enjoyed the process of building the model with the group however it was sometimes difficult due to some members of the group not fully understanding the task. We continued to talk through the model design with them and in the end we created a model we could all work with in the future.
We have also added more layers to the bottom of the model and cut out the basement shape. This was so that our pools could become deeper by digging down into the ground.
Research:
Auckland’s main water sources:
During the Wednesday class I began looking into where Auckland’s water was sourced. I found that the water comes from three main sources, the Waitakere Ranges dam, Hunua Ranges dam and the Waikato River.
Around 80% of Auckland’s water comes from the two dams located in the Waitakere Ranges and Hunua Ranges. One of the main benefits of sourcing water from the dams is that the water quality is often improved. This is because while the water is stored in the lake the sediment settles on the lake bed and the bacteria levels drop.
The remaining 20% of Auckland’s water is sourced from the Waikato River. On average 72,000 cubic meters of water is used daily from the river.
Auckland Council Geo Maps:
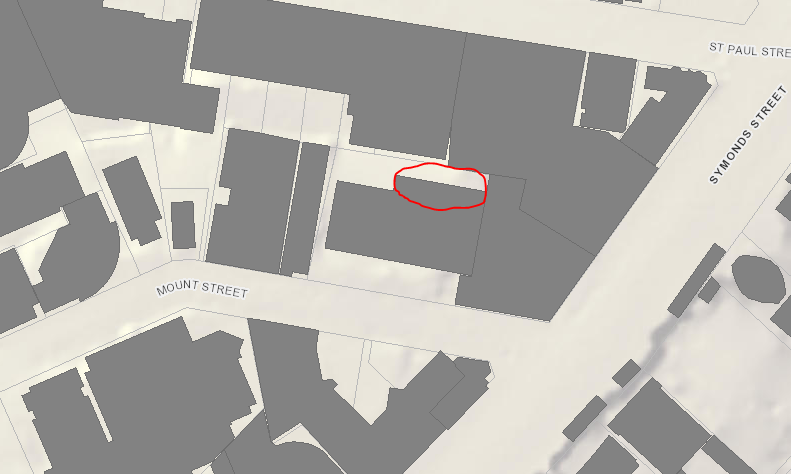
Building footprints (site circled) 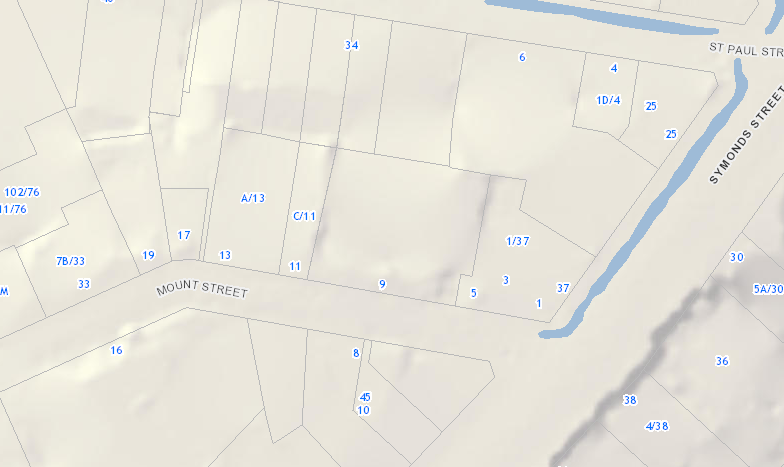
Flood plains
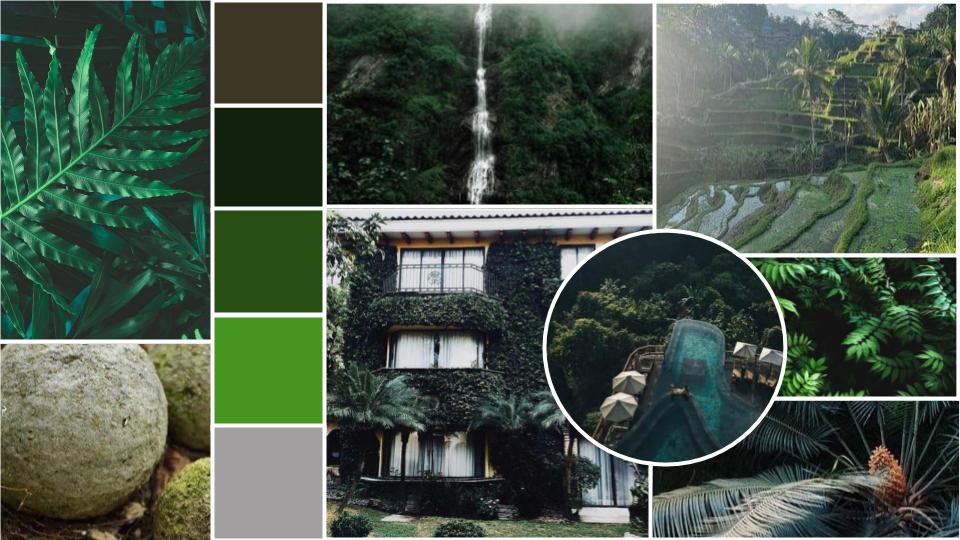
Bath House Inspiration
Below is the link to my bath house inspiration board.
I am looking into using many natural materials and earth tones to create a space that works well with the pocket forest. I am going to try to stay away from curves to create a space with clean lines. Many plants will be placed throughout the room adding to the natural element.
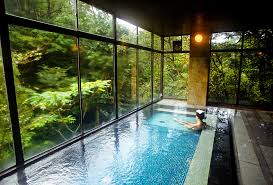
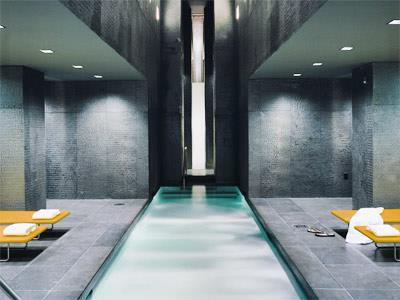
International Architecture Competition: Rebirth of the Bathhouse
I came across across these images while researching bathhouses. I was drawn to these atmospheric images that captured the beauty of the space. The images below show some of the winners project. The bathhouse was designed by the Bodega & Piedrafita Architects, Fabrizio Devoto, Leandro Villalba and Nicolas Rudolph.
https://beebreeders.com/architecturecompetitions/rebirthofthebathhouse
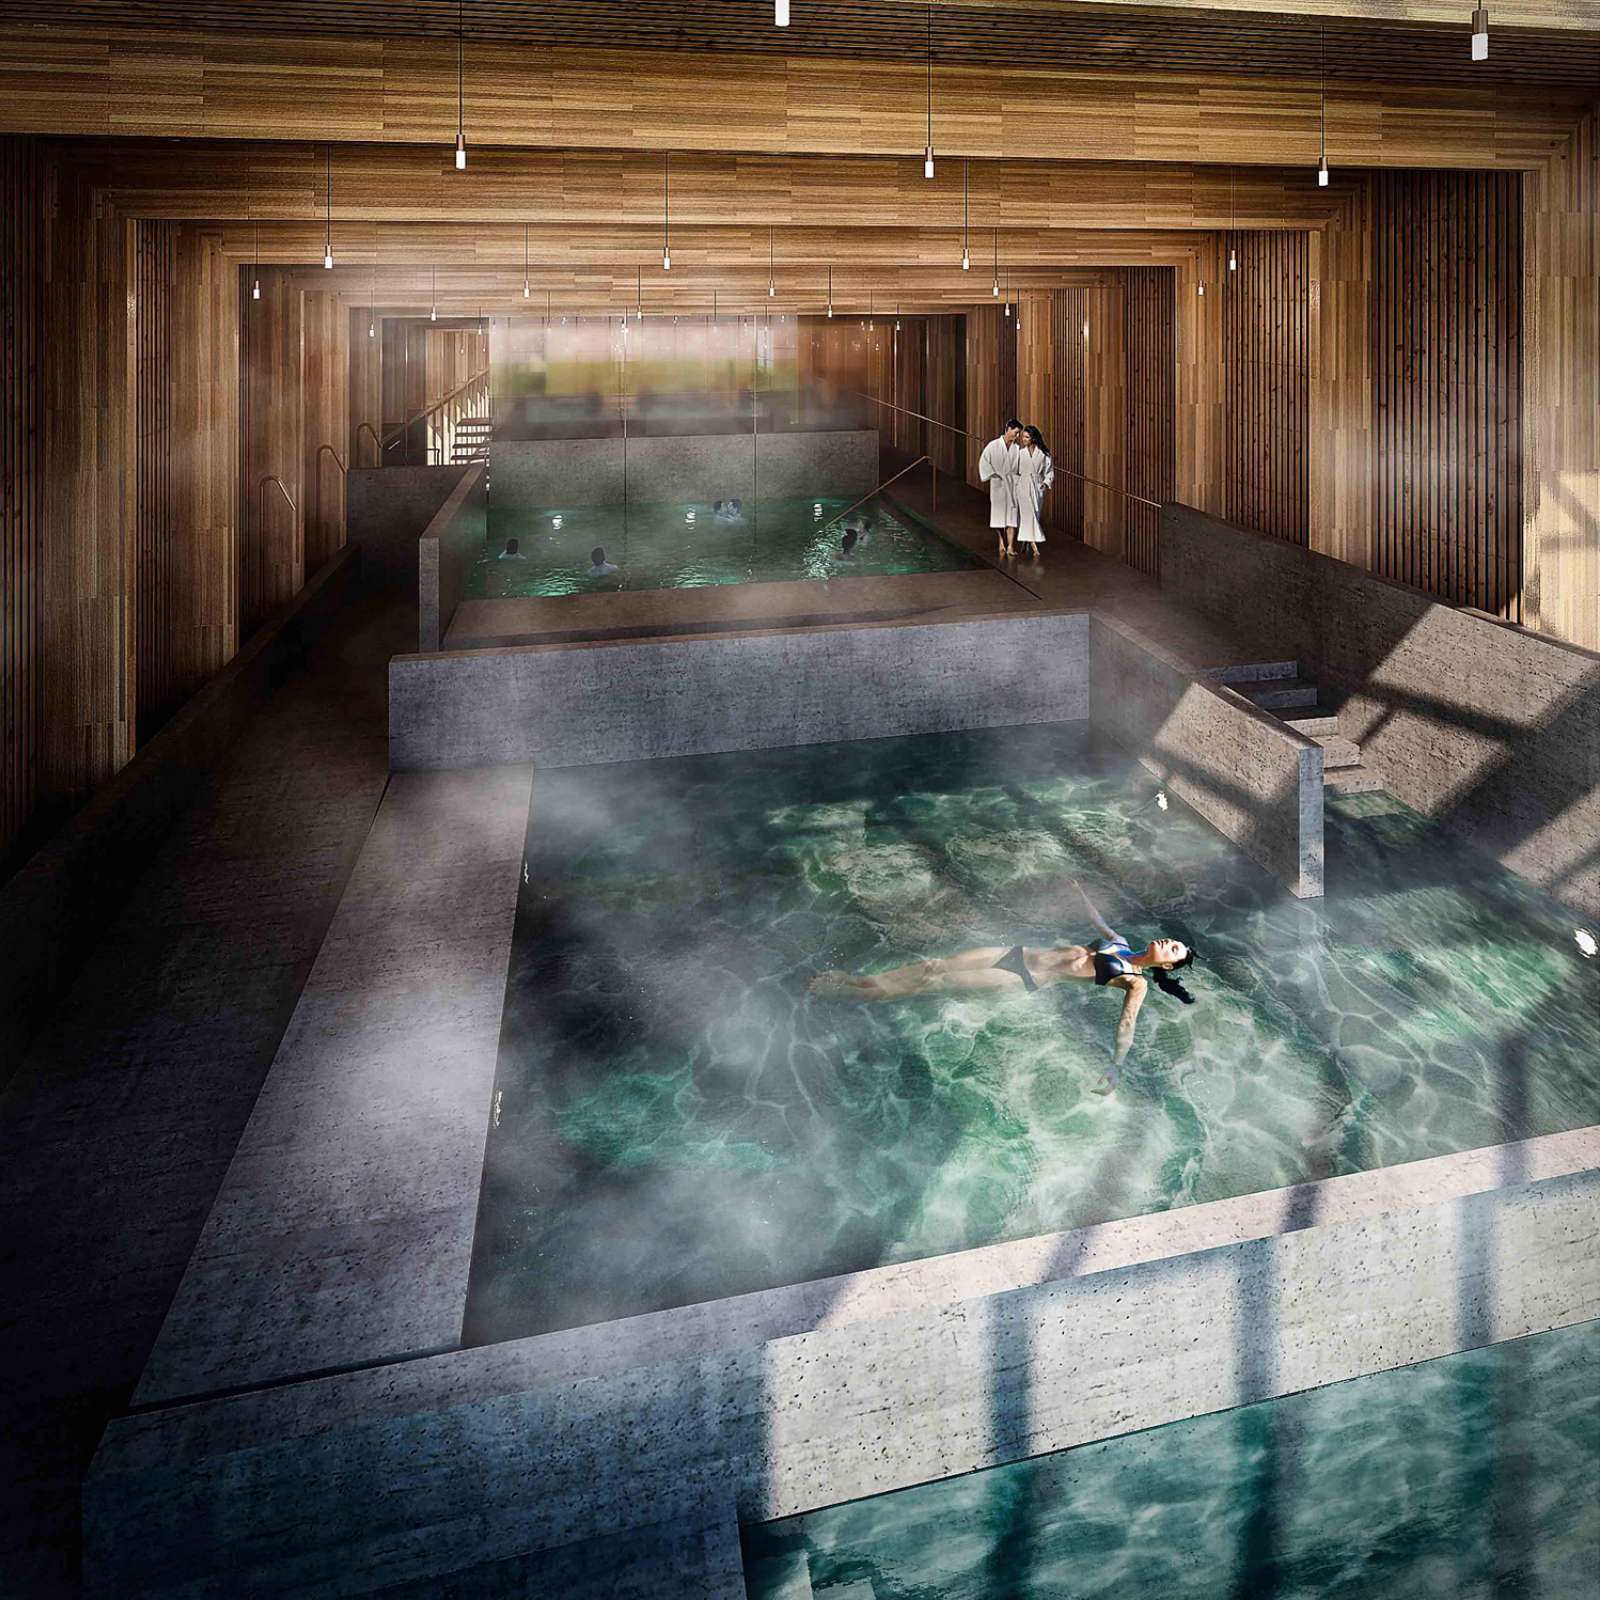
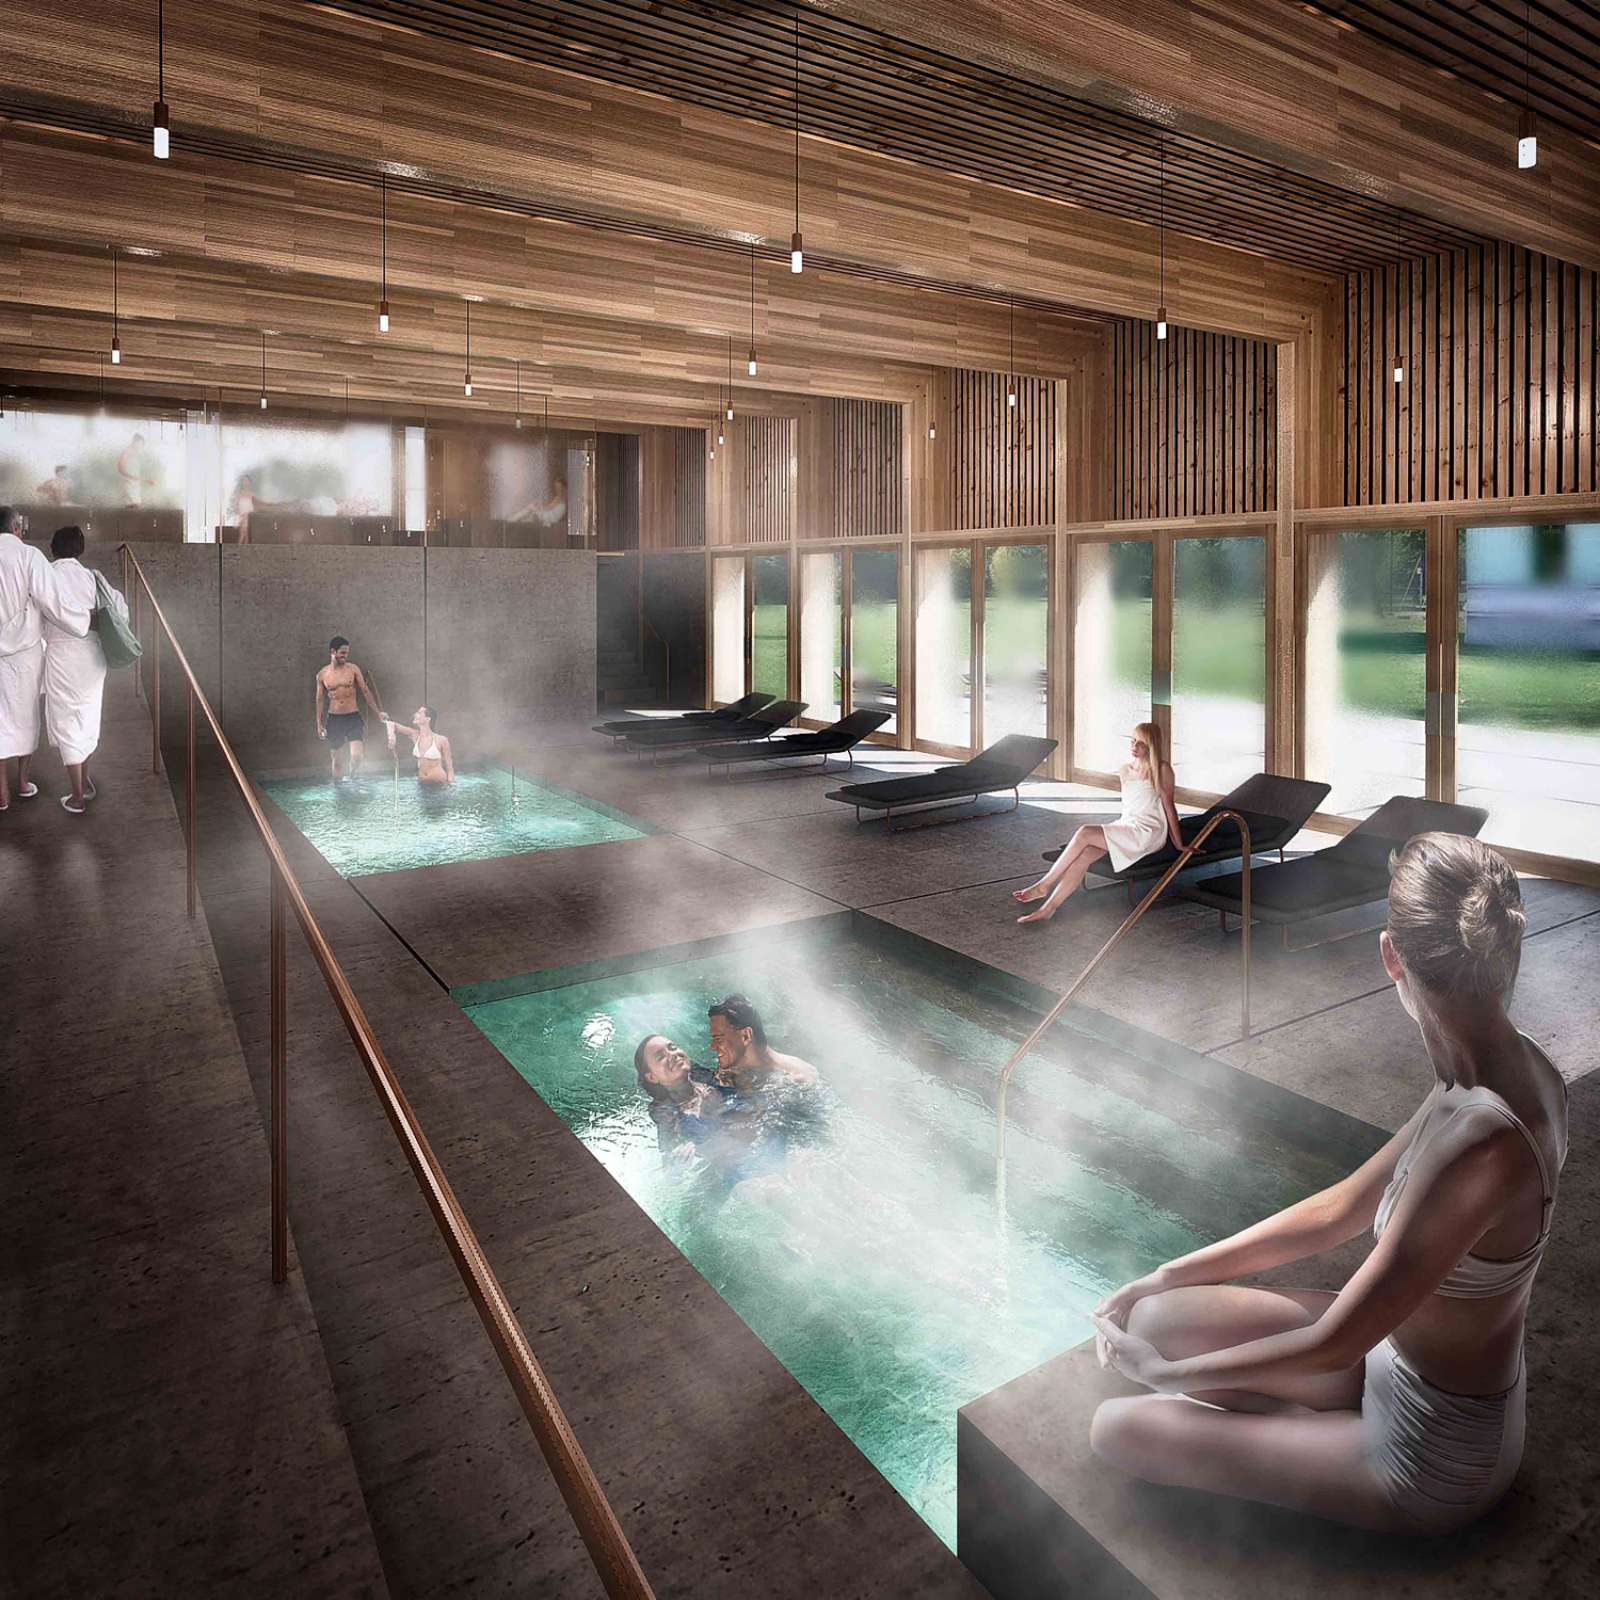
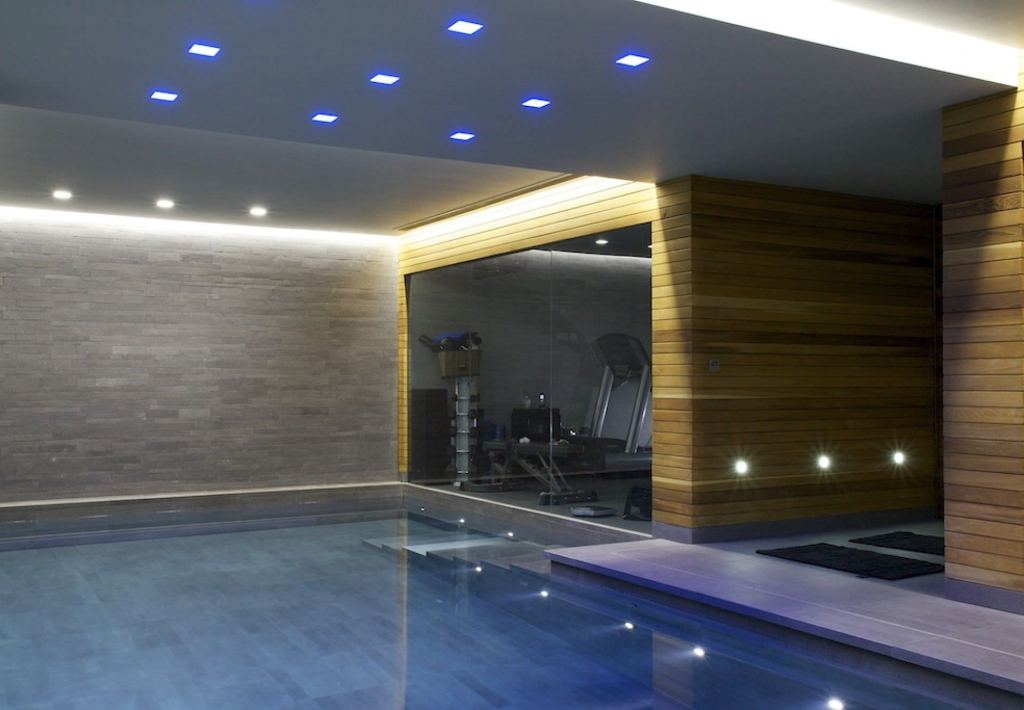
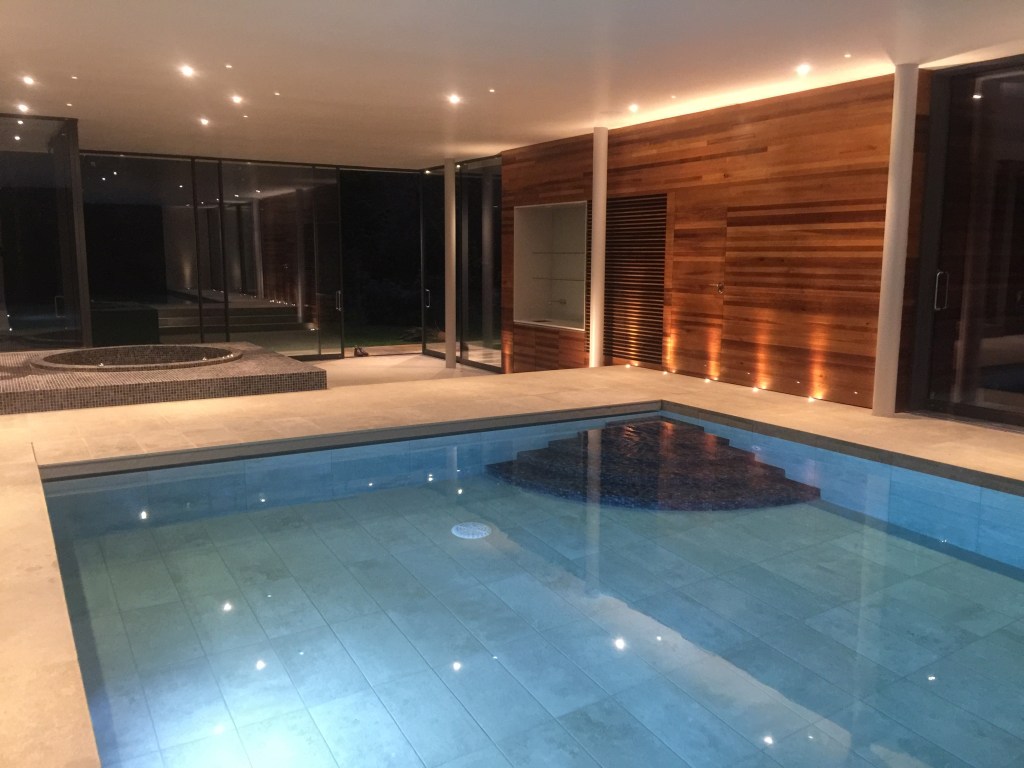
This design has many of the same features that are in our bathhouse brief, for example, a large pool as well as smaller more private pools. The images also show other spaces for relaxing such as the loungers shown in the second image.
The design uses many of the natural materials and tones that I am looking at using. These images shows they the colours work well together and look aesthetically pleasing both in the light and shadow. The open plan style make the space feel bigger and is something that I am looking into doing seeing that the WW building basement is rather small. Natural light is used effectively allowing light into most spaces. I have been thinking about the type of lighting that could be used in my space so iv’e taken notice of the small down lights used in this design.
Week 4: Draft Model
Design Research:
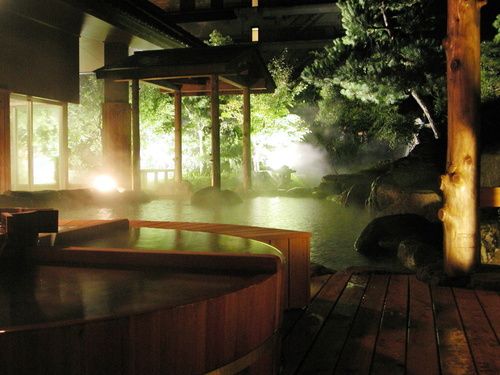
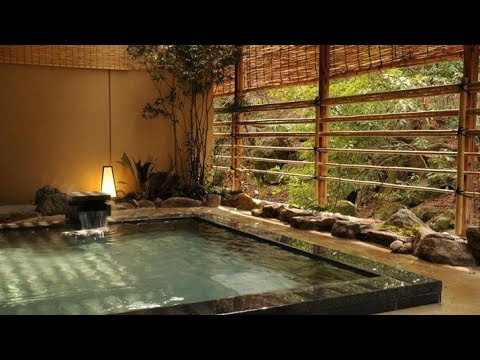
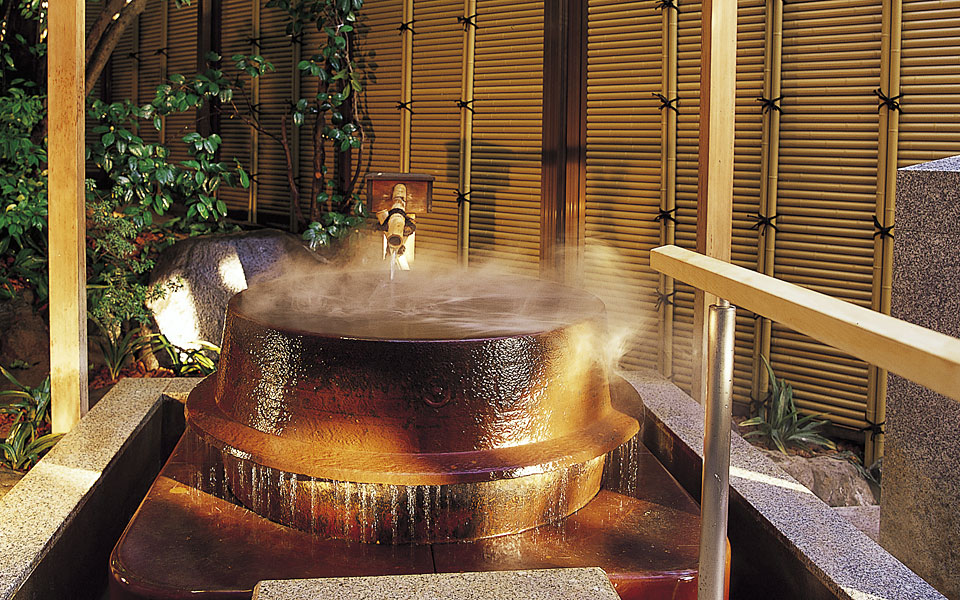
I have been looking further into Japanese style bath houses as I would like to draw ideas (specifically the materials) from them. The Onsen Baths located within the Yunokuni Tensyo hotel in Japan offer a range of different bathing experiences. The hotel offers 18 different types of hot spring baths in three large bath areas with different atmospheres.
The first space, Yugen no Yudono is located outdoors. This provides fresh air for bathers while being immersed in large baths.
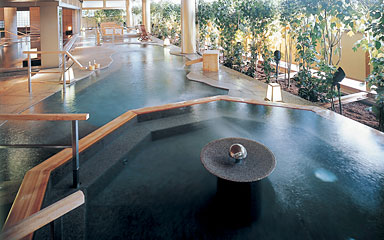
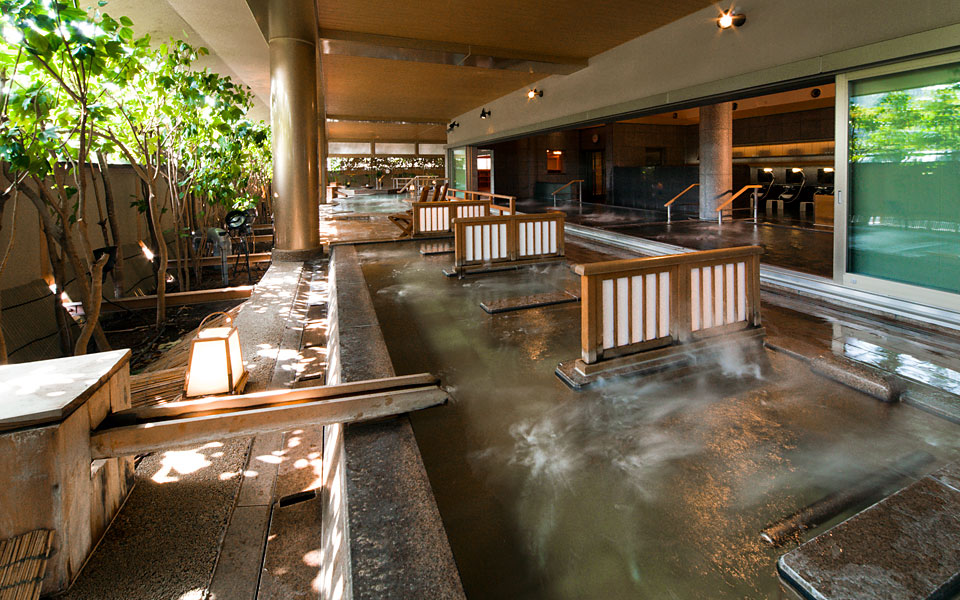
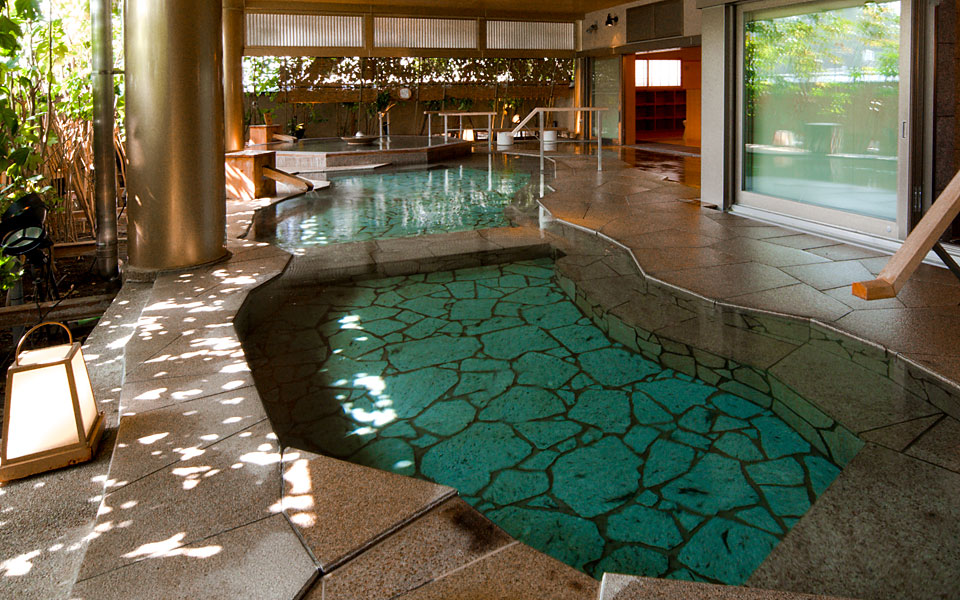
The second space, Takimi no Yuya, allows bathers to relax in hot water while gazing at the water flowing down a large rock transported for a near-by valley.
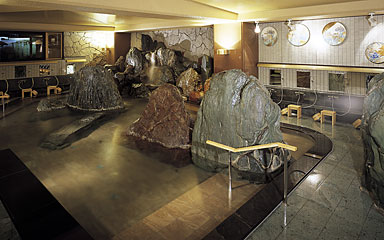
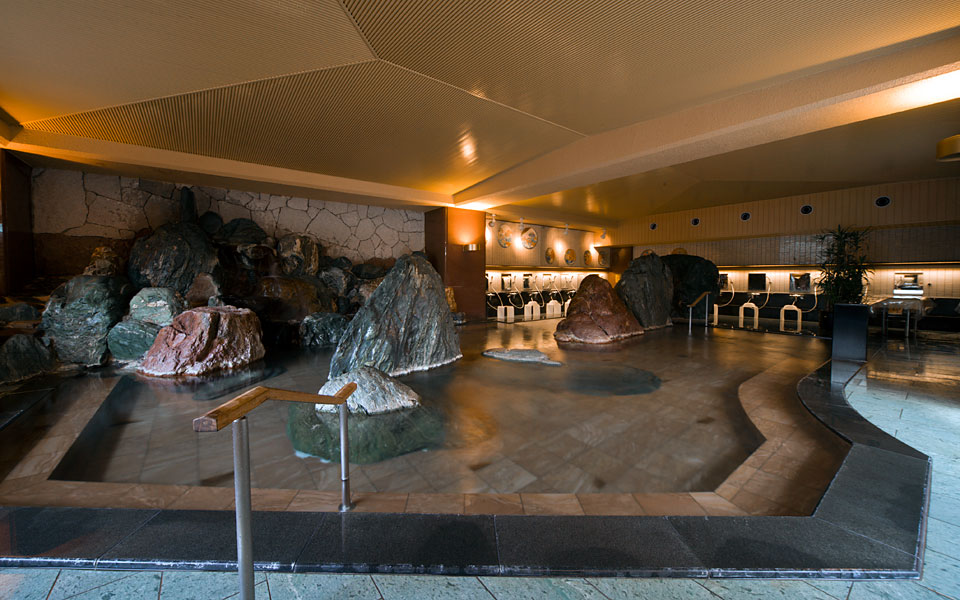
The third bath area, Kutani no Yudokoro, is a indoor space where the walls are beautifully decorated with Kutani-yaki plates, the traditional craft of the Kaga area.
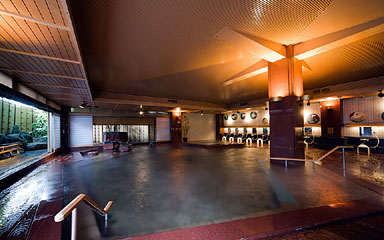
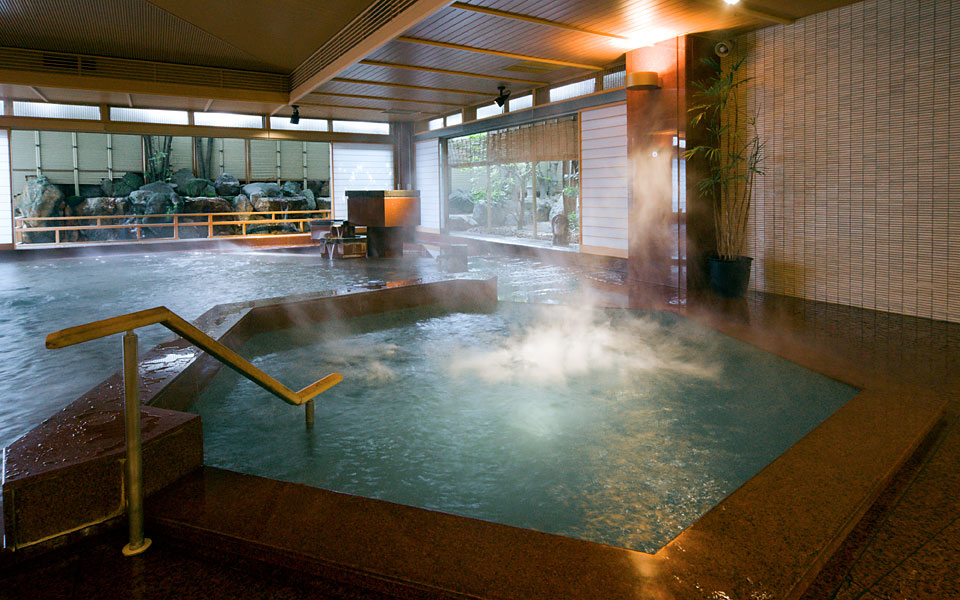
I really like the use of natural stone used in the second space (Takimi no Yuya). I think this is an element that I’d like to bring into my own design. I think the way each space has different features and is able to create different atmospheres is really interesting. This is something I could look into for spaces in my own bath house, such as the larger bath, smaller baths, changing and toilets as well as the refreshment area.
https://tensyo.yunokuni.jp/foreign/en/onsen.html
Other Facilites:
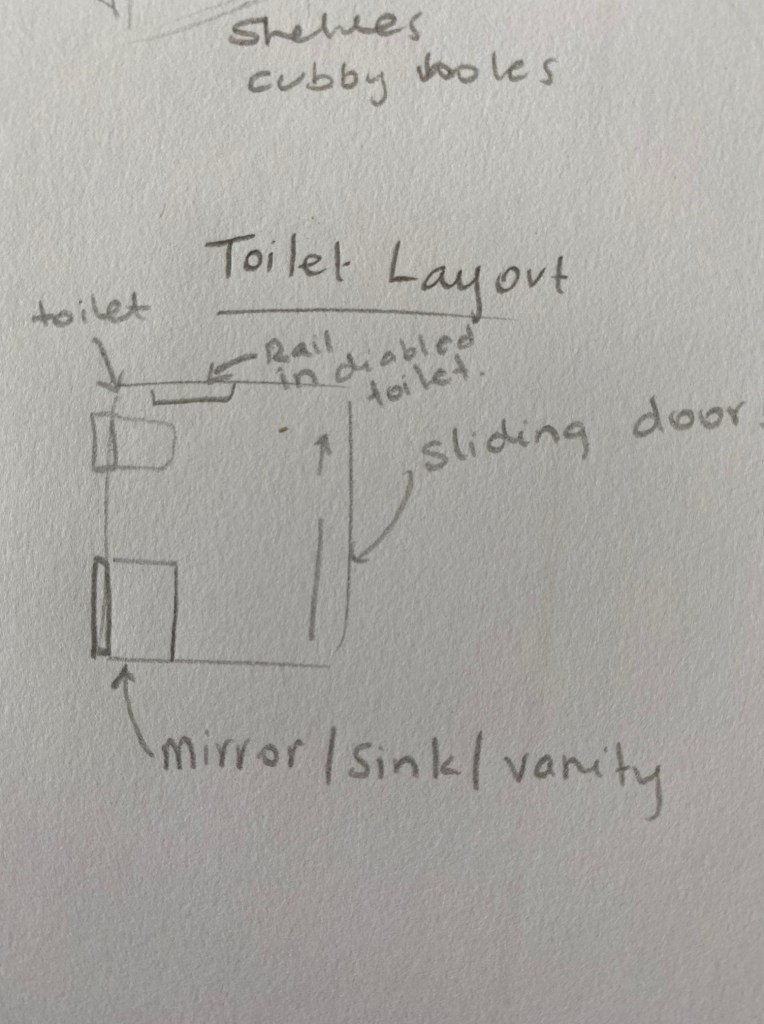
Seeing that the space is rather small I wanted to find out how many toilets I would actually need for an average number of 20 people. Using the toilet calculator on the Building performance website I entered all of the information that I could (building use, swimming pool and number of people, 20). I had always planned on having unisex bathrooms to save space within the bathhouse. The calculator came back with the result of 1.
I also wanted to find out more about the type of space i’d need for a person in a wheelchair seeing that the space needs to be compatible for all people. Disabled toilet users need to be able to access the toilet. This means that wheelchair users should be able to comfortably approach and use the facilities within the building. Below is a list of requirements for a disabled bathroom.
- A raised height WC with extra projection for wheelchair transfers
- A basin with lever taps to assist users with limited dexterity and five supporting grab rails.
- Access door to open outward
- An emergency assistance alarm system
- Supporting grab rails to be of a contrasting colour to aid the visually impaired
- Toilet flush to be of a paddle type design for ease of use.
Compulsory dimensions for a disabled toilet state that the room needs to be at least 2200mm in length and 1500mm in width. I will make sure that at least one of my bathroom spaces. fit these requirements.
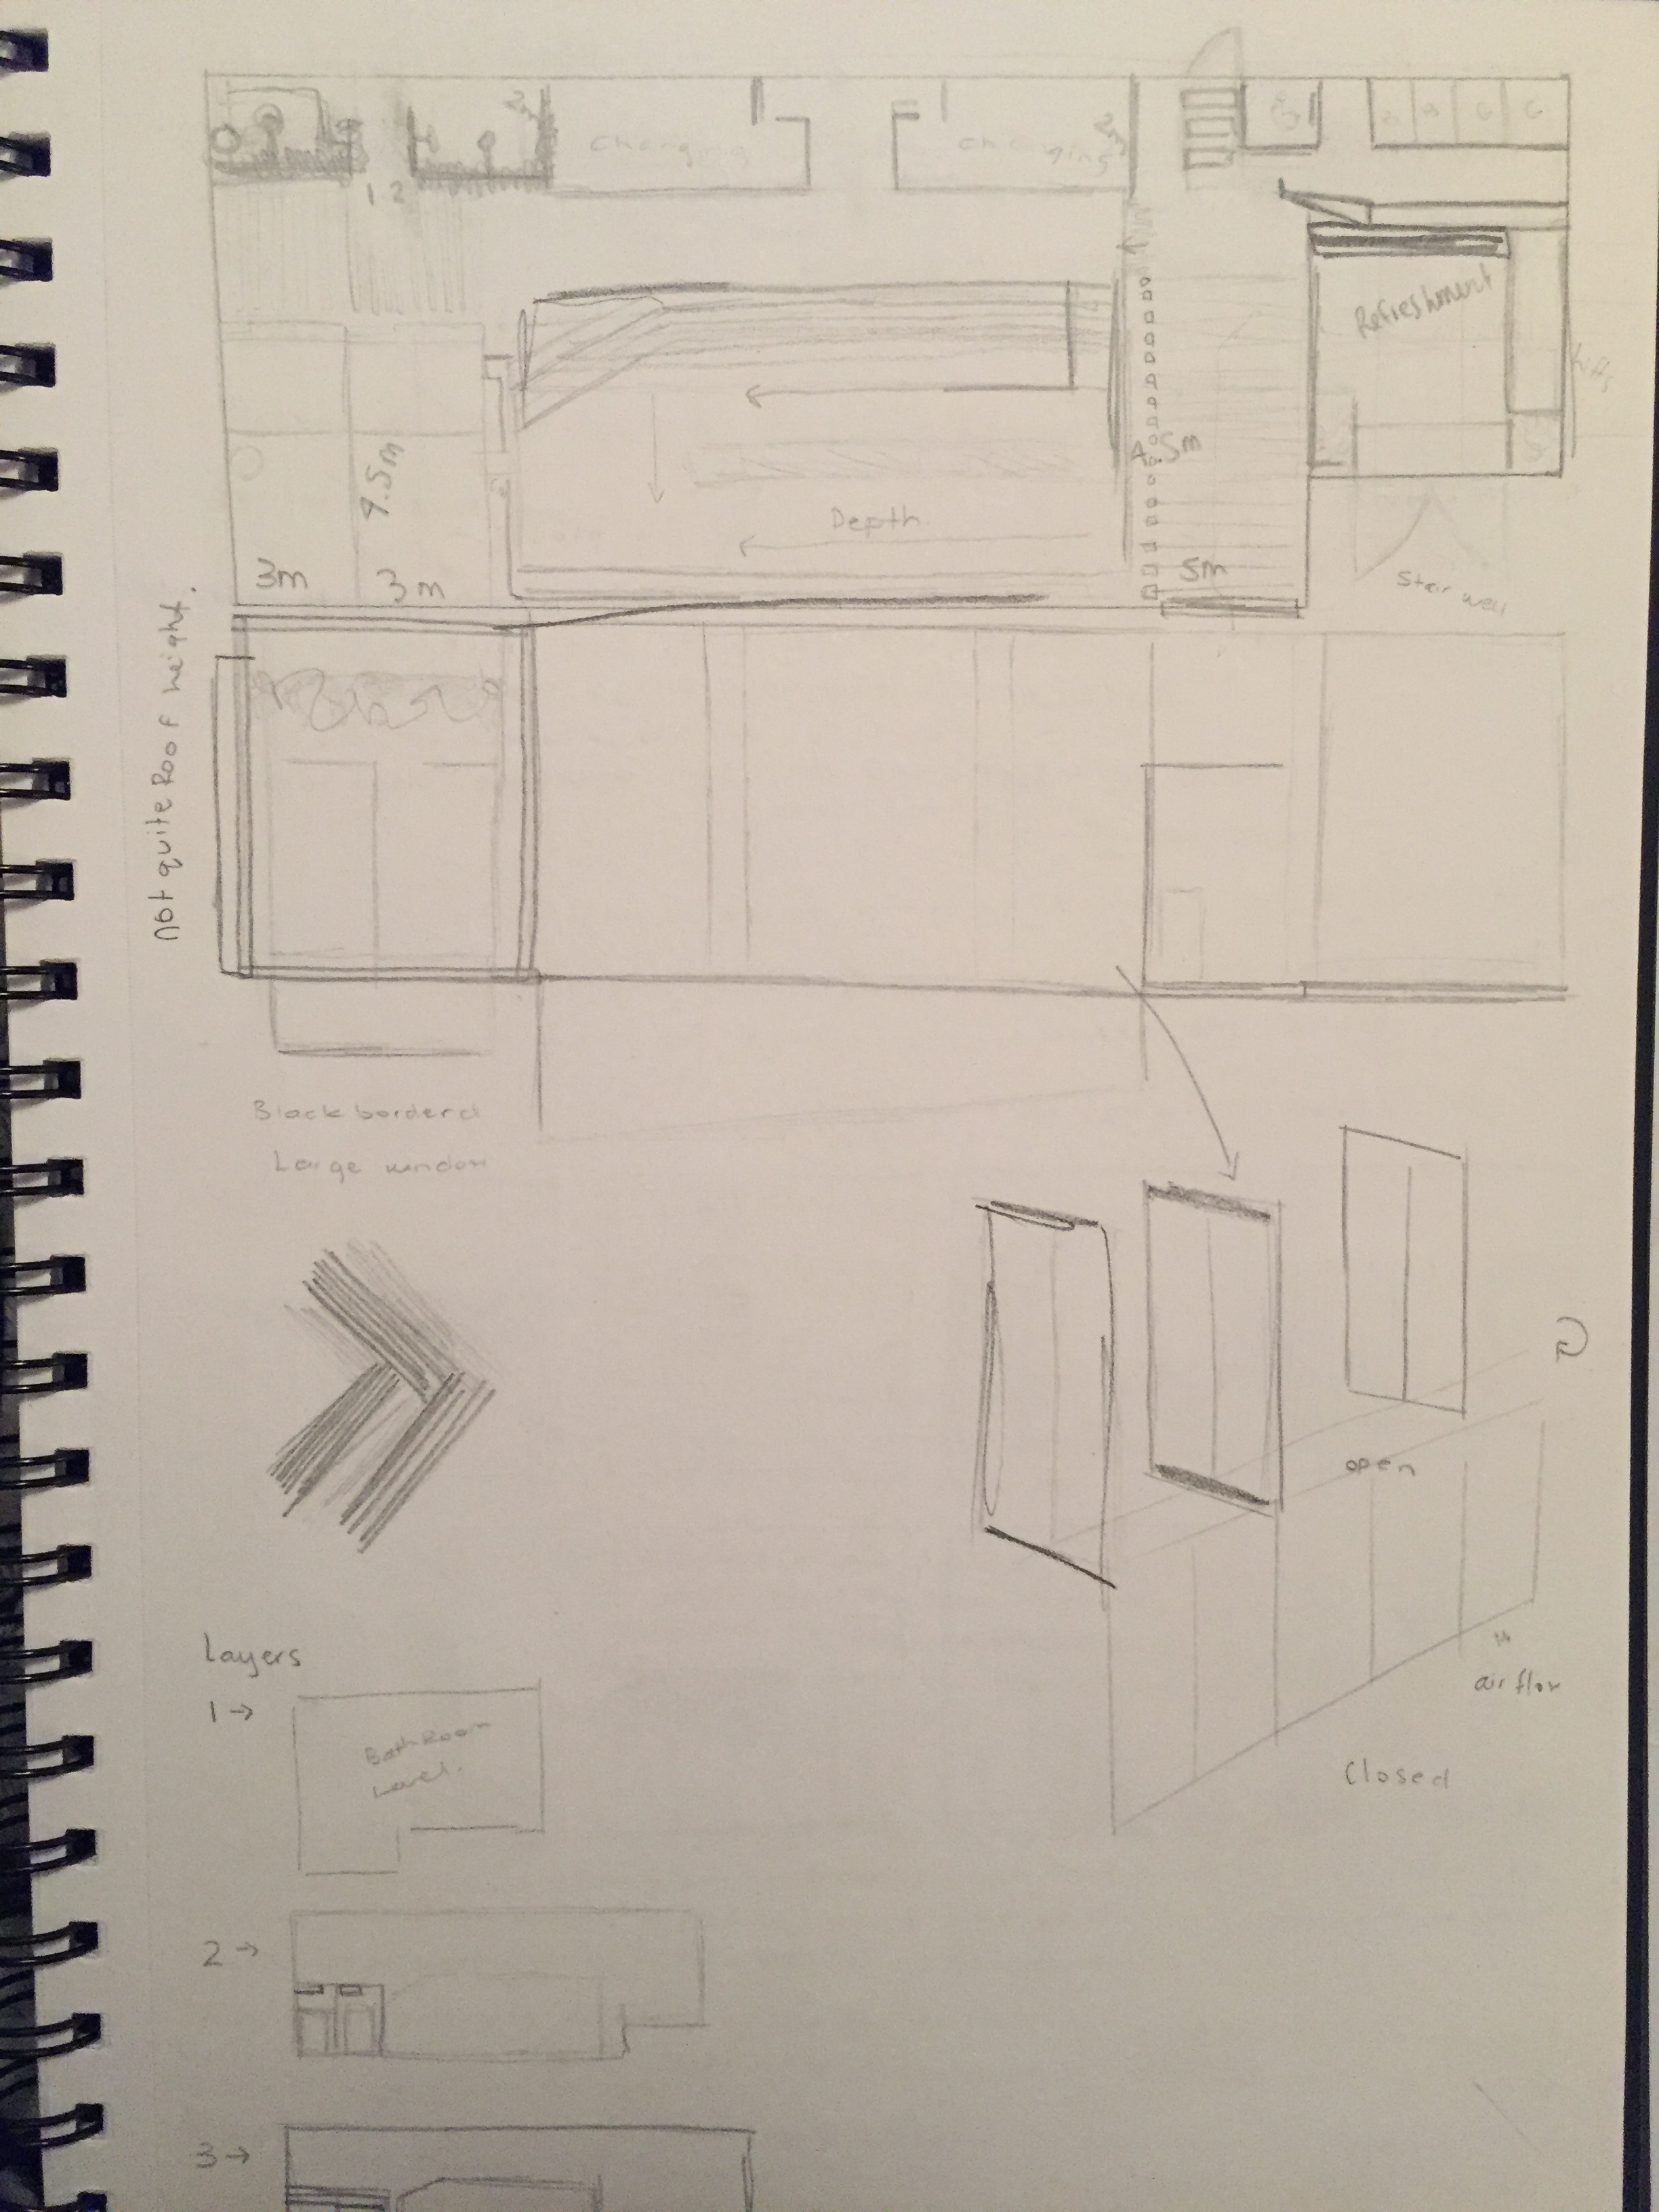
First Concept:
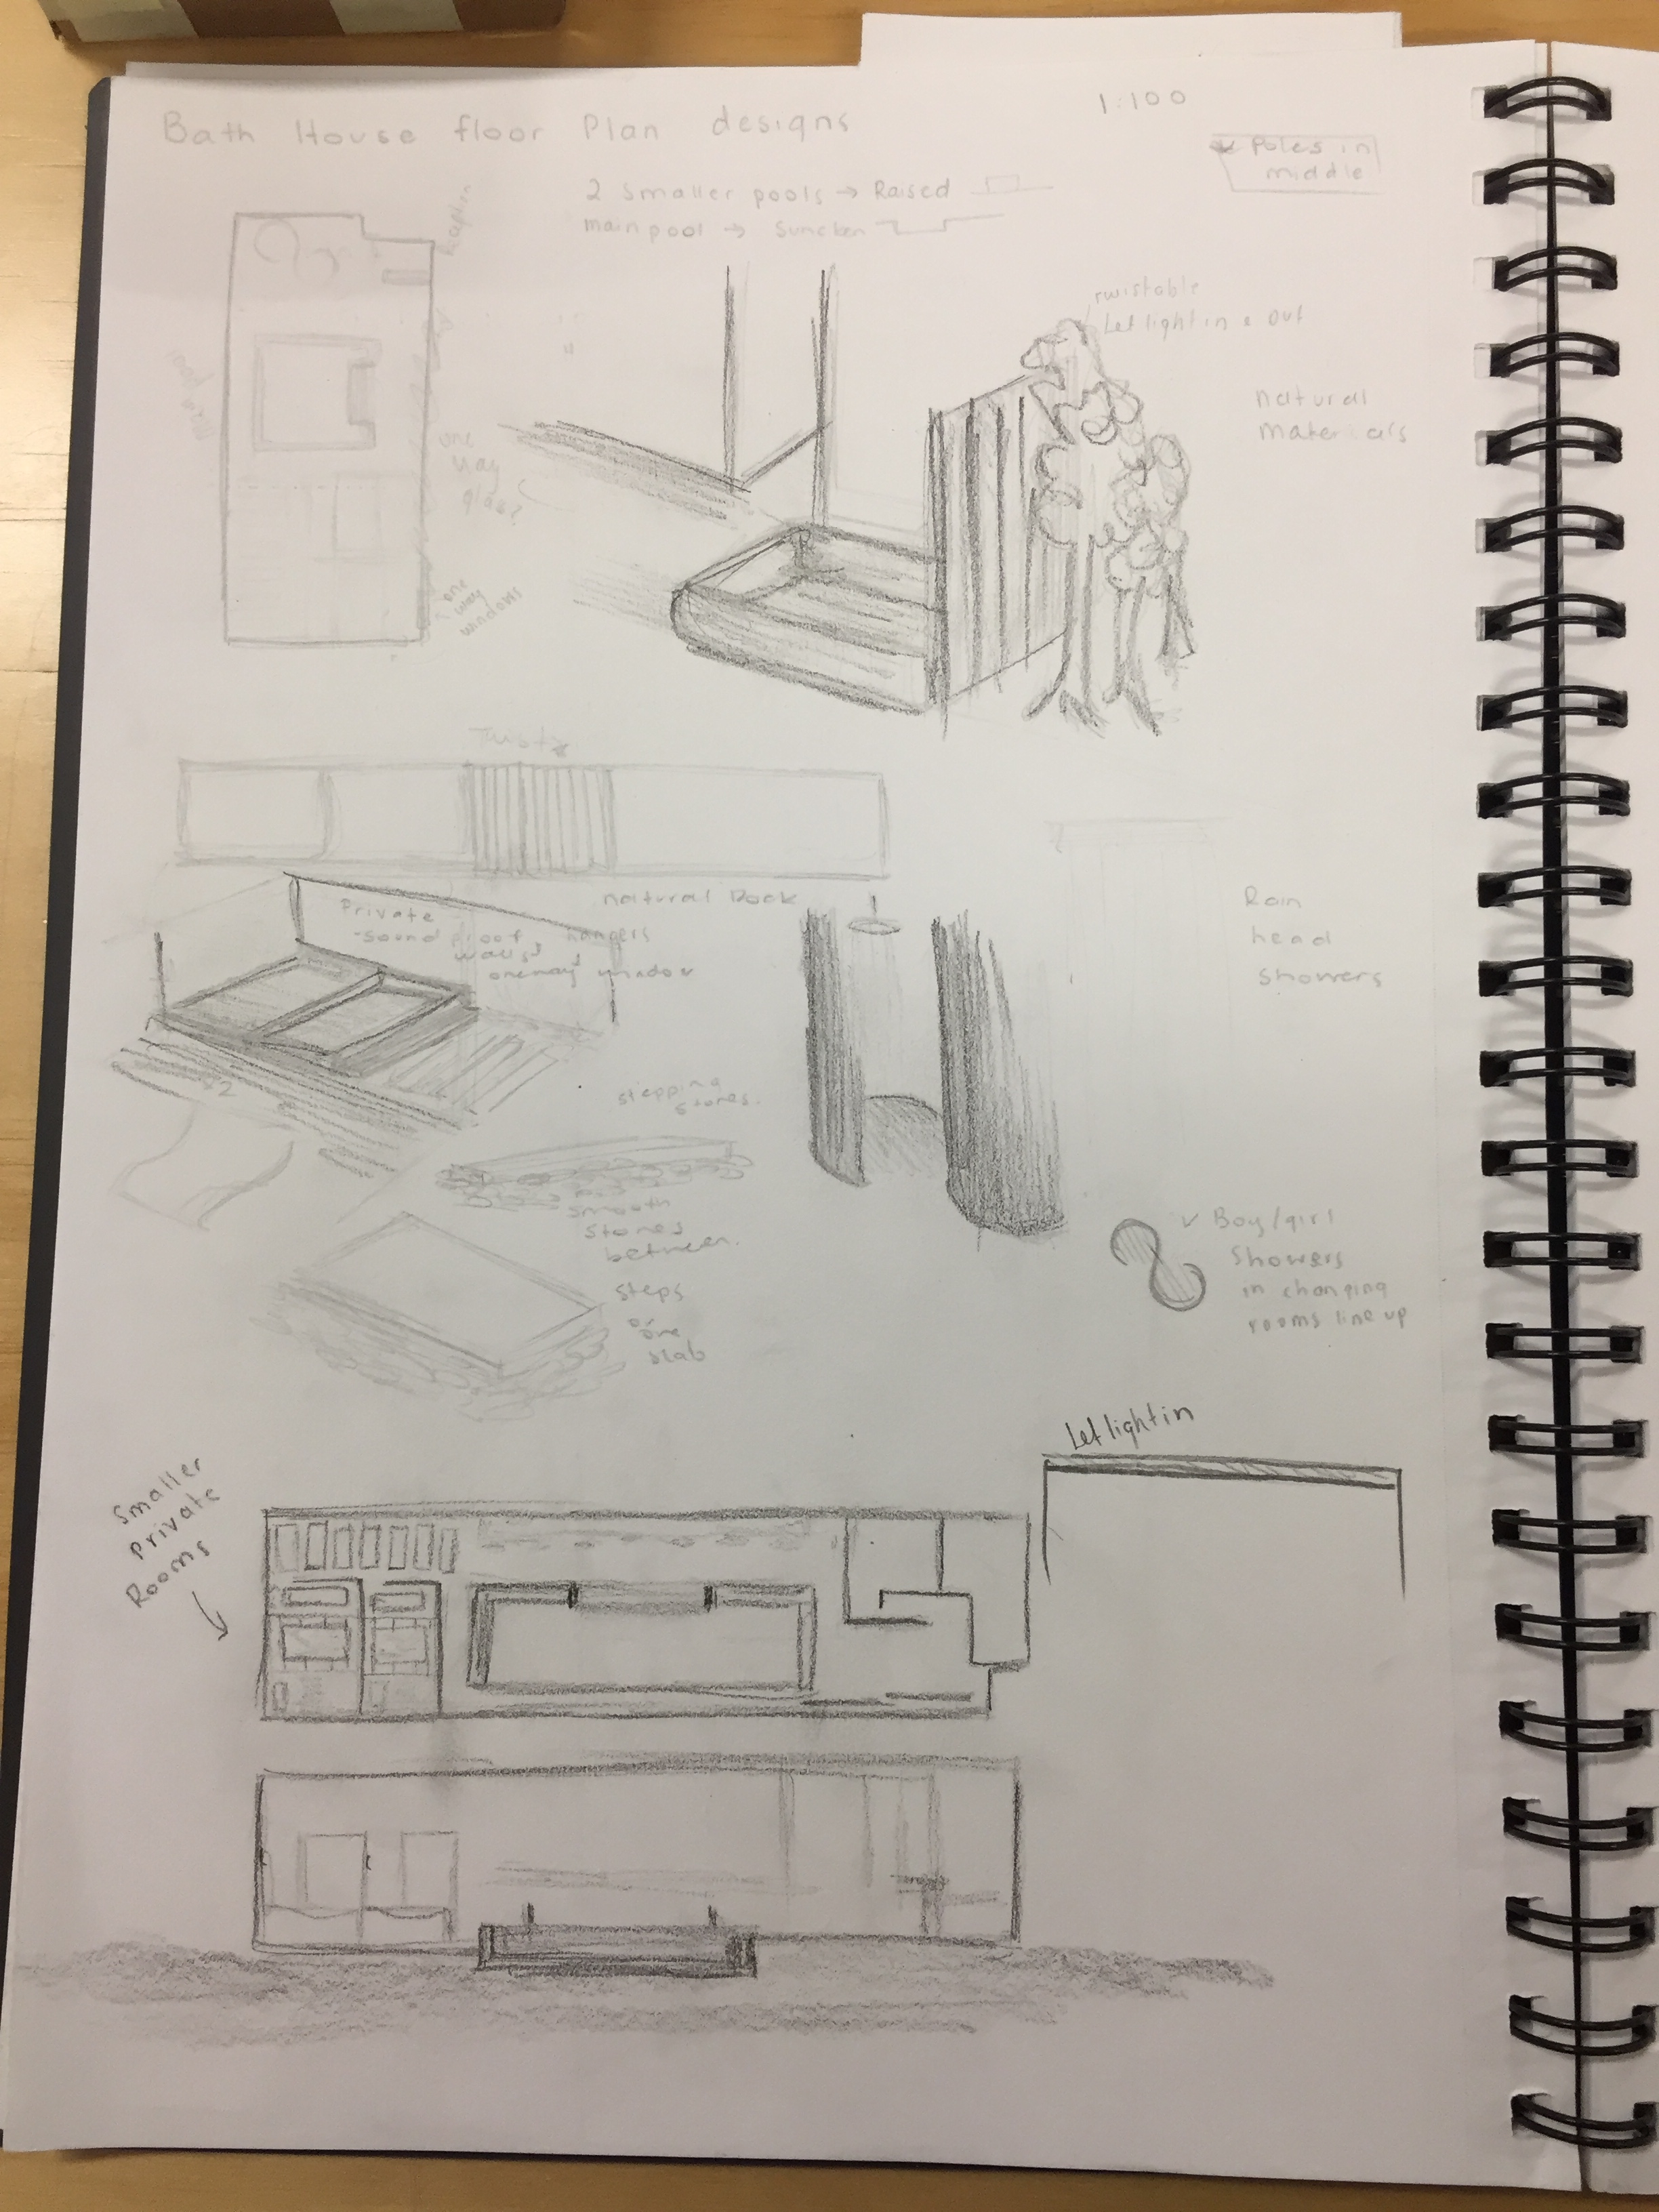
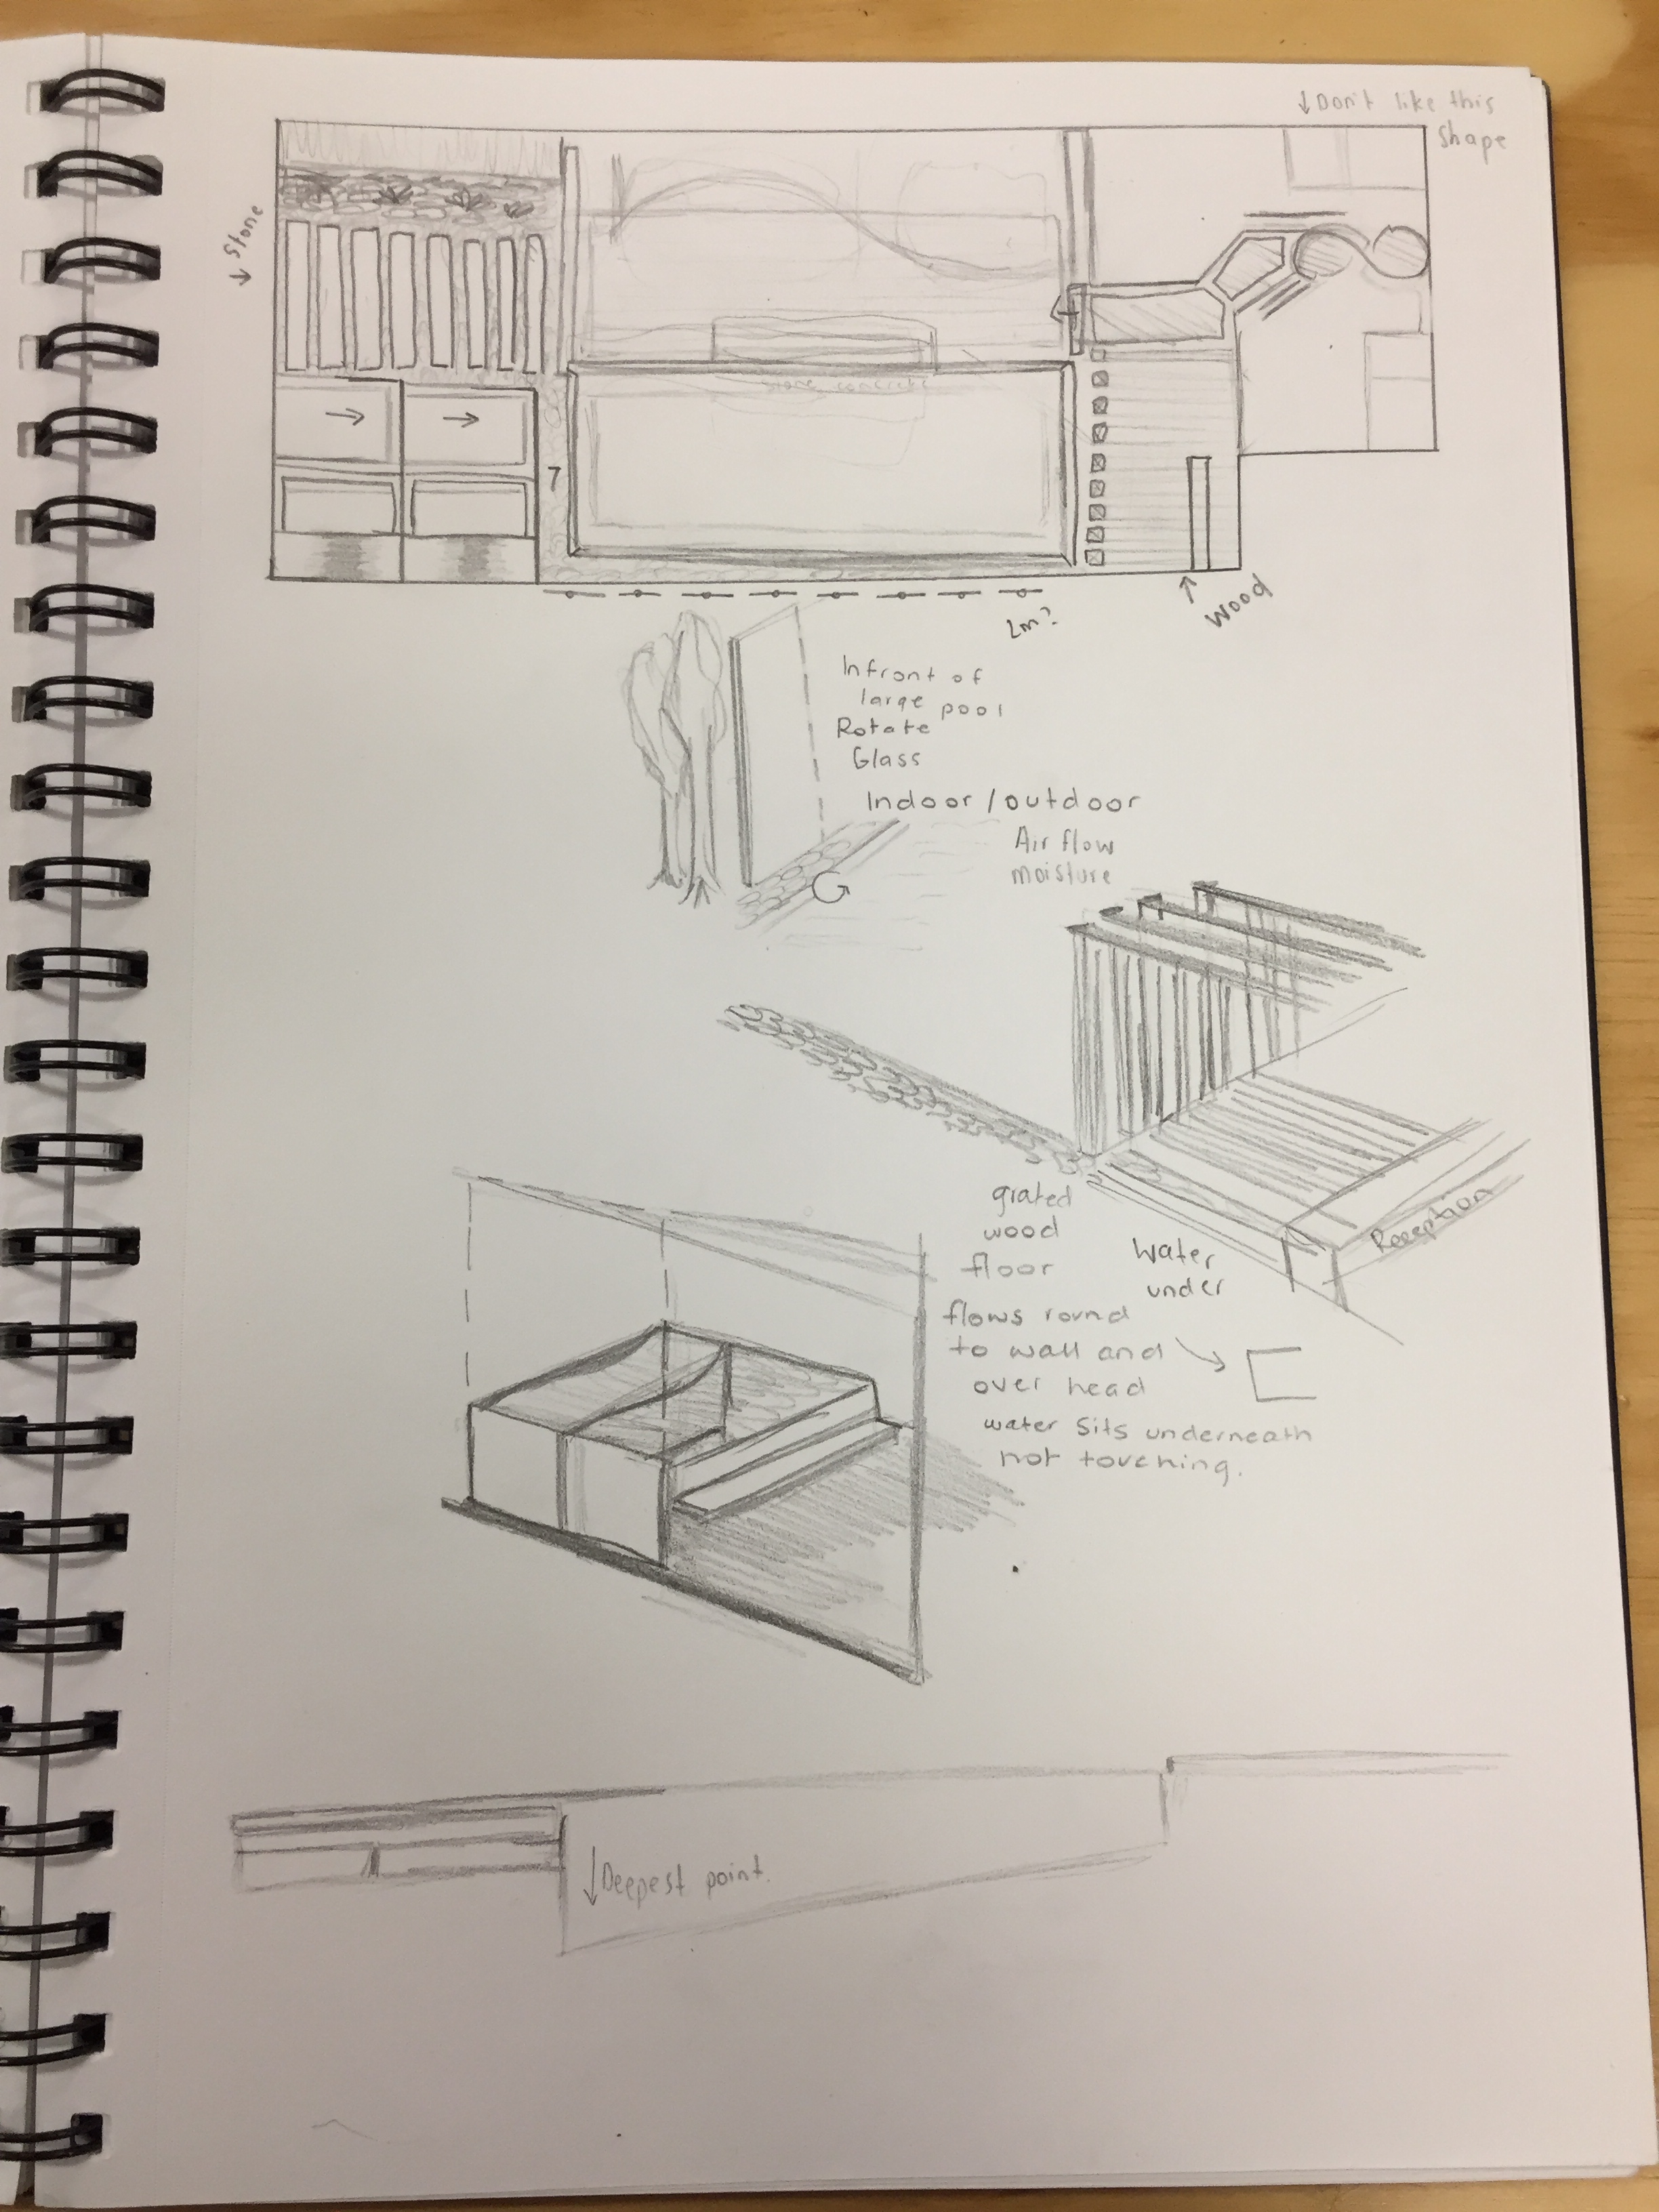
Sketches showing my initial design ideas. I plan to use a range of natural materials (stones and timbers) creating cohesion between the interior and exterior spaces.
I would like the entire wall facing the pocket forest to be turned into a large window. I am thinking that some of the window panes could possibly be able to rotate opening the space up to the outdoors as well as letting fresh air into the space.
The main pool will be sloped creating different depths throughout the pool while the private pools will be the same depth in all areas. The private pools will also have a lounger submerged in the water close to the window.
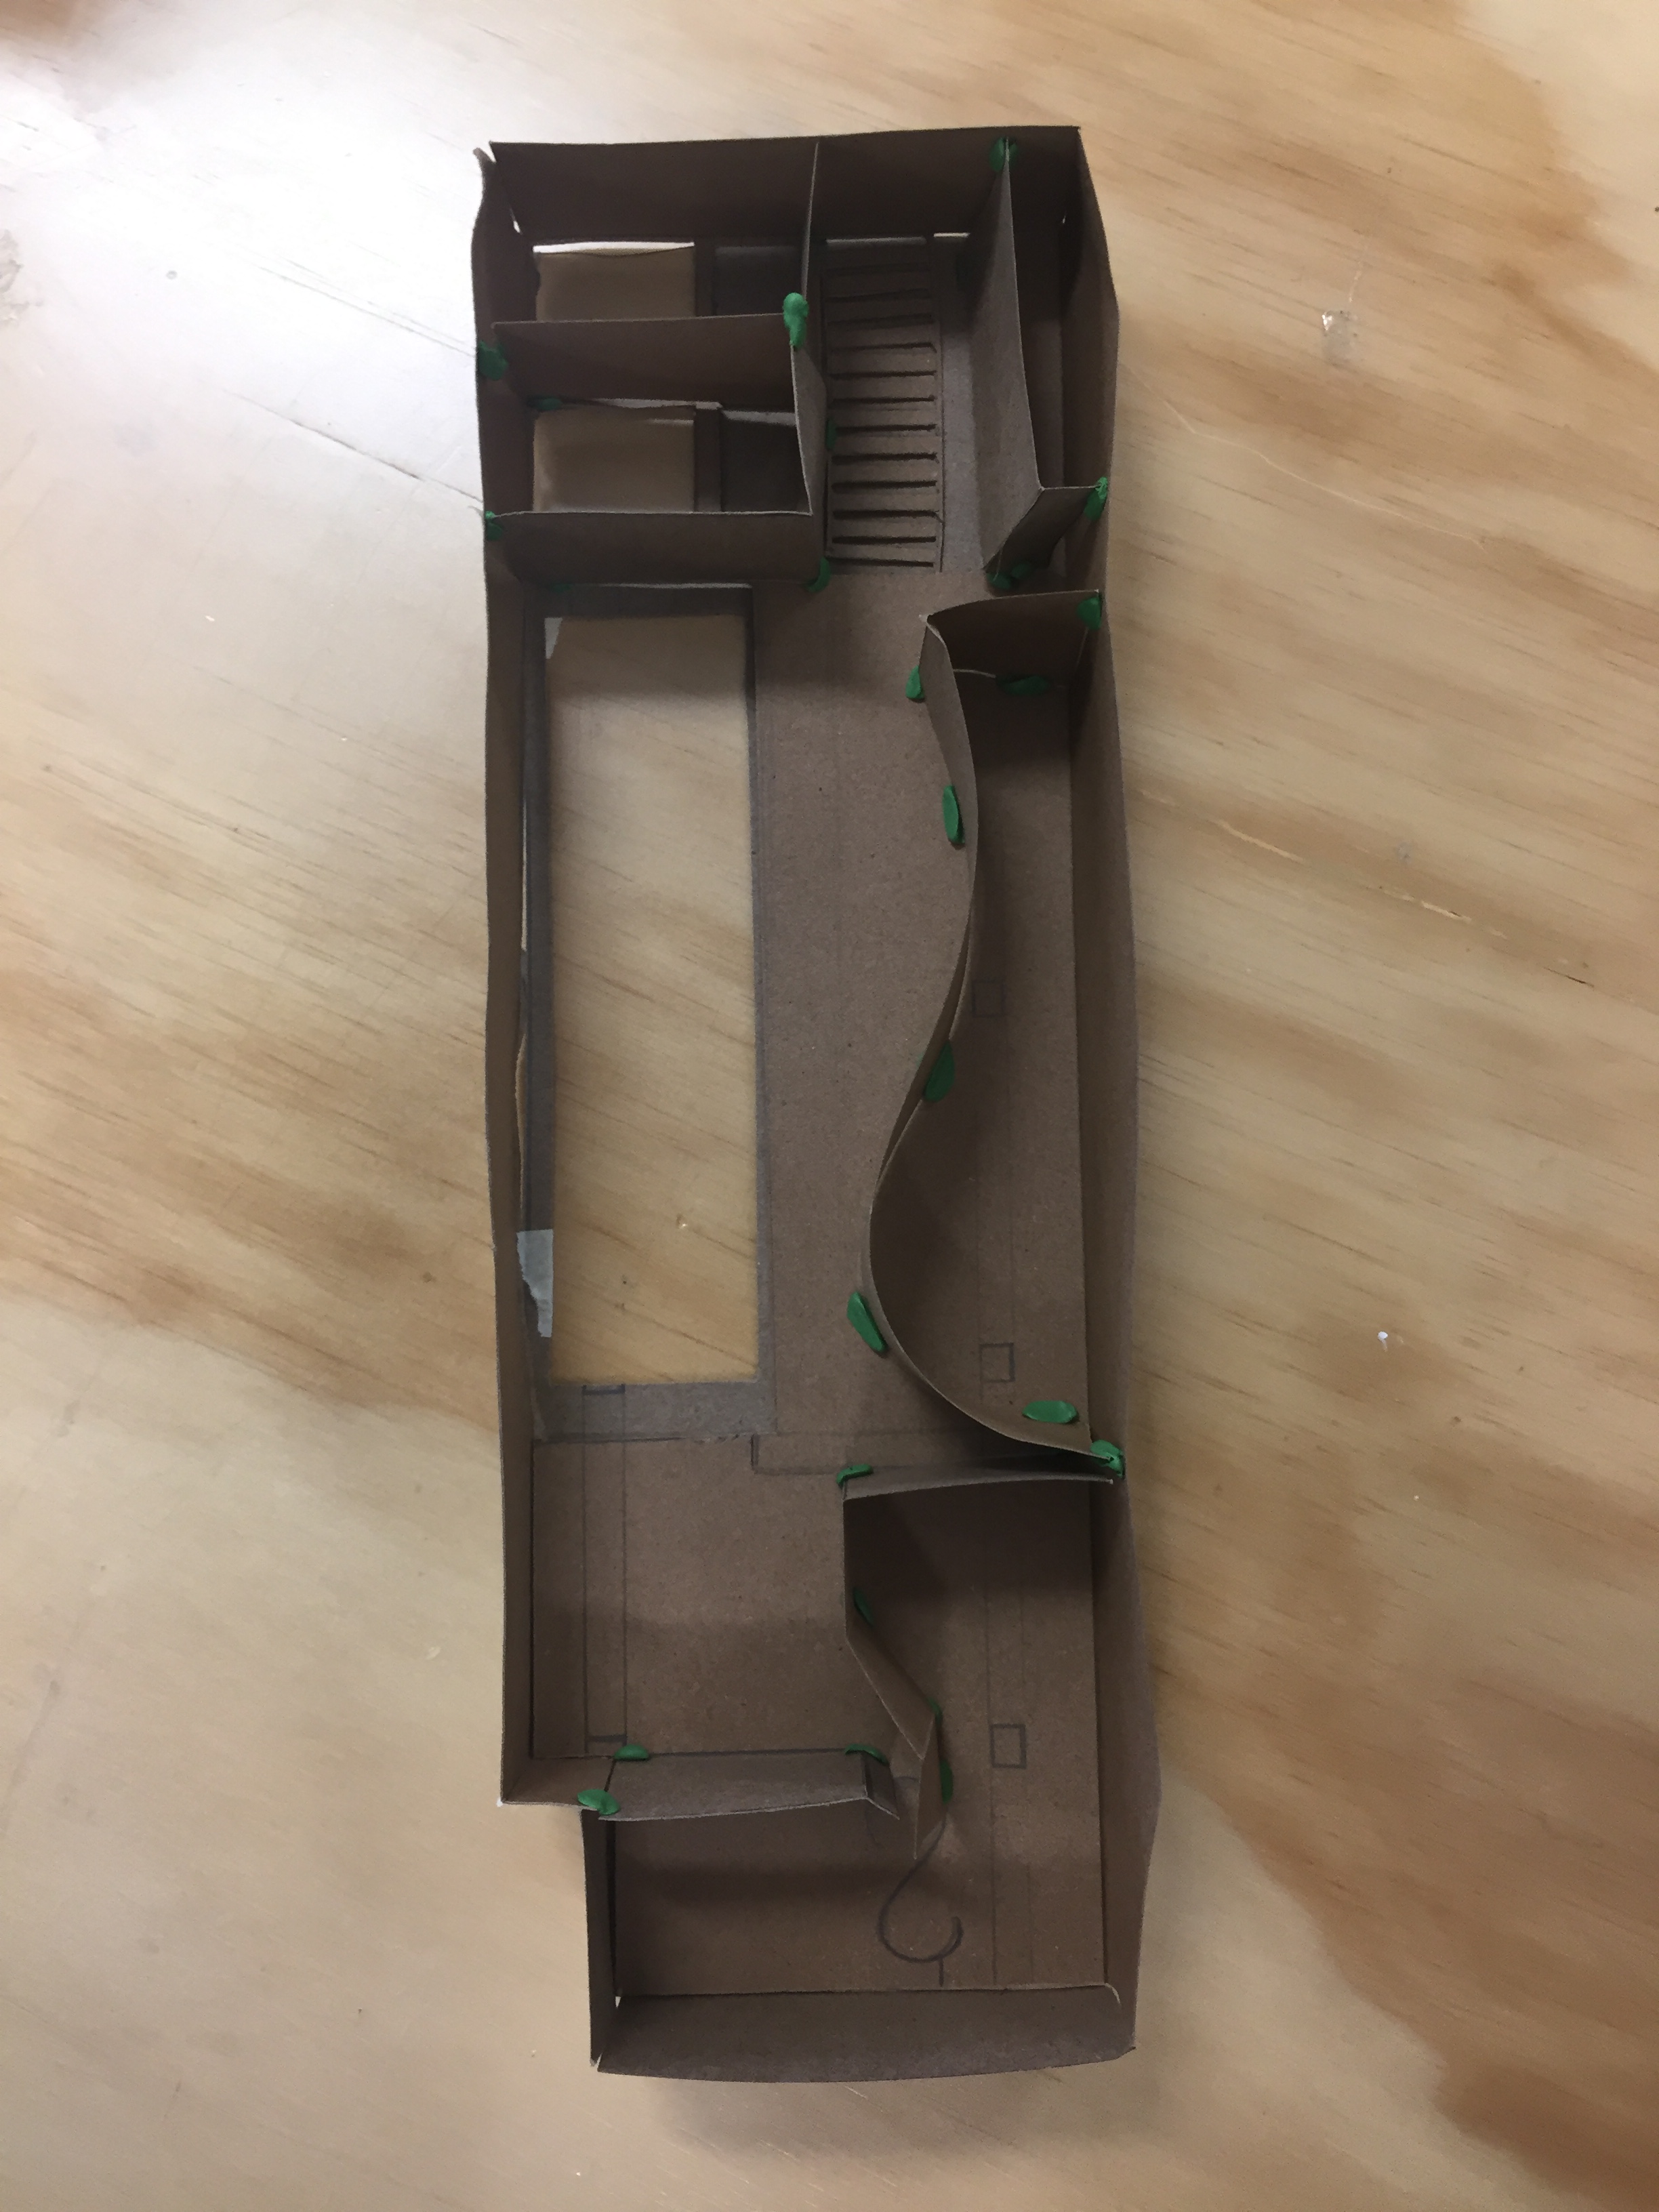
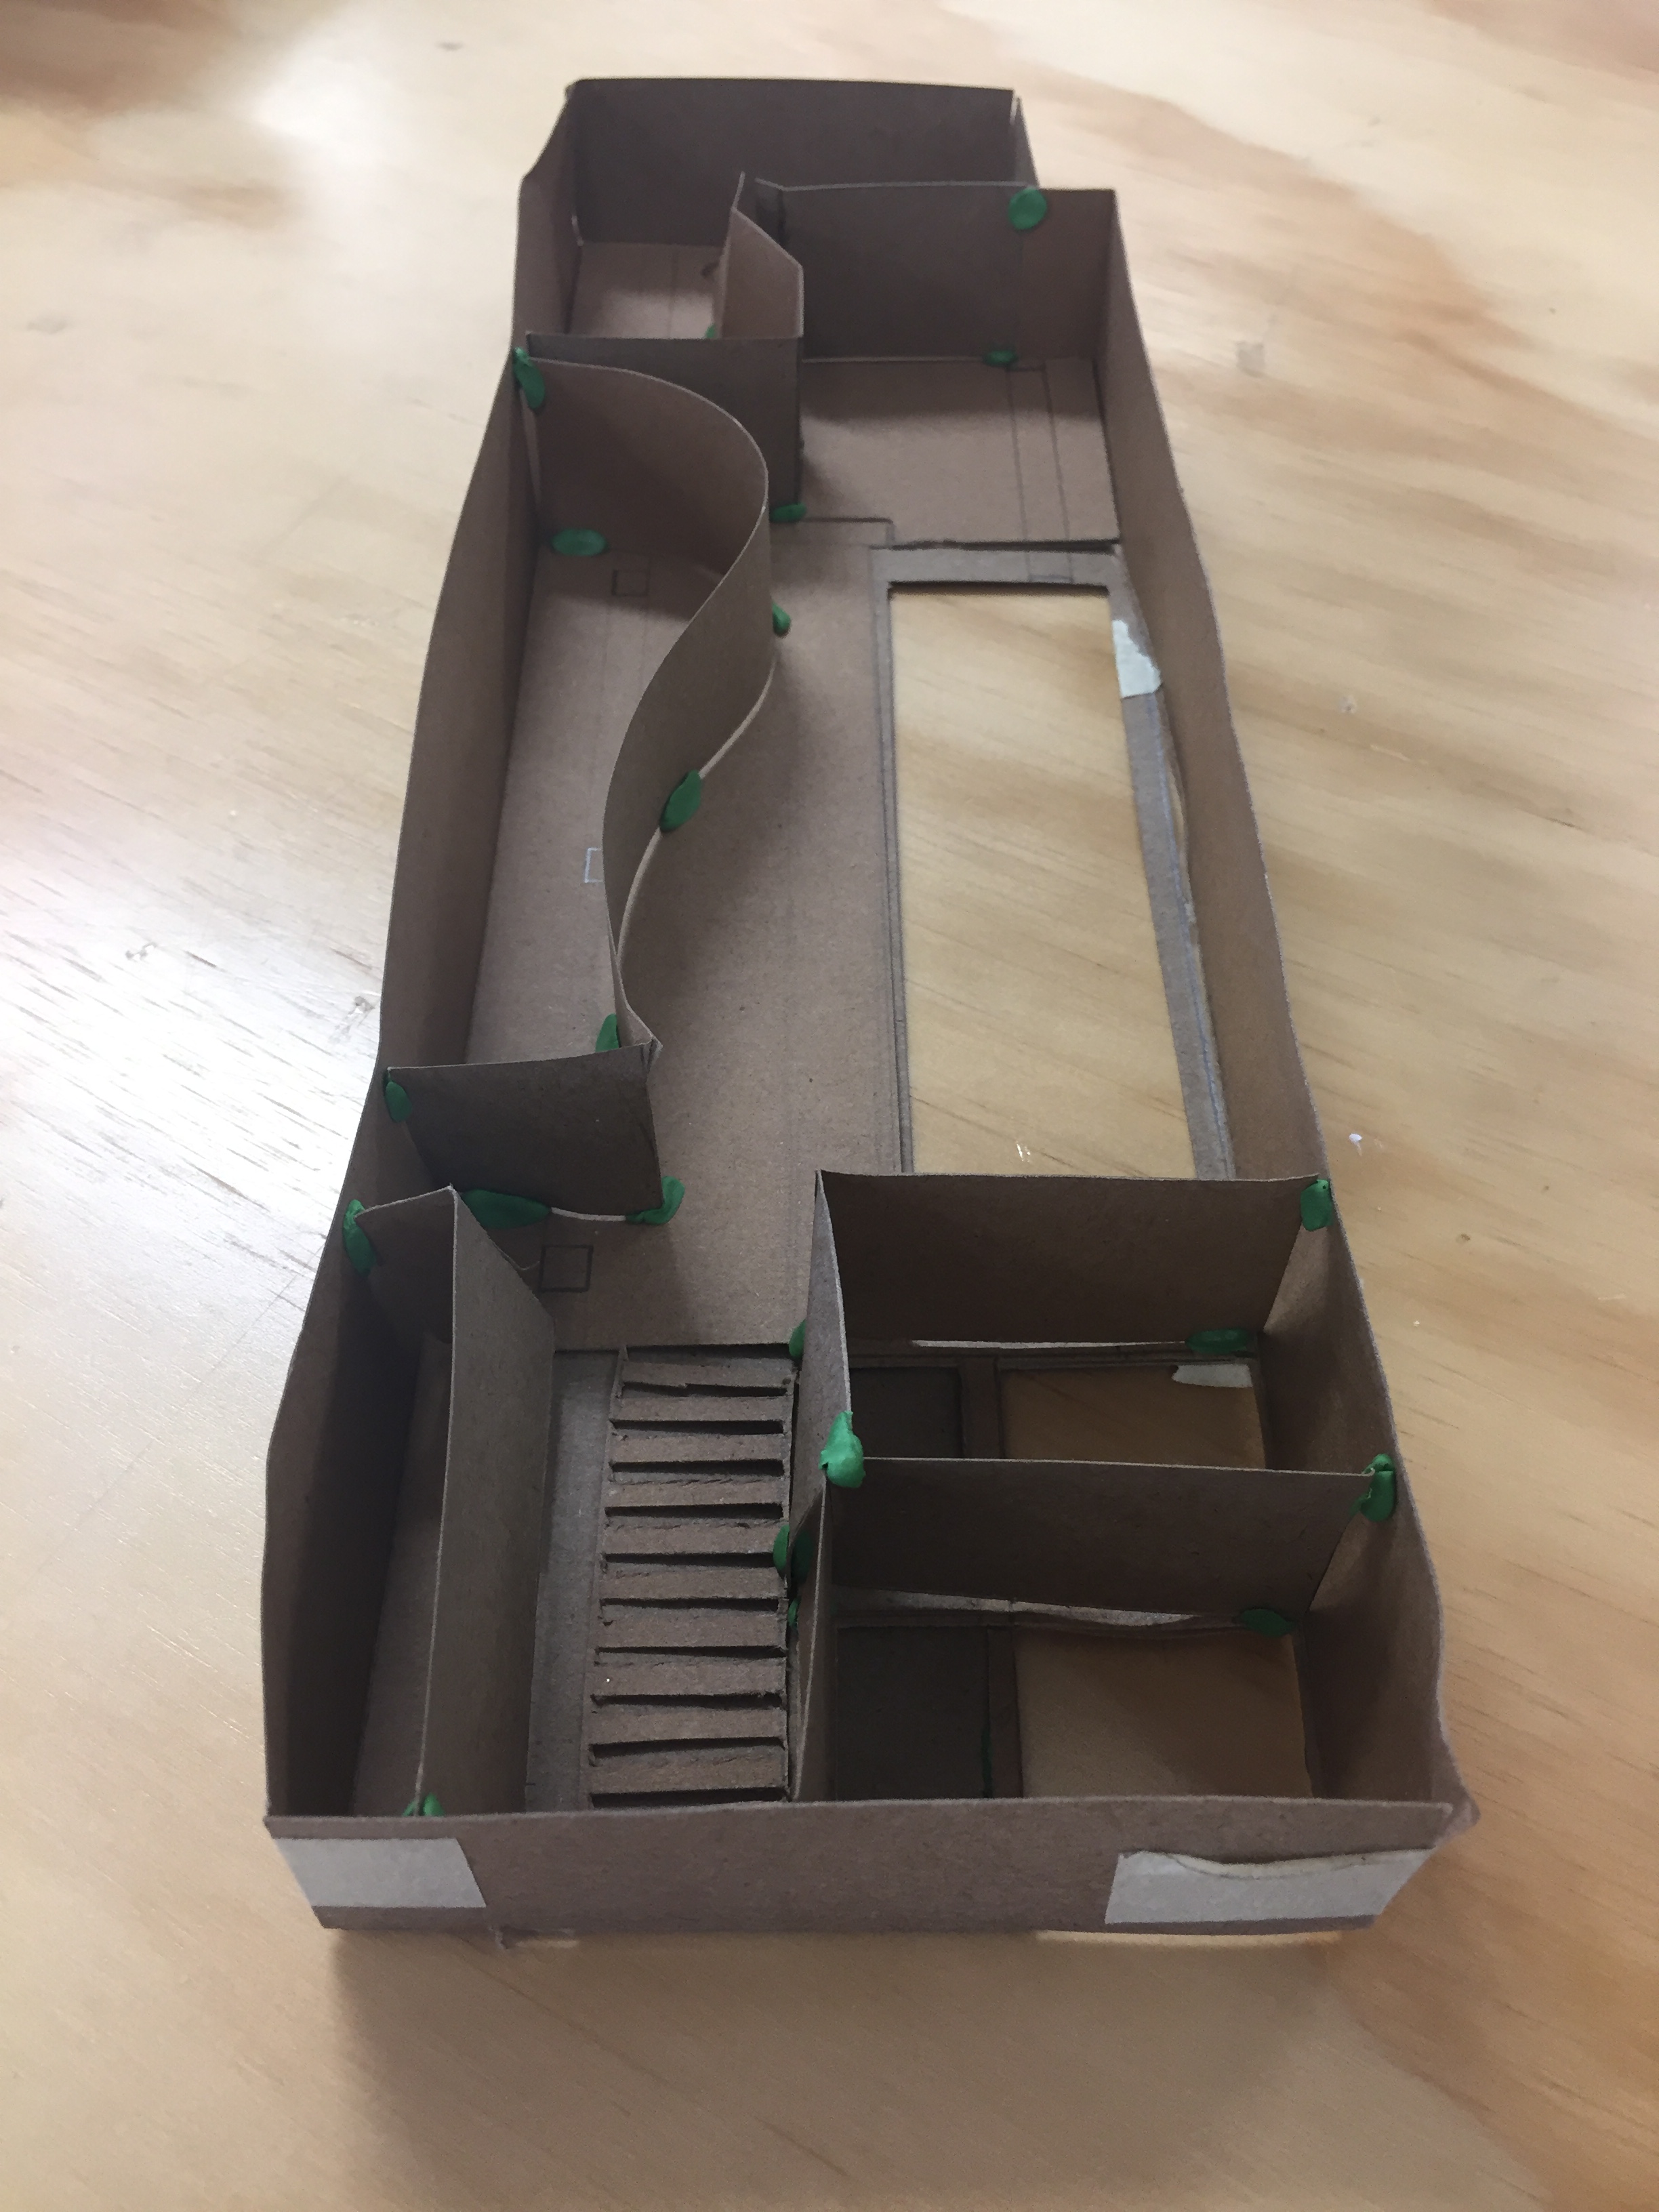
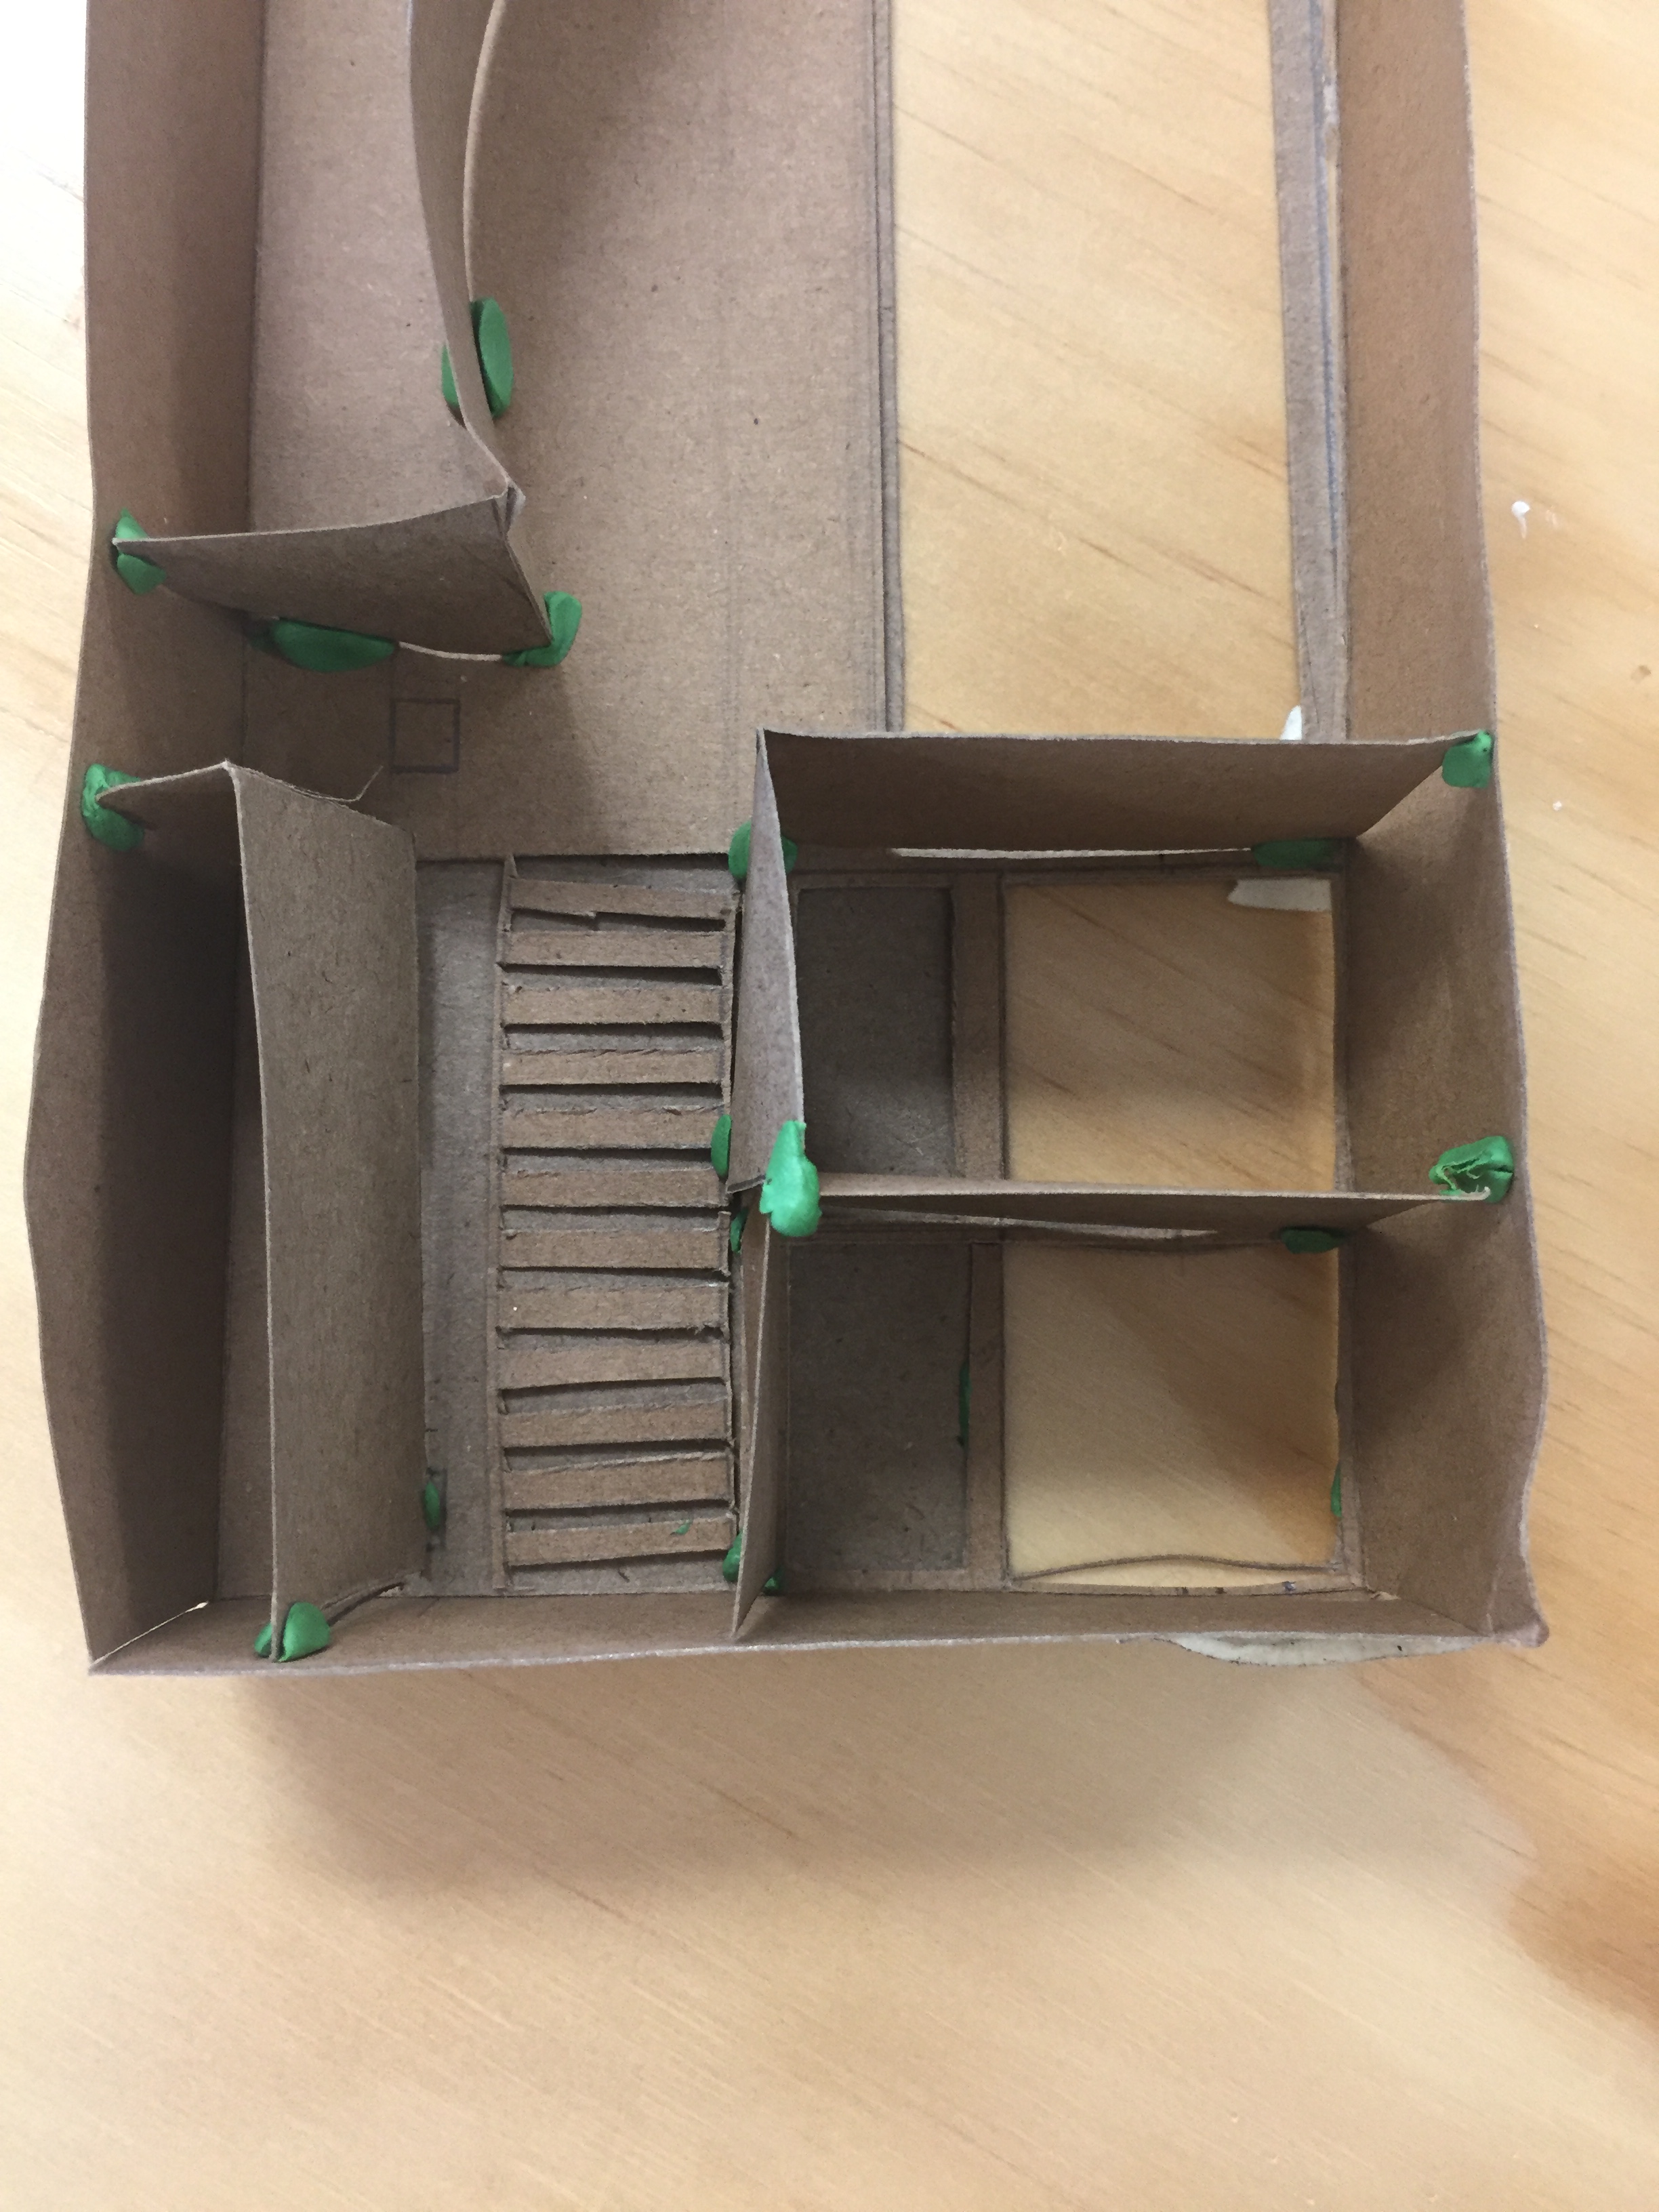
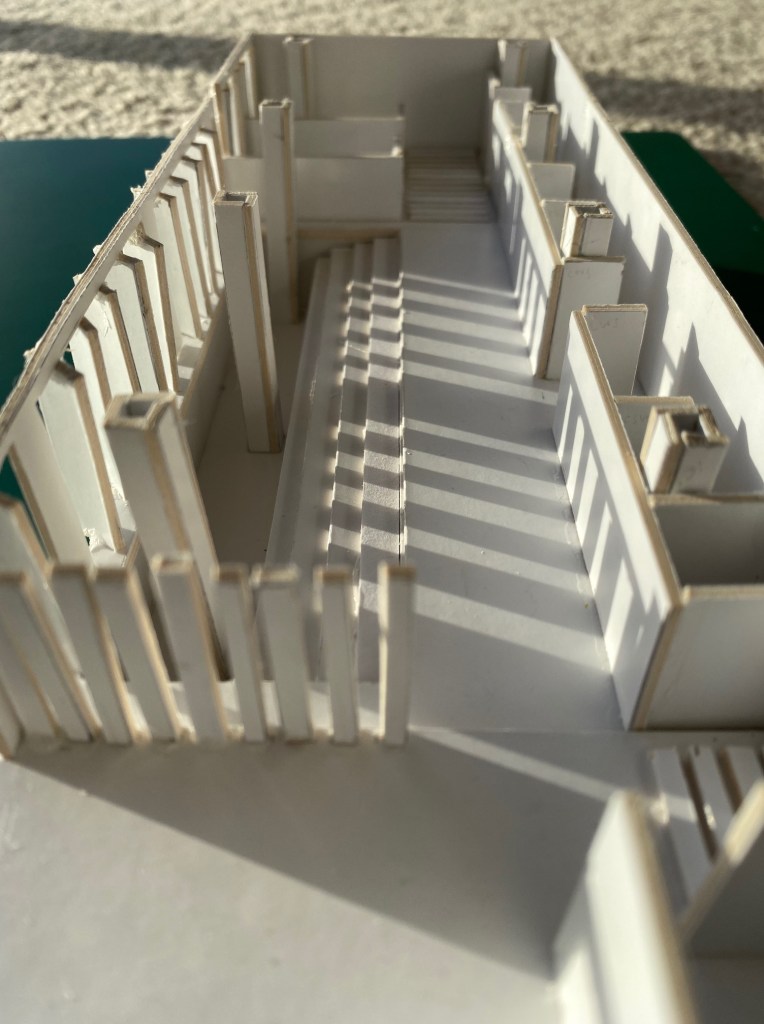
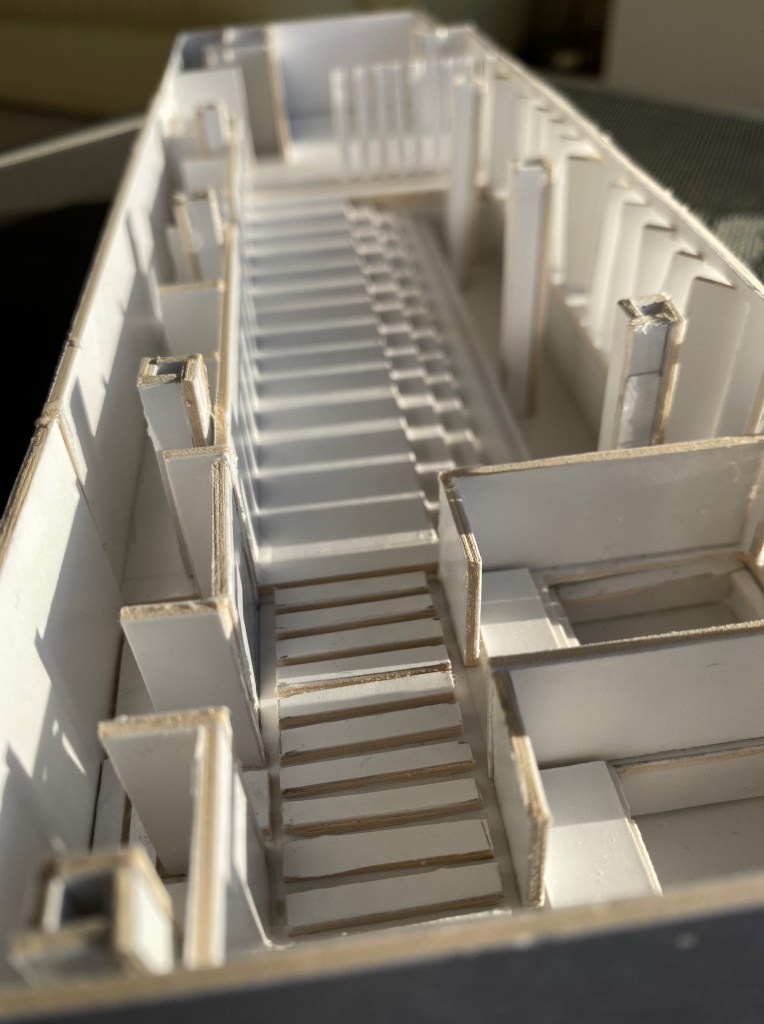
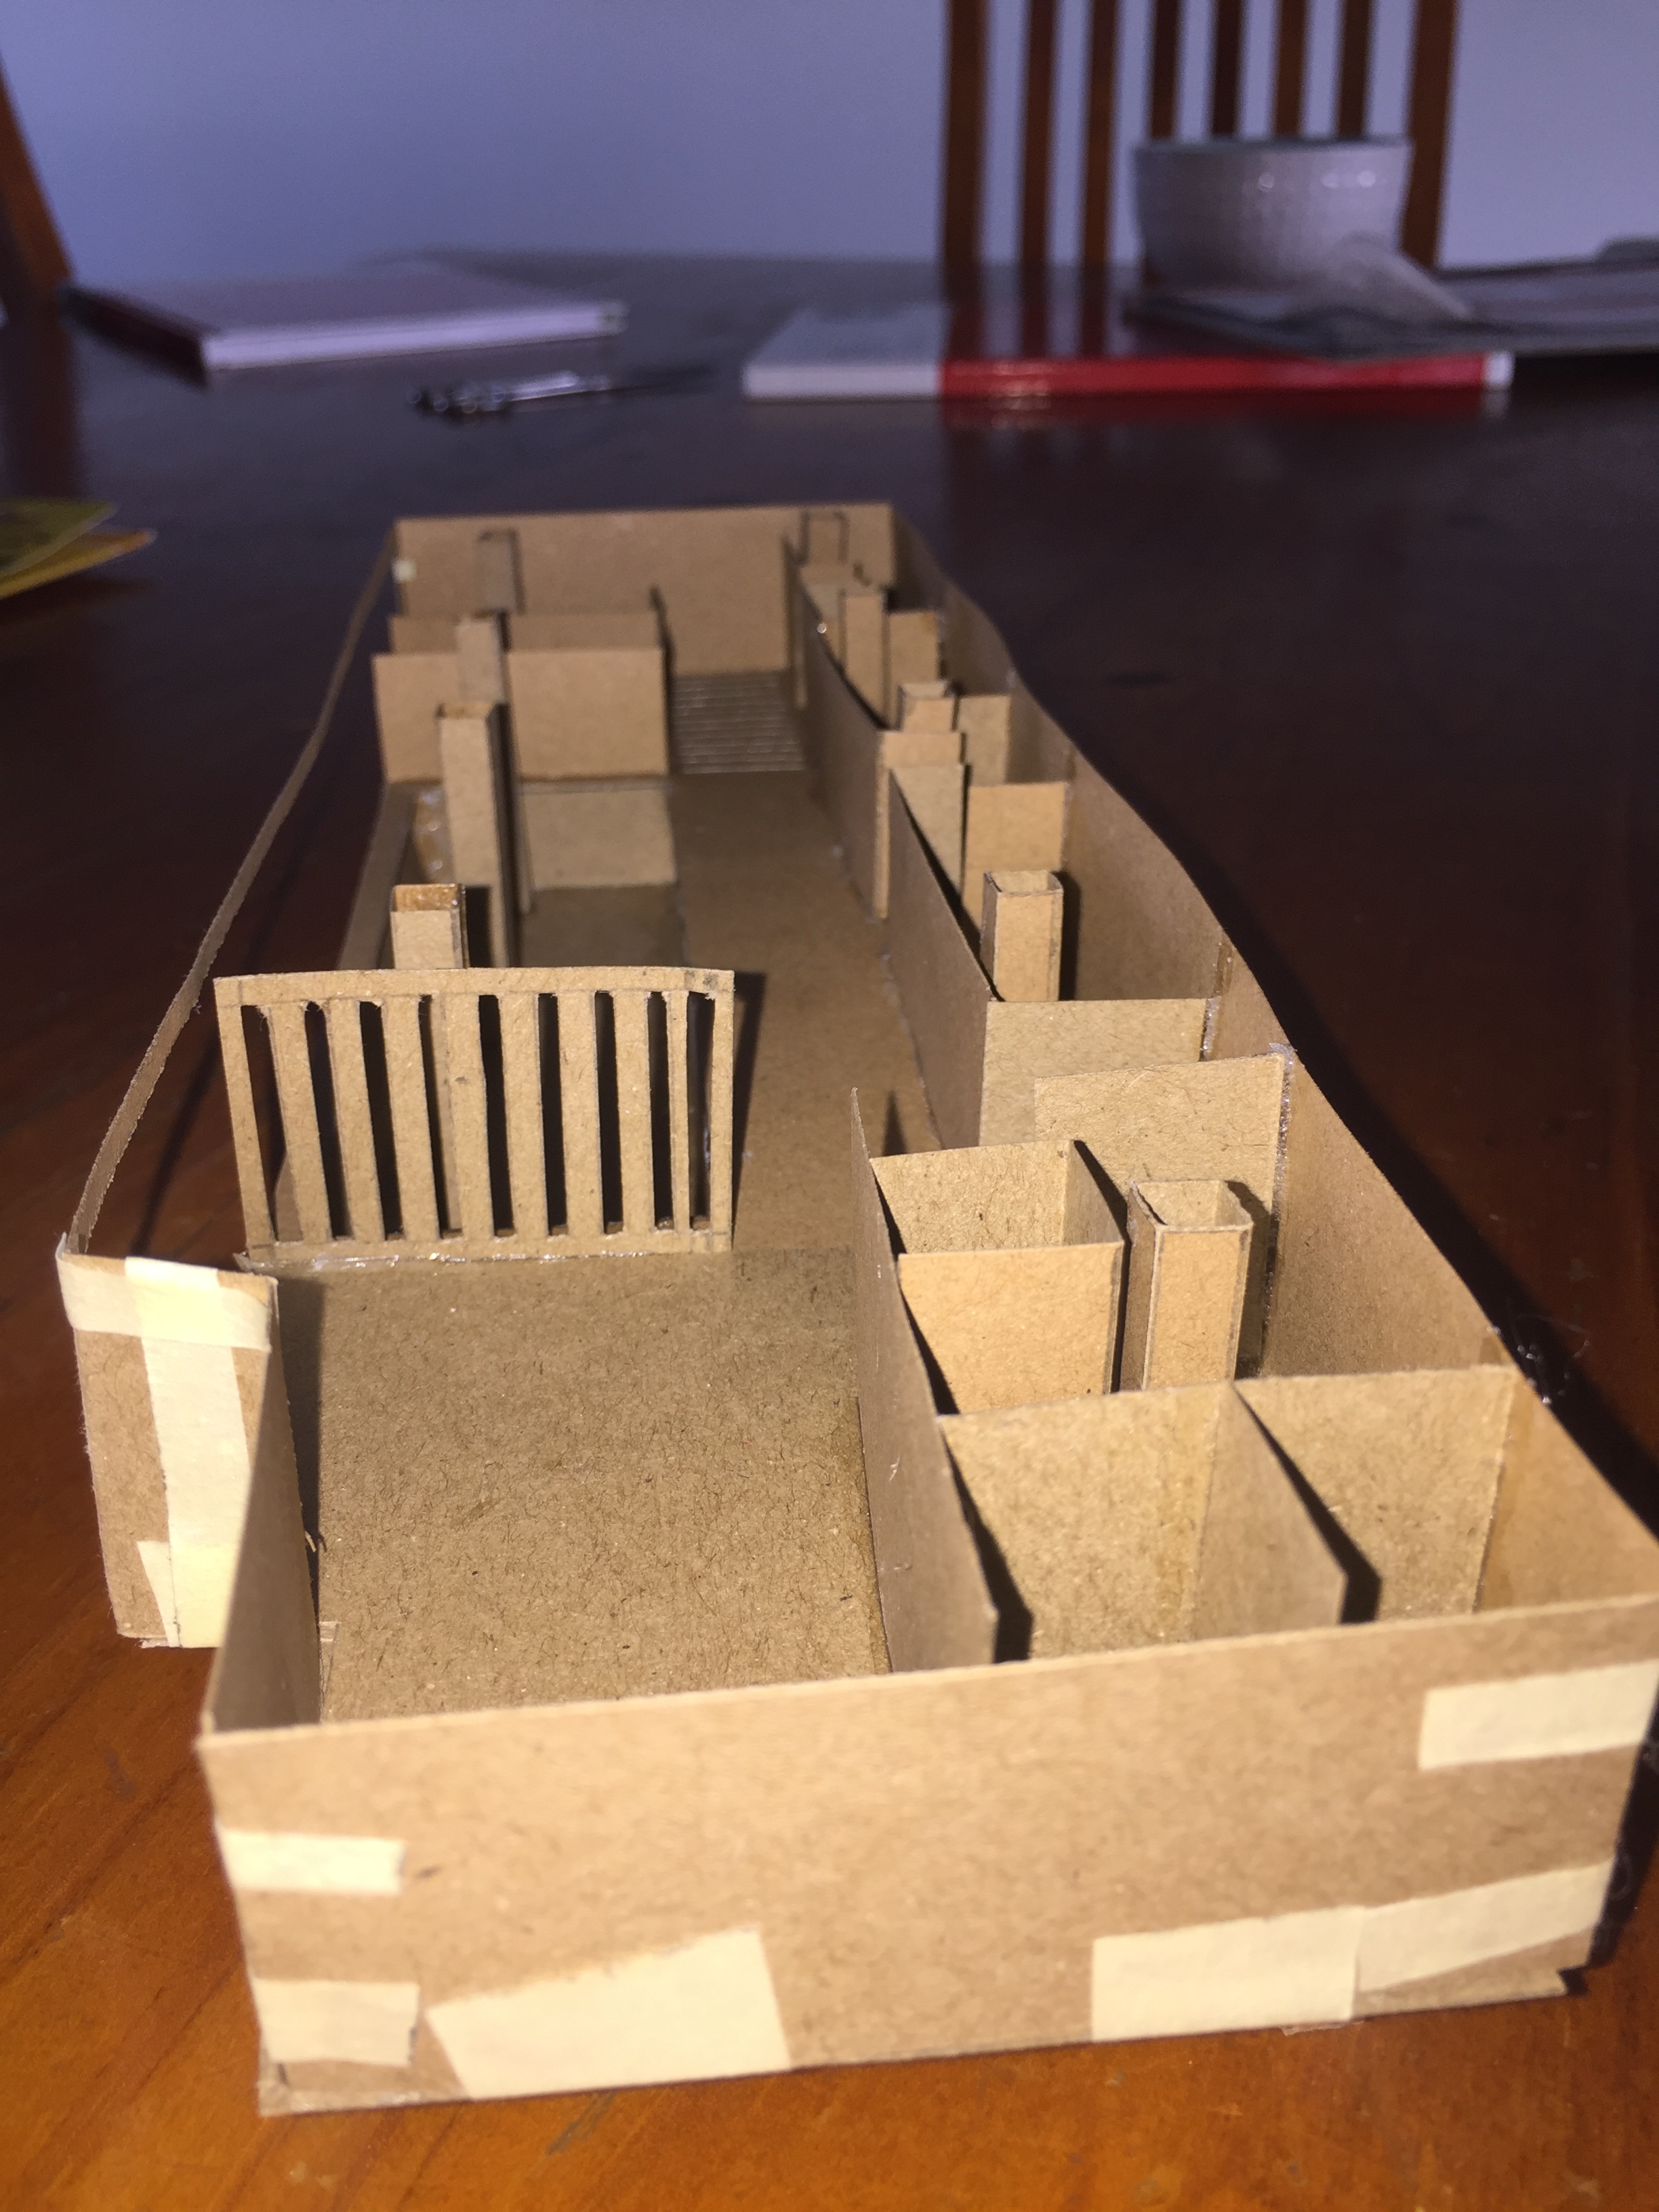
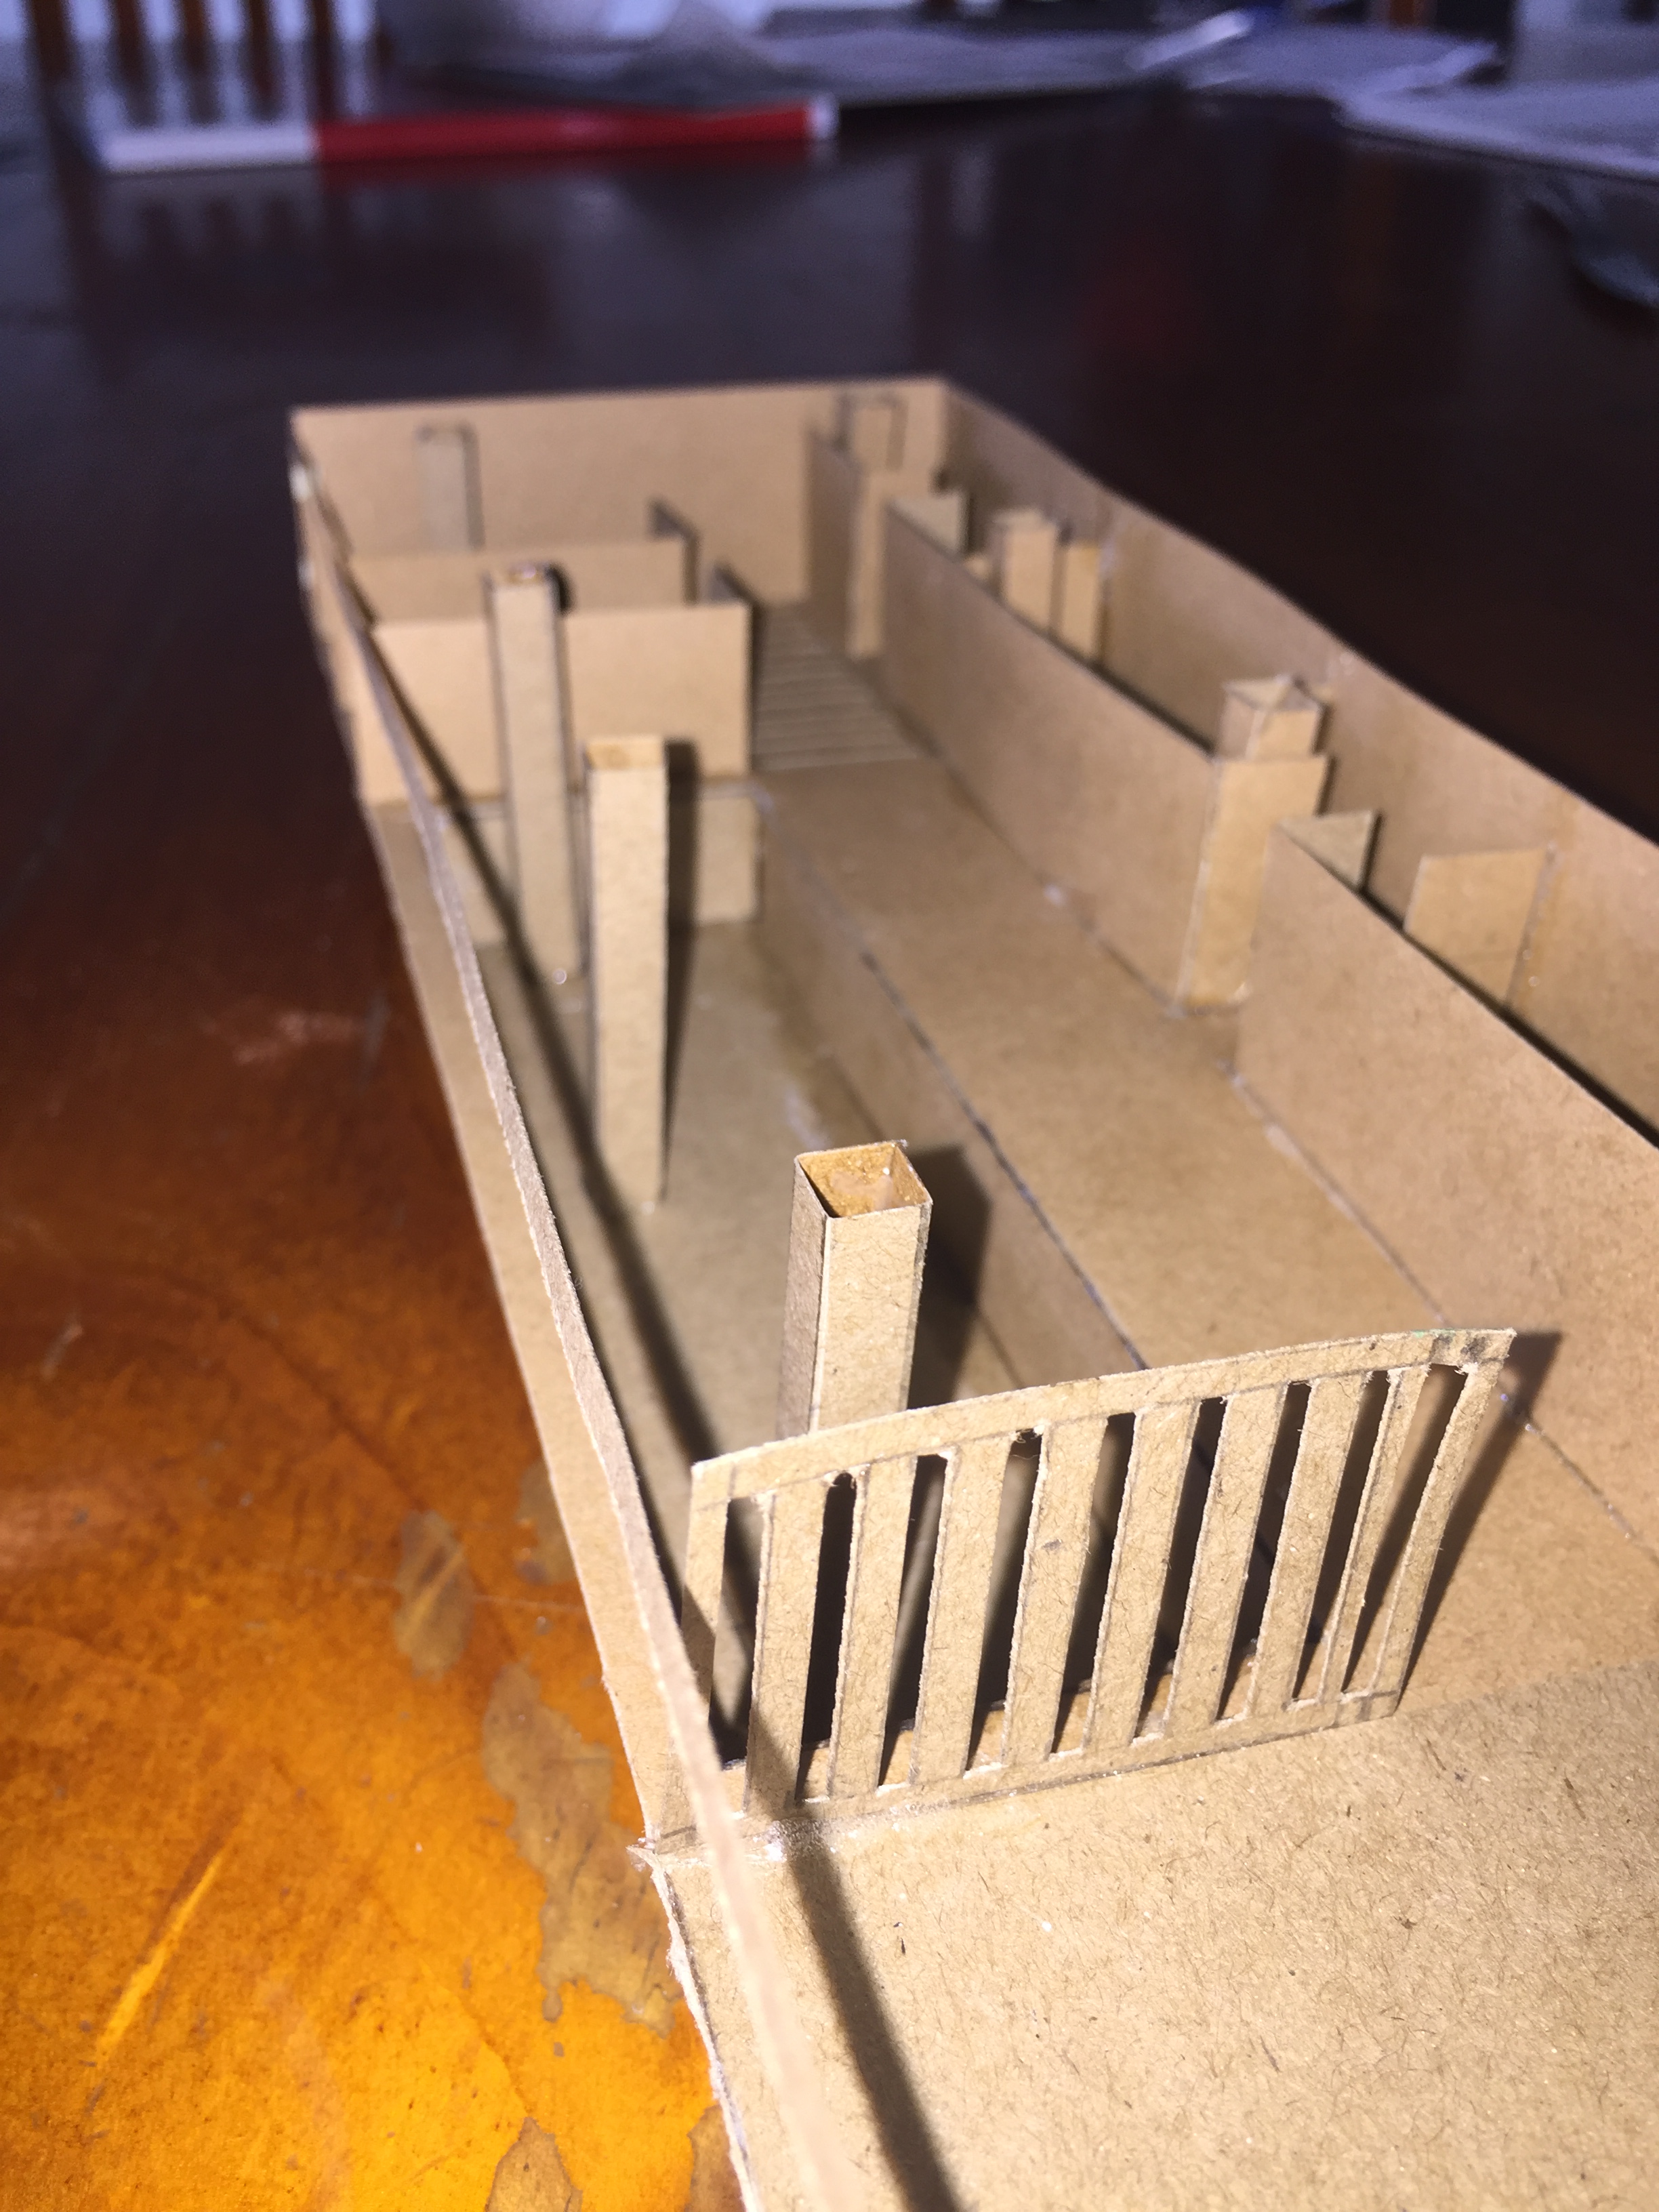
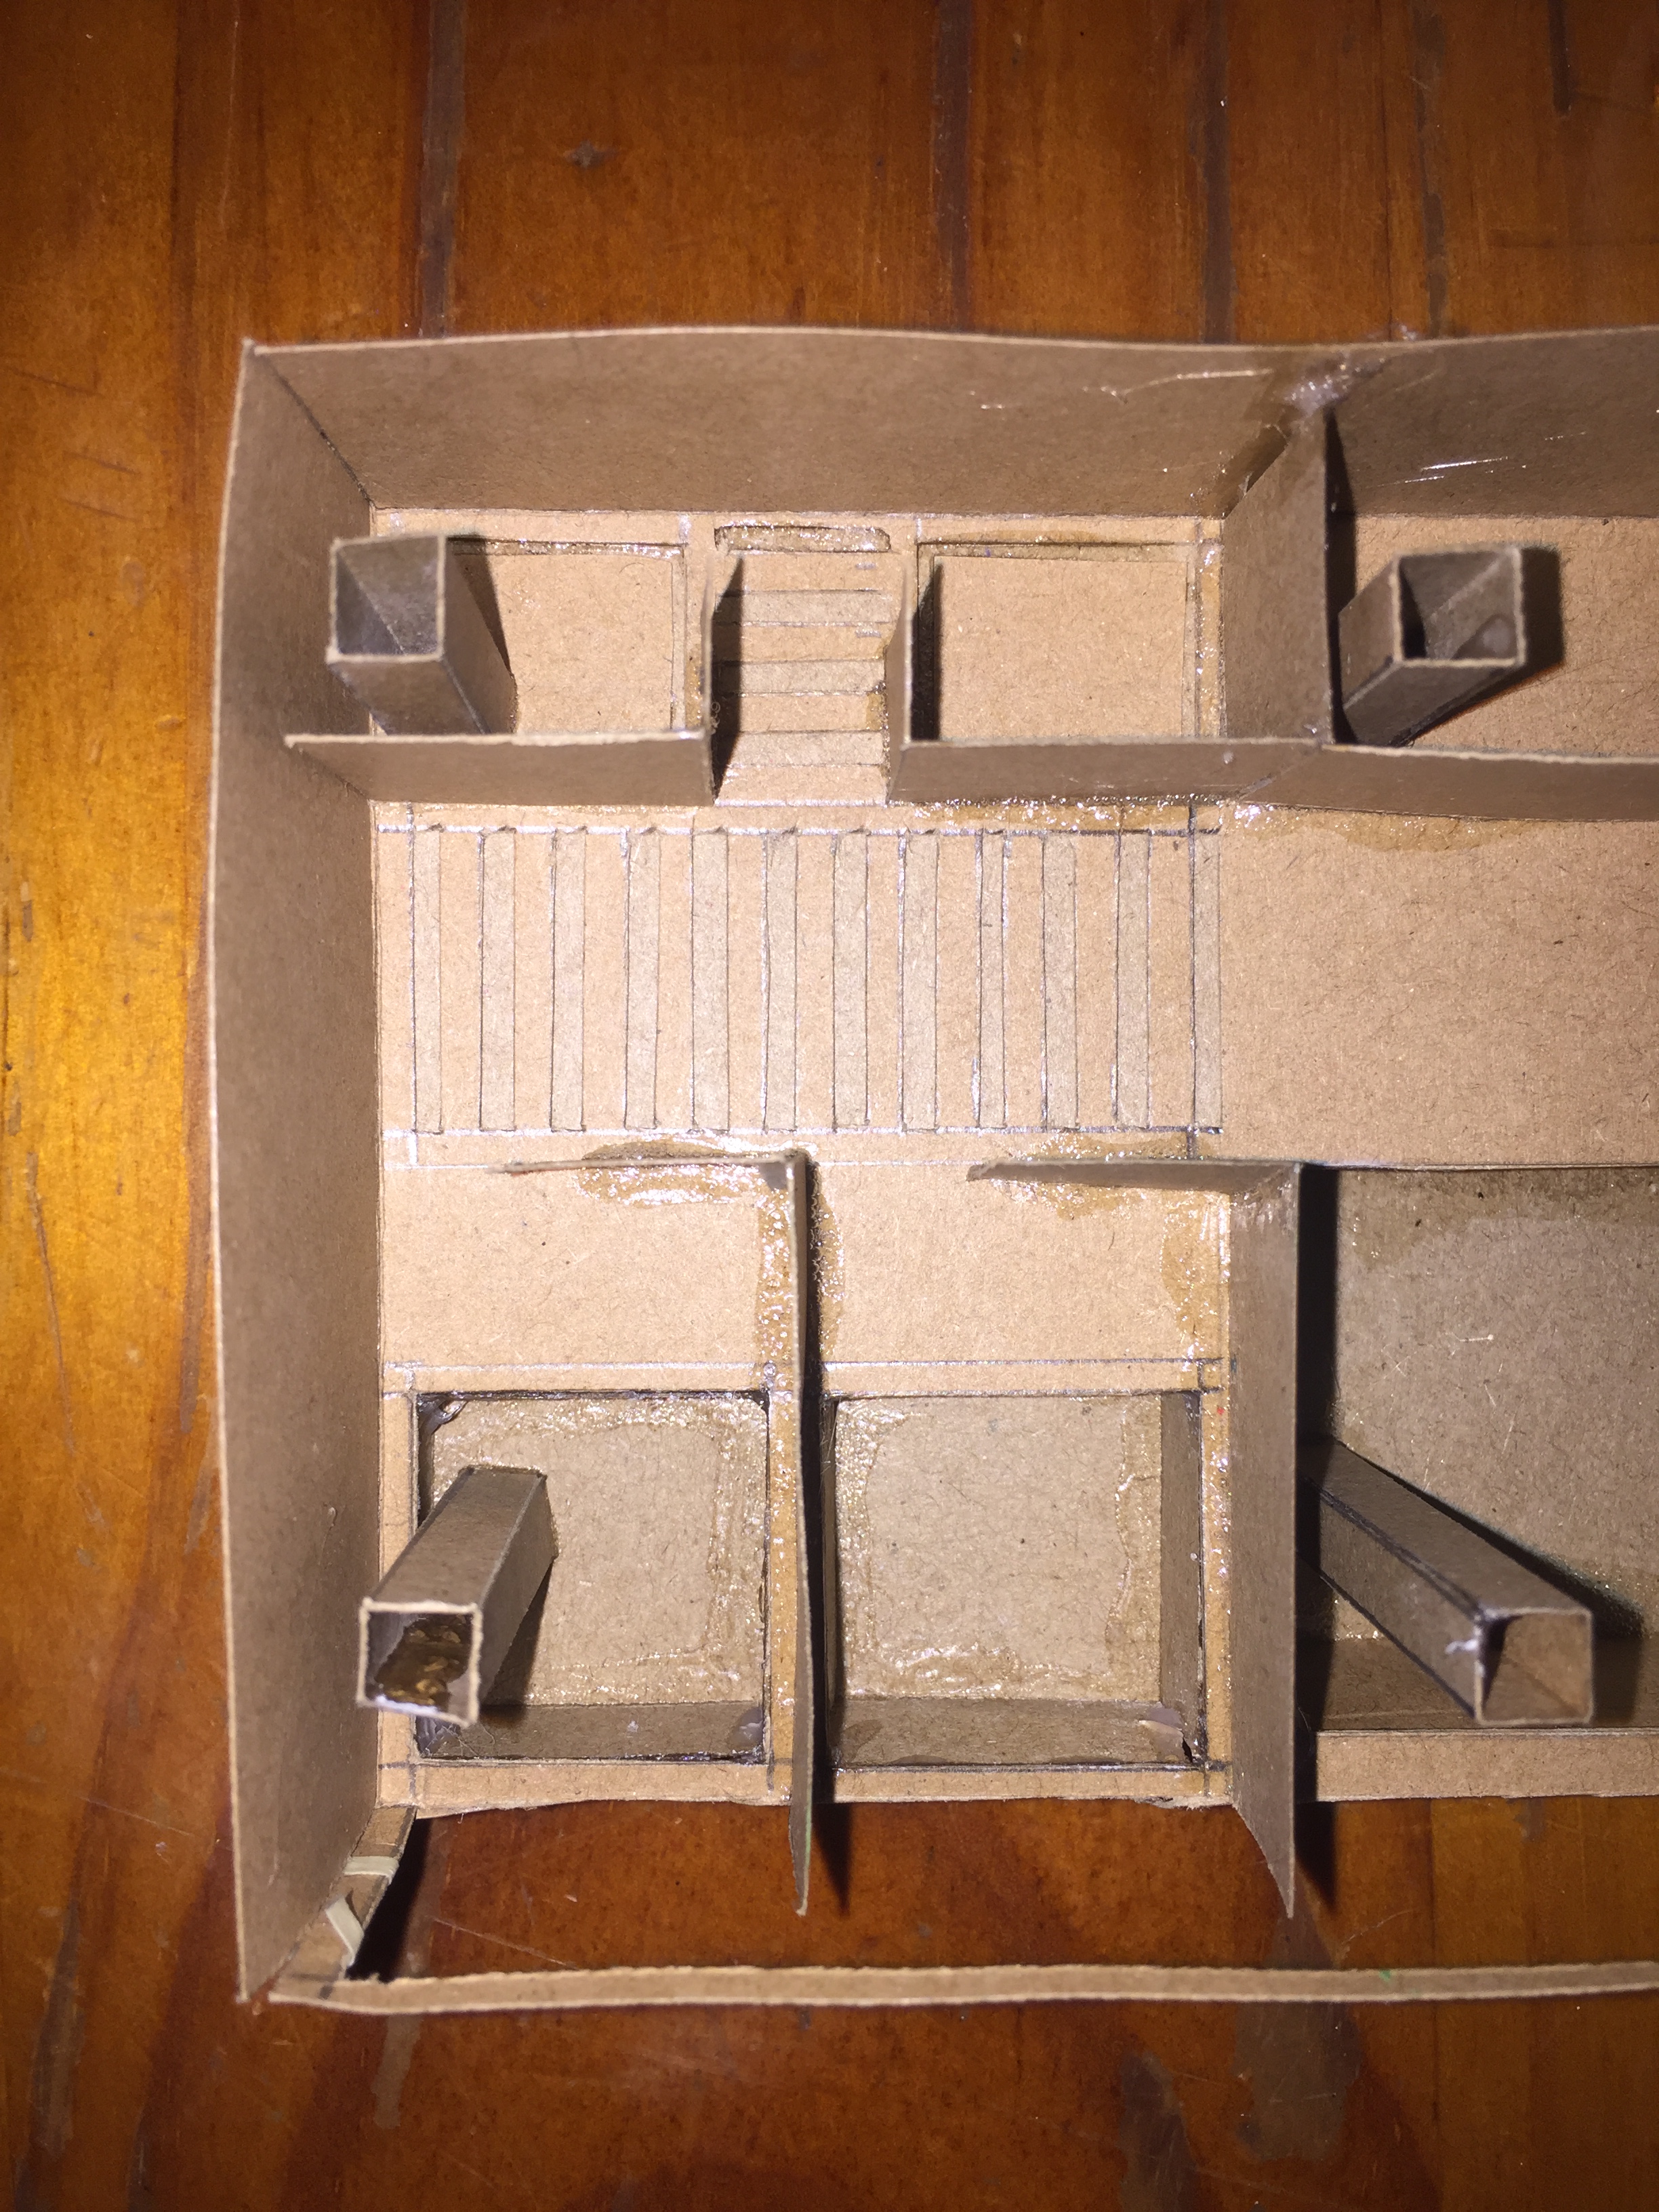
Above is my first draft model. I think it was successful due to the fact that I now know what I want to change. I’m definitely going to change the way I have laid out the changing rooms/bathrooms. I also think I am going to remove the large curved walls and change it in a way that creates a more open space. I do like how all 3 pool are located directly behind the window allowing bathers to have a perfect view of the forest outdoors. I plan to start working on a second draft showing the changes I have made.
Week 5: Model + Materials
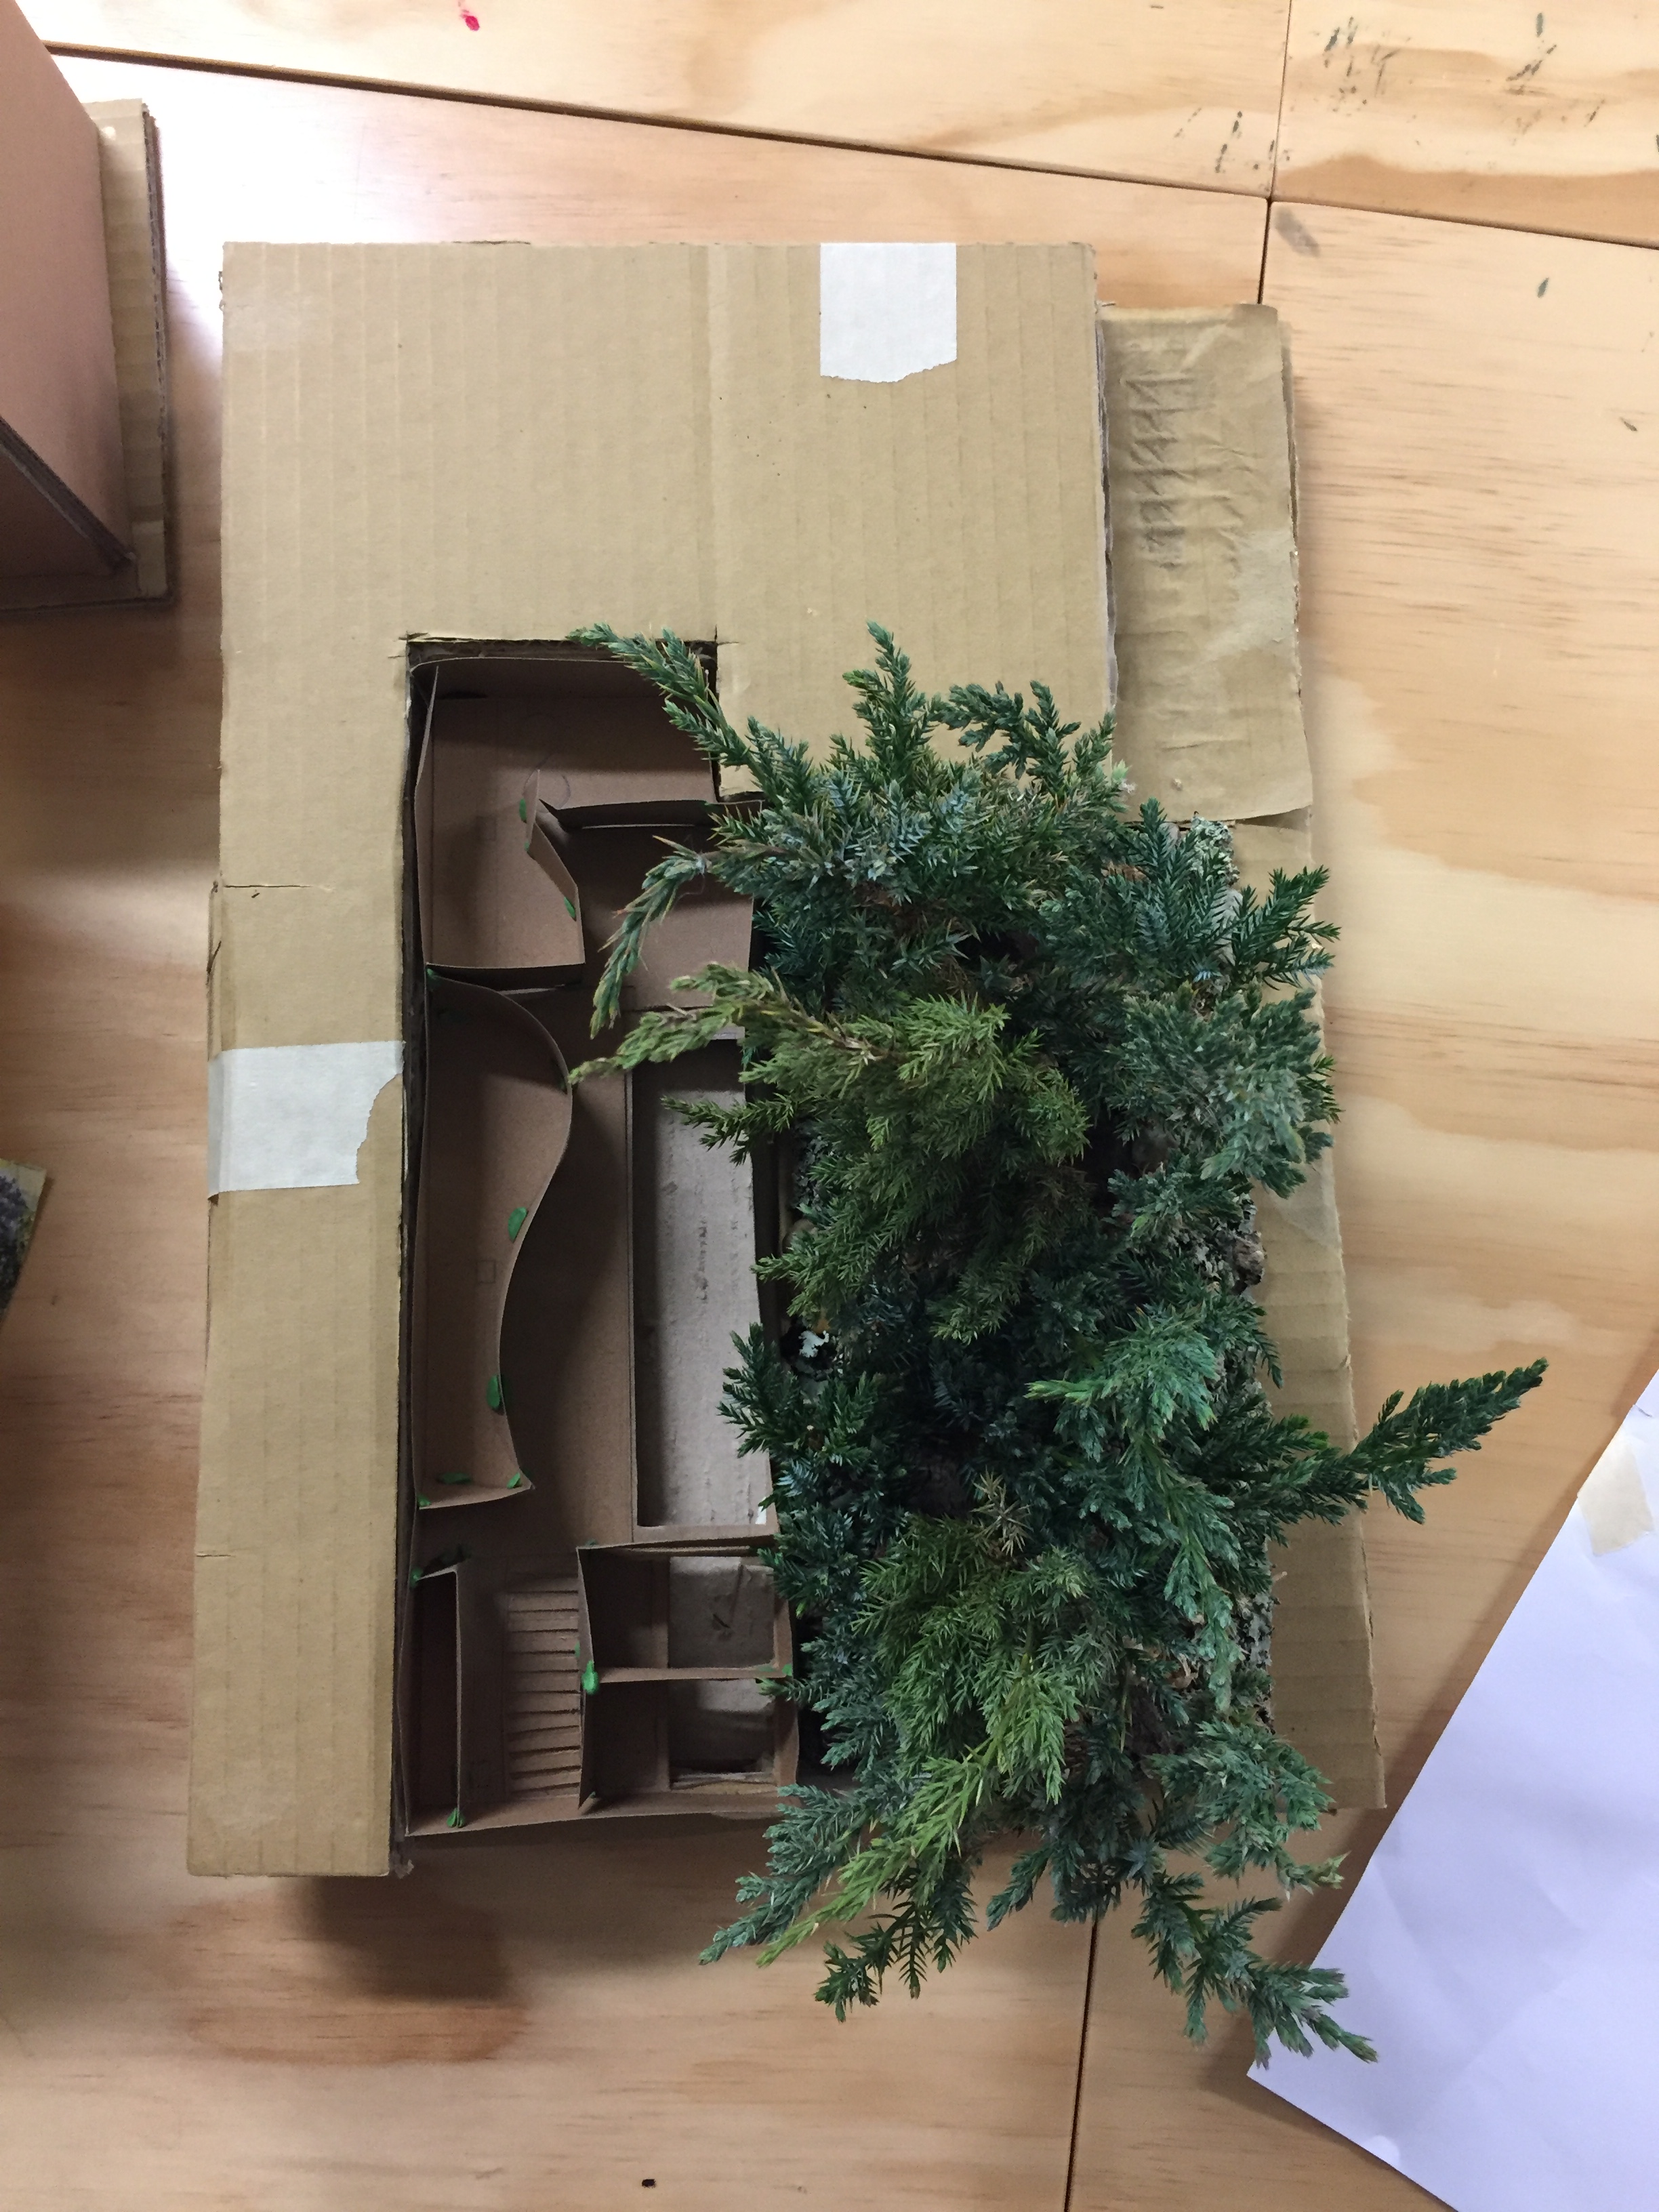
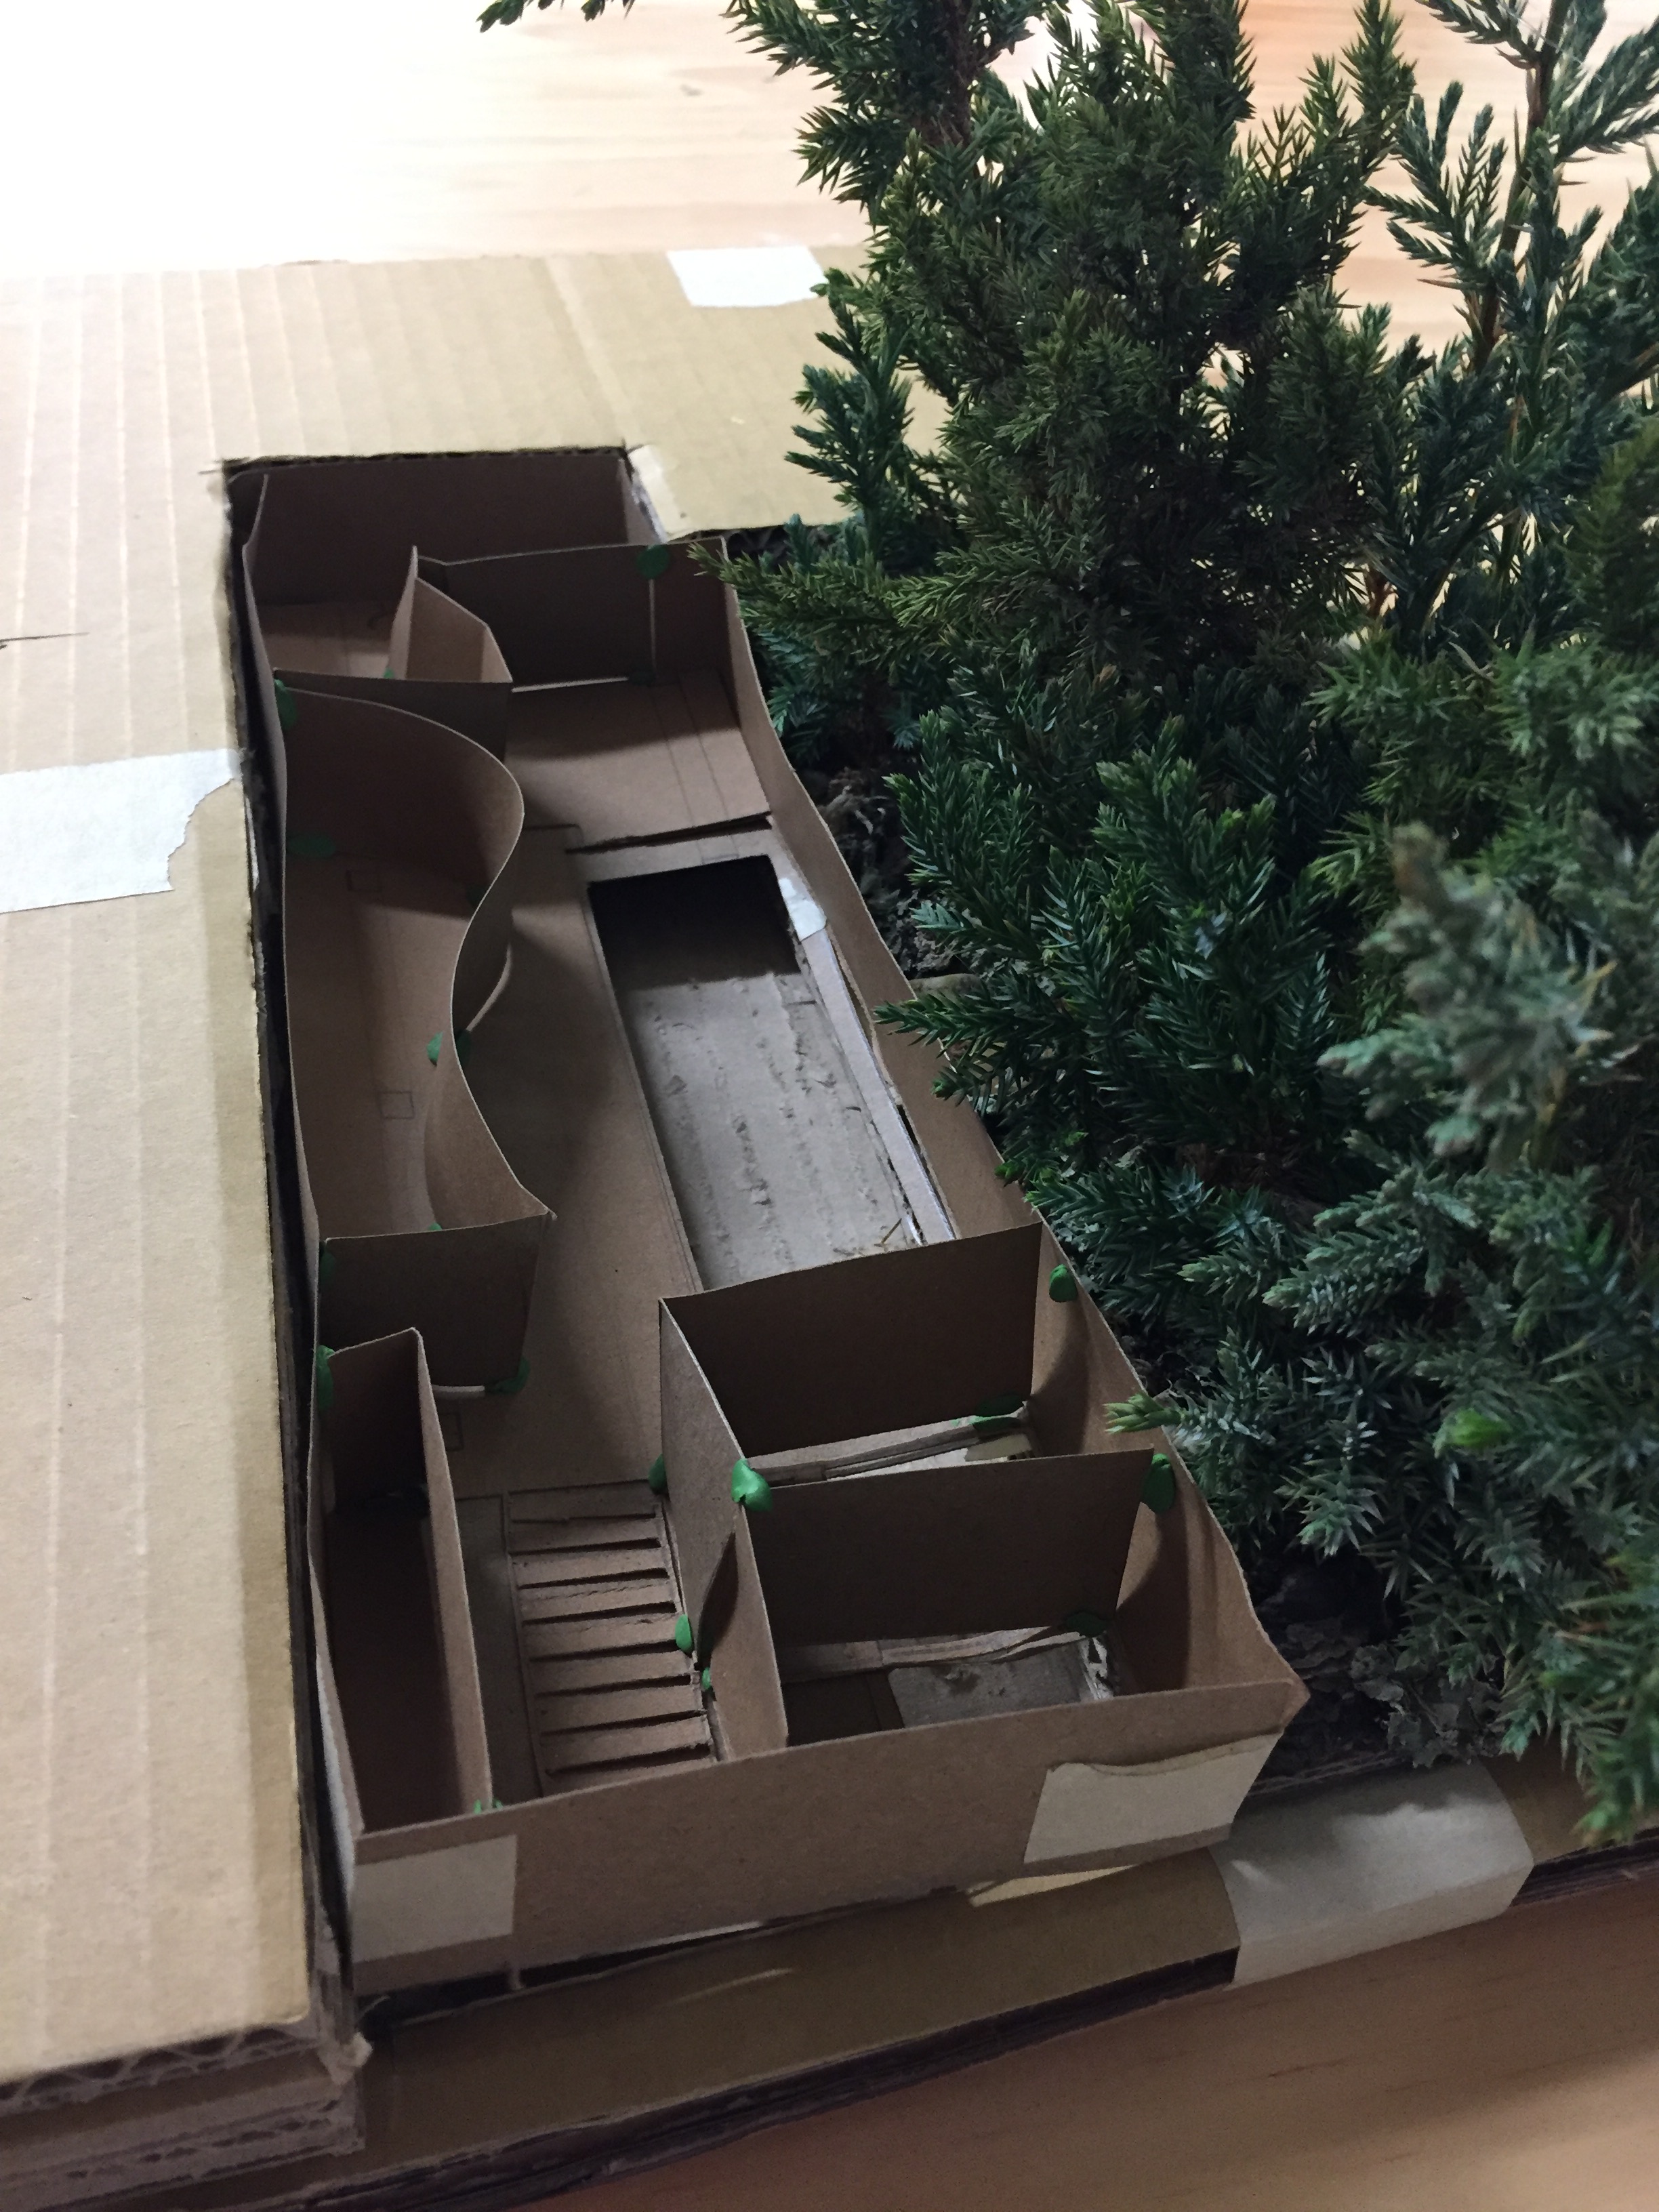
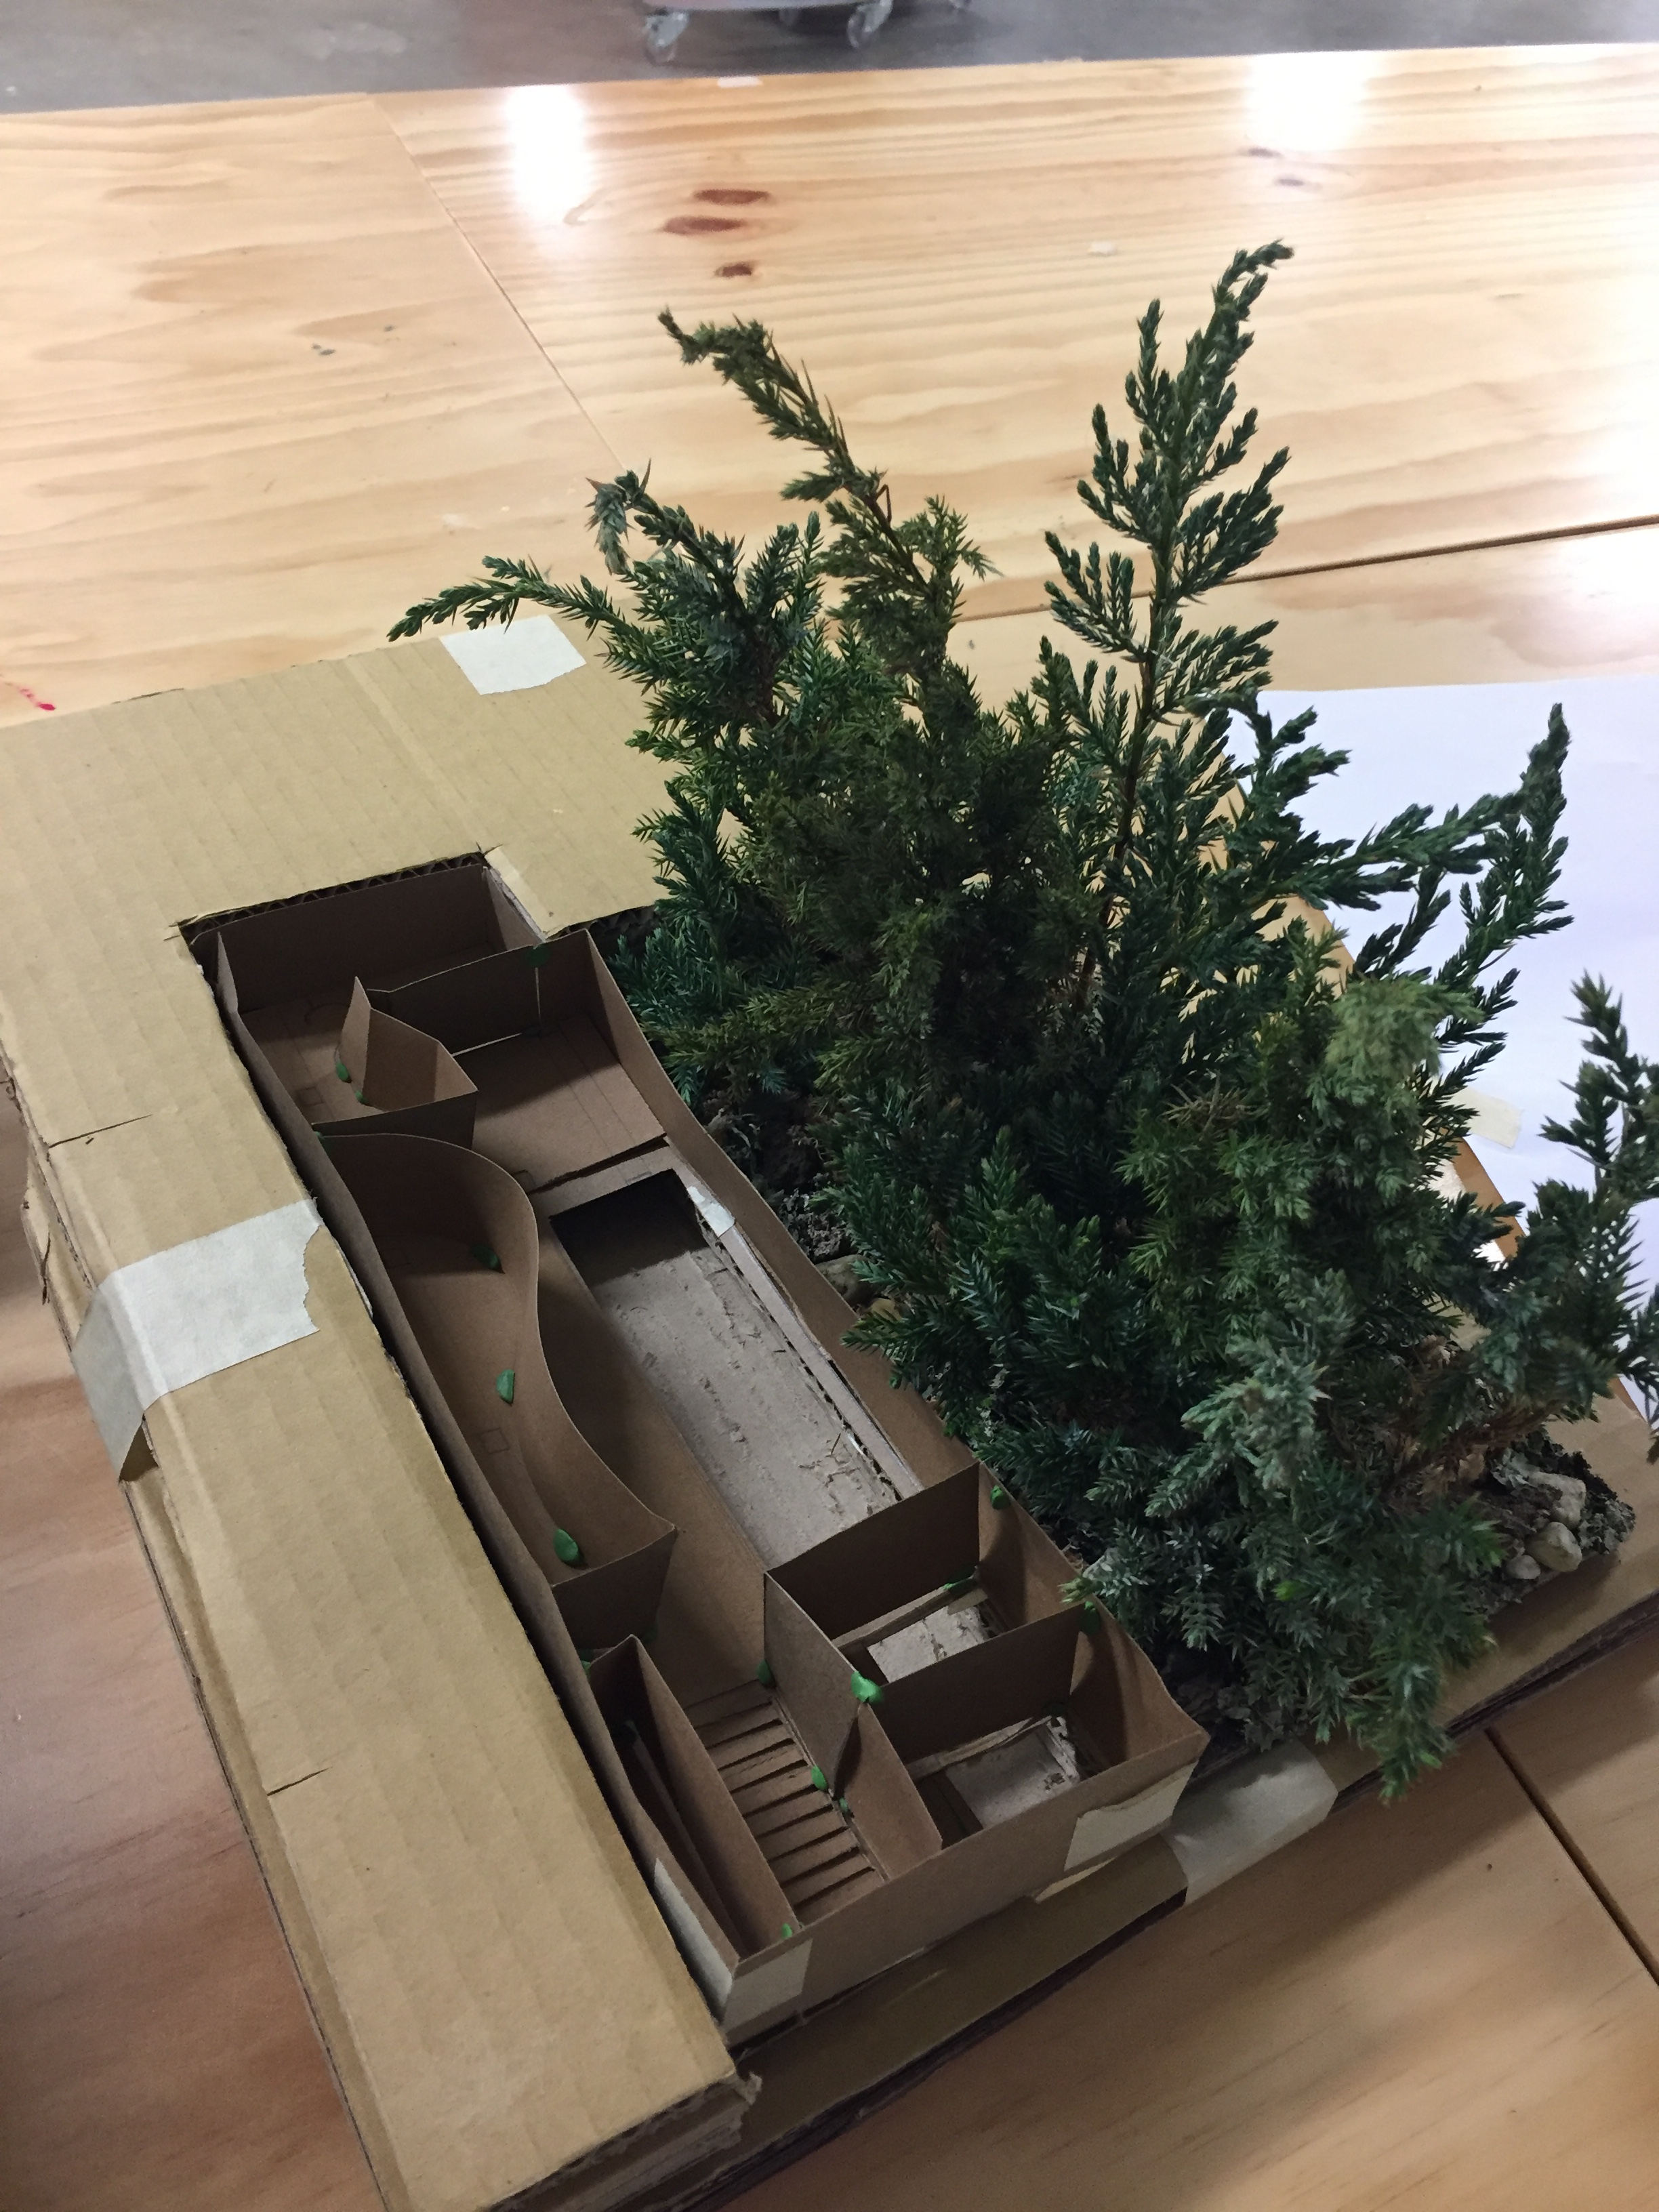
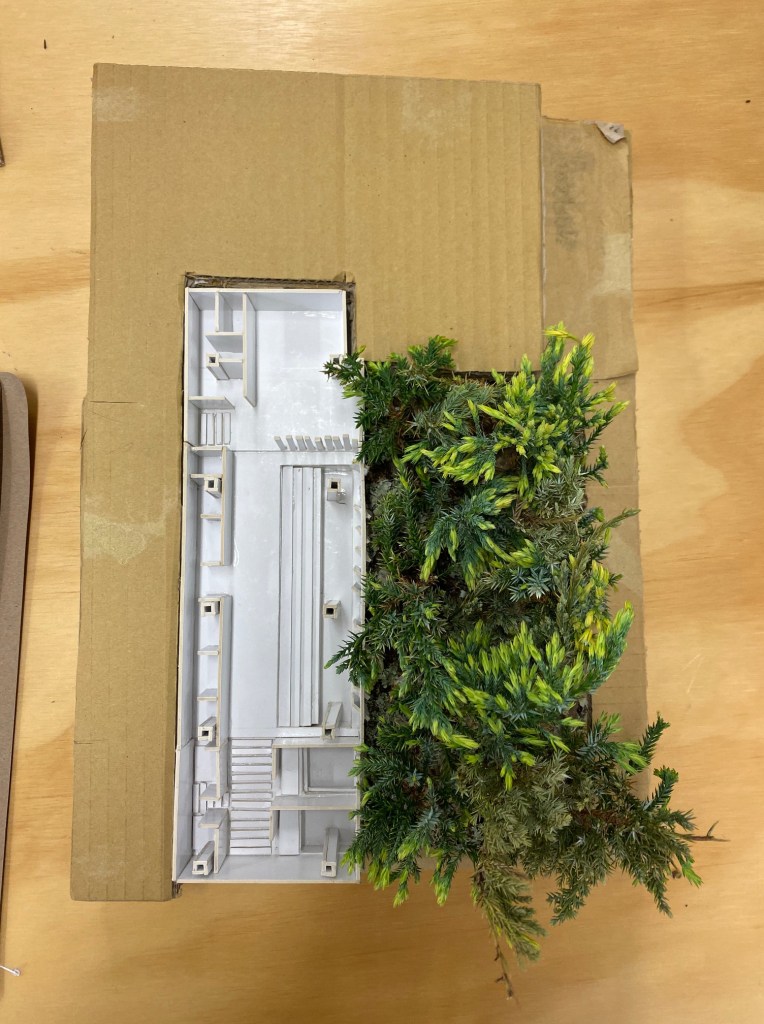
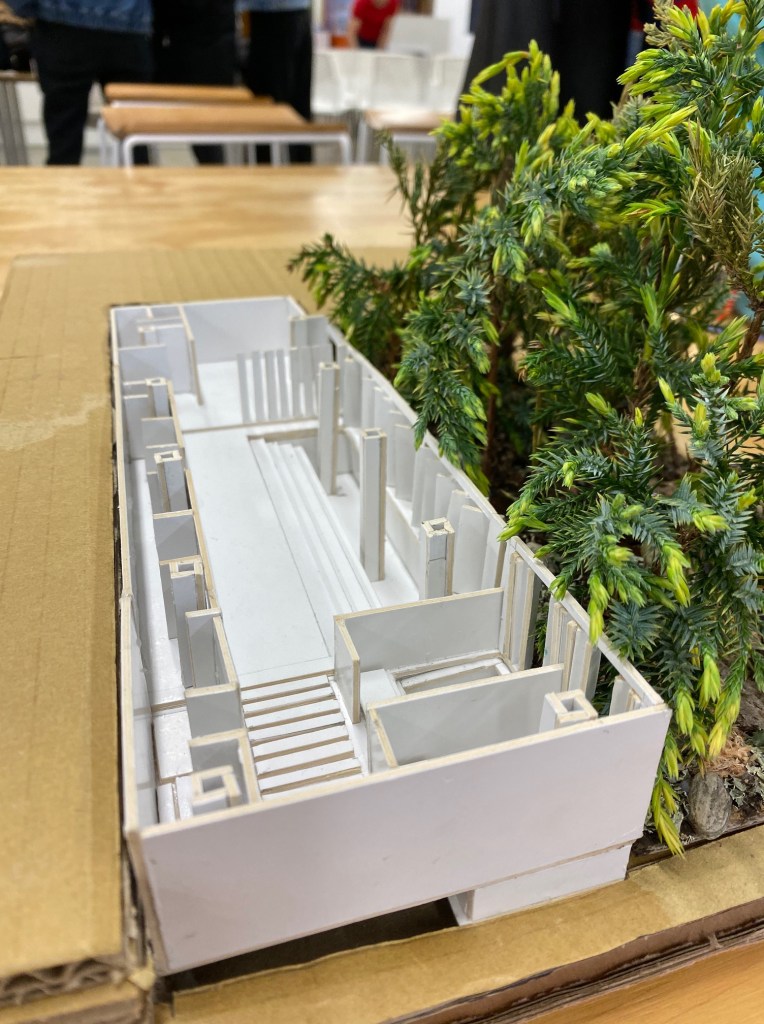
On Monday morning I brought my draft model to class to see how it would fit into my group’s site model. I think that it slotted in quite nicely and look forward to creating a more sturdy model. Placing my model into the larger site model along with the pocket forest made the design seem more realistic and also gave me a good sense of scale. I still plan to build a second model, changing some elements of the space as well as adding the pools in.
Pepeha:
Ko Pukekawa te maunga – The mountain I affiliate to is Pukekawa.
Ko Waikato te awa – The river I affiliate to is the Waikato River.
No Pukekawa ahau -I am from Pukekawa.
Ko Renee Henry toku ingoa – My name is Renee Henry.
Materials:
Natural materials are going to be a big part of my bathhouse design so choosing the right ones will be necessary.
With concern for the environment on the rise, every product we use offers a chance to be more sustainable. Choosing natural materials is just one way you can improve your environmental footprint. They last better than synthetics which equals less fast fashions and less waste in our landfills. They are biodegradable so won’t need to be incinerated which contributes to air pollution and are always renewable. They also tend to absorb the same amounts of CO2 as they emit during the production cycle.
Biophilia hypothesis is a theory that humans crave connections with nature and feel better when surrounded by it. Research shows that employees working in places with natural wood surfaces had higher productivity, mood, concentration and optimism than other work places. This shows that the inclusion of any natural element or material will bring greater well being for those using the bath house.
Indoor Plants
I plan to not only use natural materials but also bring a range of indoor plants into the space. This will create a cohesion between the interior and exterior spaces. I have started to look into indoor plants that will be beneficial to the space, such as air purifying plants.
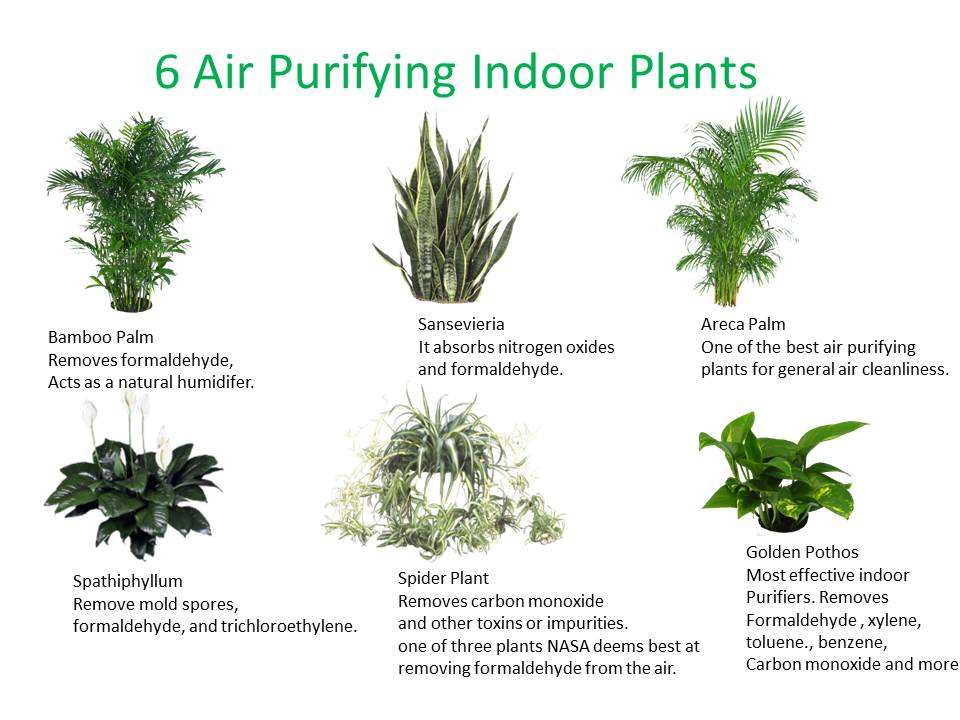
I am particularly drawn to both the bamboo palm and the areaca palm due to there tropical looks. Areca palm is one of the best plants for general air cleanliness whle the bamboo palm acts as a natural humidifier. I think that the spathiphyllum would be a perfect fit for the space as it removes mold spores which could be an issue within the wet spaces.
I would also like to plant a range of indoor vines and climbers along the walls that don’t reach the ceiling. This would allow them to run along the top and down the sides of the walls. The images below show a range of vines and climbers that require little maintenance.

Heartleaf Philodendron 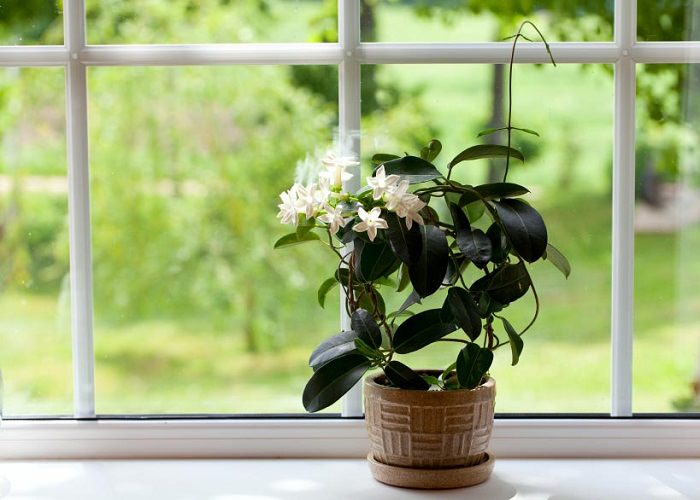
Jasmine 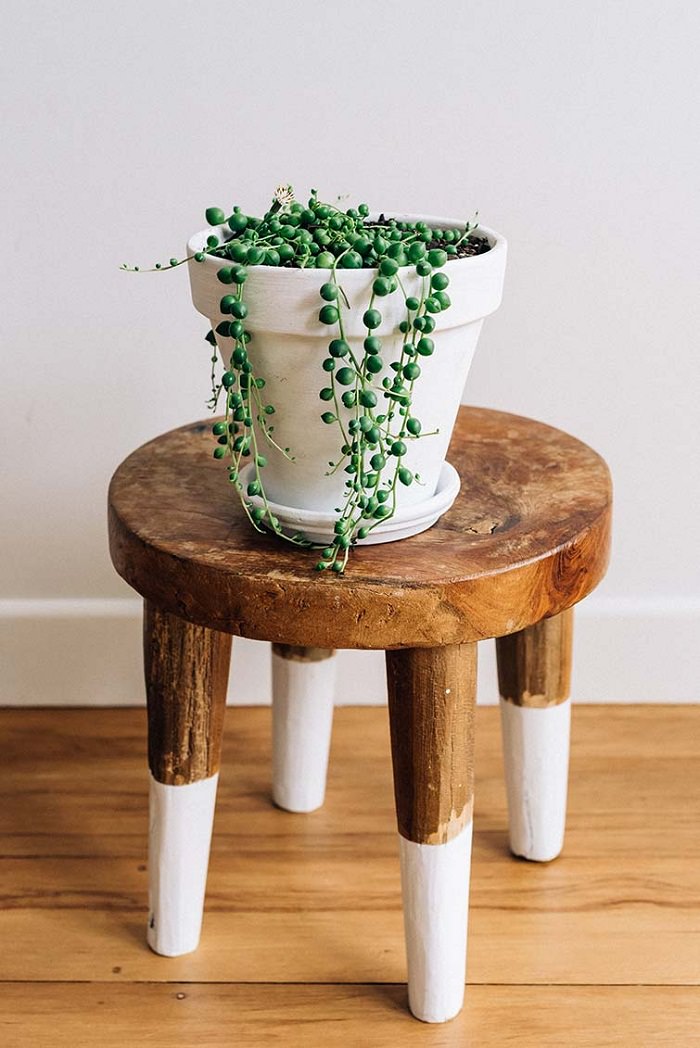
String of pearls
During Wednesdays class I decided to further look into some indoor plants that would be able to provide some type of natural healing or air purifying benefits.
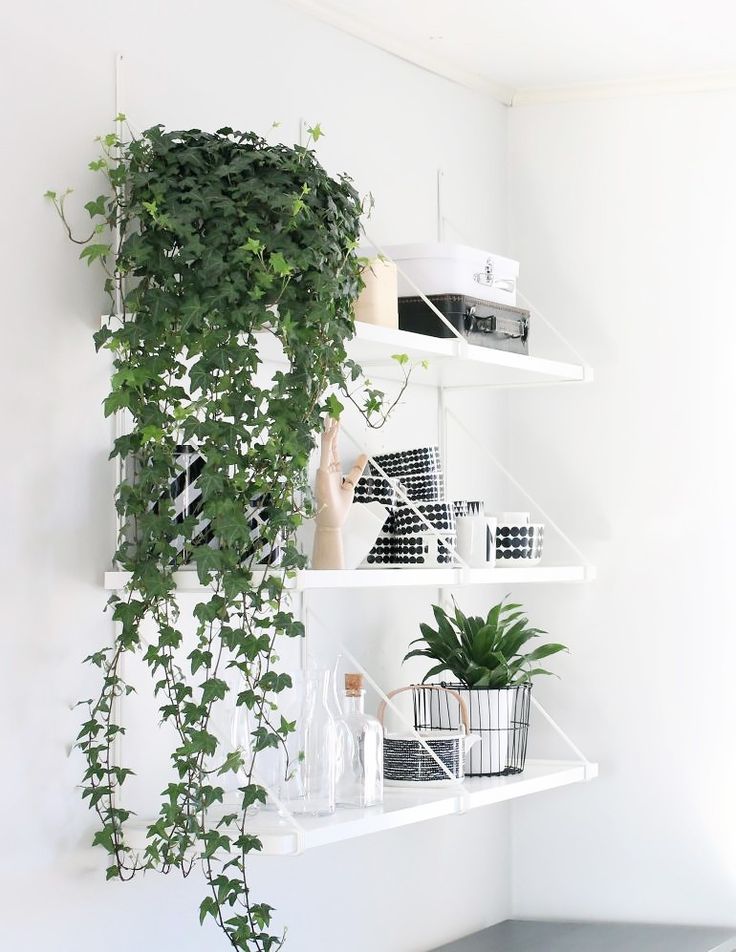
English Ivy 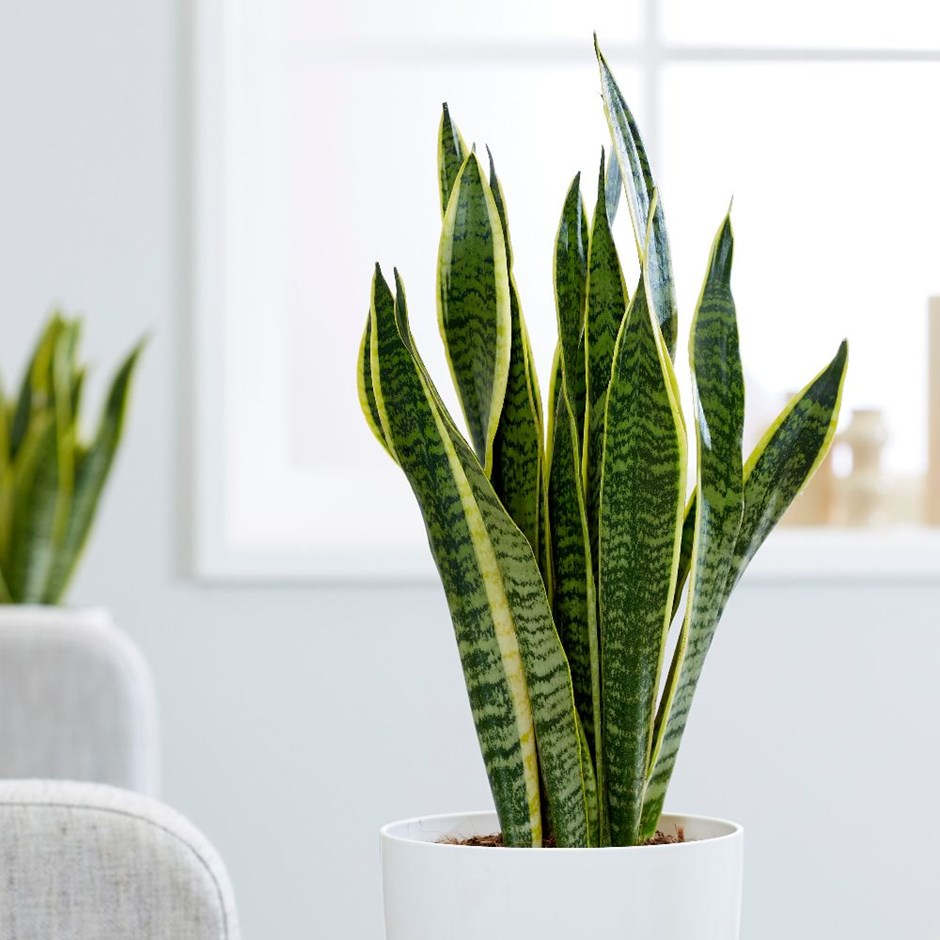
Snake Plant 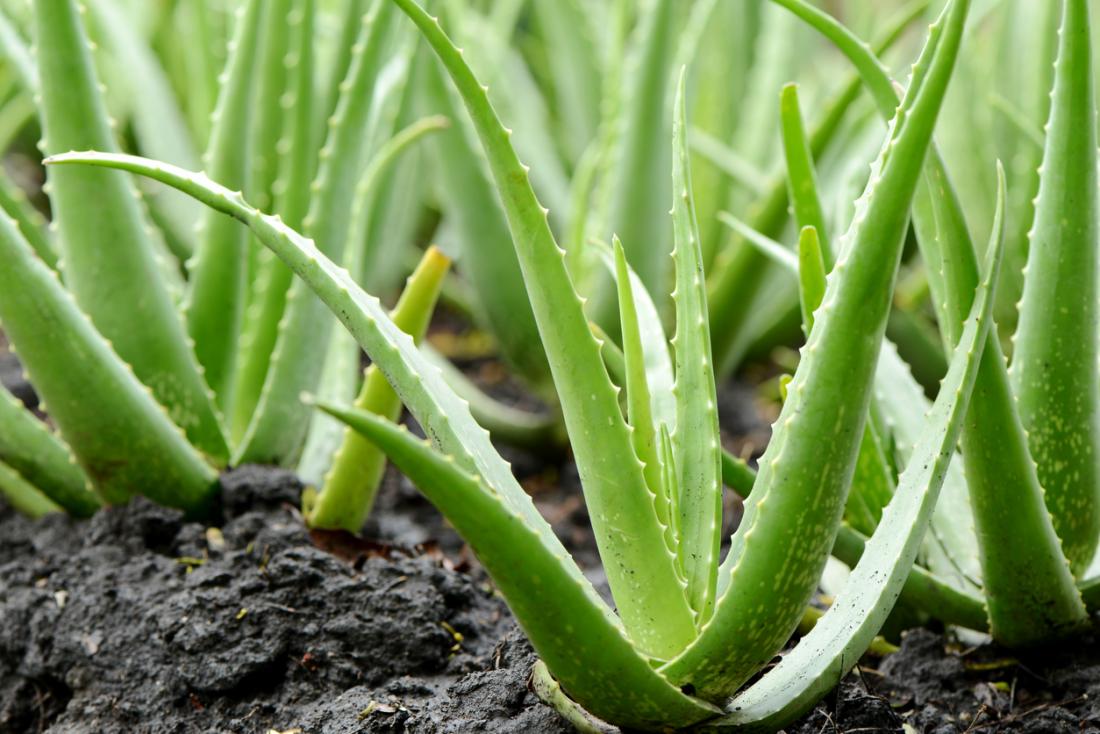
Aloe Vera 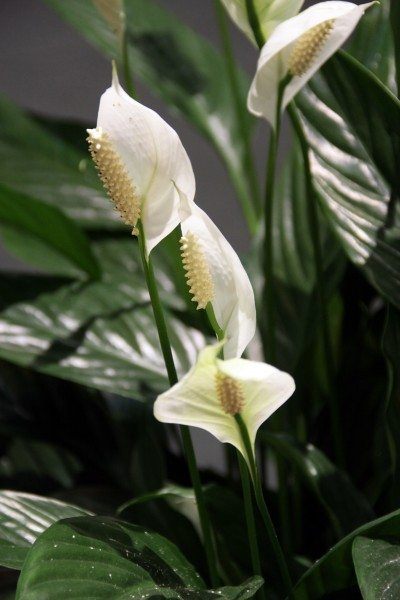
Peace Lily
English Ivy: The English ivy does a number of things to improve the air quality of spaces. The plant purifies benzene (found in plastics and rubber), formaldehyde (found in glues and cleaning products), trichloroethylene (a compound found in paint removers and carpet cleaners) and also works to reduce carbon monoxide. I really like how the English ivy in a vine/climbing plant therefore it’d be able to run along the tops of the half walls as well as down the sides of the walls.
Snake Plant: This plant is able to thrive in low lit areas which is perfect seeing that the given bathhouse site is a basement space. At night, the pointed leaves adsorb carbon dioxide, reduces formaldehyde and benzene as well as releasing oxygen into the air. The unique pattern and coloured edge of the snake plant will bring new elements to the space. The snake plant will be able to be planted in the darker parts of the site and still grow healthy and strong.
Aloe Vera: The aloe vera plant is simple to care for and easy to maintain. Like the other plants, aloe vera also clears the air of formaldehyde and benzene. Aloe vera is most commonly known for its juices that are used to soothe sunburns, cuts, burns and other skin conditions. The plants has been used for over 6000 years.
Peace Lily: The white flowers of the peace lily bring smalls pops of white colour amoungst the greenery. Again, this plant is able to reduce benzene but it also reduces acetone, a chemical released from electronics, something that is used by every person these days.
Concrete Pools
I want to create each of the pools out of the best material for the space. After researching a few types of pools I’ve decided to go with a concrete pool as they can be formed into virtually any shape and size. Concrete pools are often called Gunite or shotcrete pools because concrete is shot from a gun onto steel-reinforced walls. Once the concrete cures, it’s either plastered smooth, painted or finished with a textured aggregate surface or tile. Concrete pools typically take longer to install (generally 3-12 weeks) but they are considered the strongest and most durable type of pool. As well as long-lasting, concrete pools are the only kind of underground pool that can be remodeled, enlarged and updated over time.
Timbers
Wood is material I would love to incorporate into my bathhouse as flooring in certain areas. I have started to research the best type of timbers to use in wet areas.
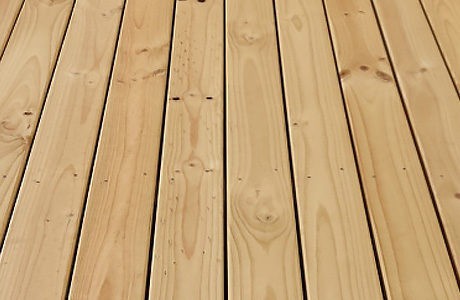
Pine 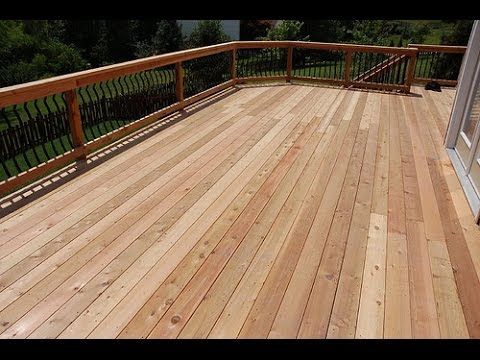
Cedar 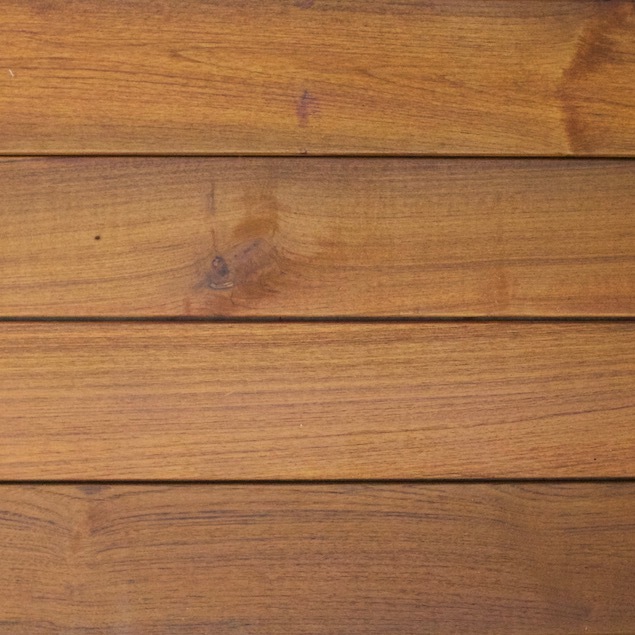
Teak
Pine: Pine is a very common choice of timber as it is inexpensive and highly available. On the downside pine has a tendency to warp overtime. Treated pine has a longer life and requires less maintenance.
Cedar: Cedar is known for it’s strong resistance to pests and bad weather conditions. Both traditional and treated cedar have very long lives. Traditional cedar is very resistant to water, this is good for a bathhouse space as it will more than likely be wet most of the time. Treated cedar only increases the resistance, however, this involves adding chemicals.
Teak: Teak is the most durable wood that is used for pool decks. It is known for its resistance to mold and mildew which could an issue within such a wet space. Teak requires little to no maintenance and has a longer life to most timbers due to the fact that it doesn’t adsorb any water. I think teak may be the best option for flooring in the bathhouse due to it’s strong water resistance.
Pool Tiles
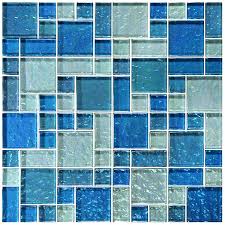
Glass Tile 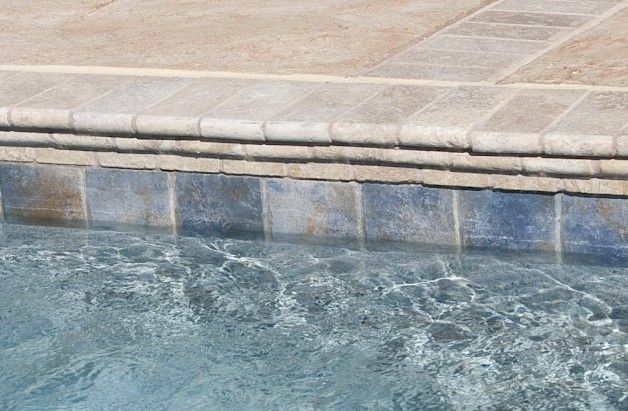
Stone Tile 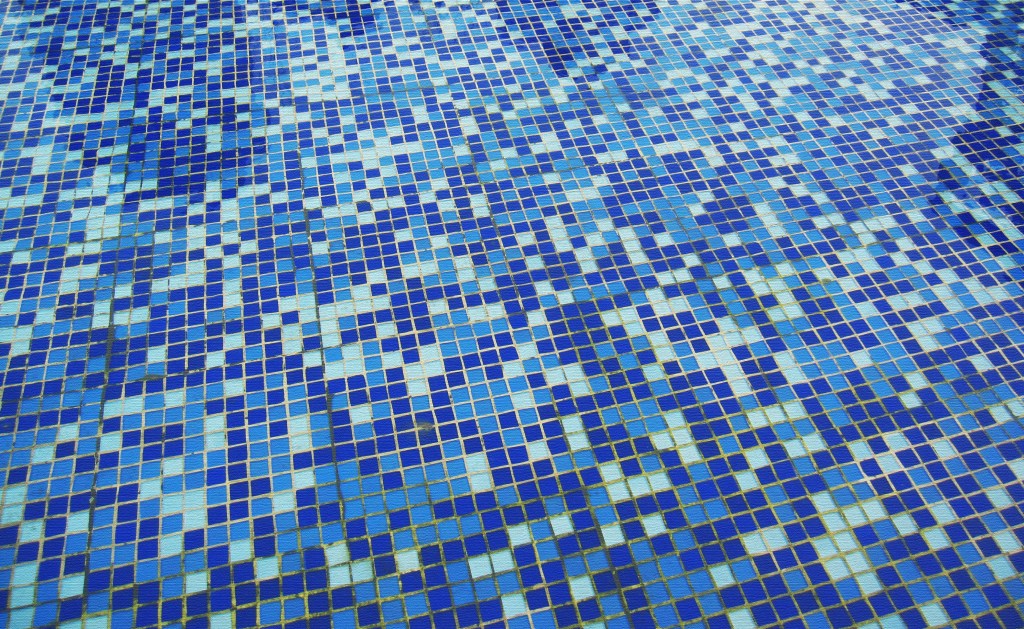
Ceramic Tile
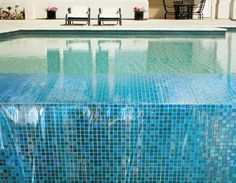
Glass tiles: A glass tile is often the most expensive option as they are usually made from 100% recycled glass. Glass is the most durable and non-porous of the tiles I have researched. They work well with the transparent nature of water and customised colour schemes are available. Some tiles have a iridescent coatings that shimmer with the change of light and water flowing over the surface. Glass tiles are also able to create beautiful underwater reflections.
Stone tiles: Stone tiles offer a classic mediterranean style. Natural textured tiles can work well with surrounding pool decks.
Ceramic & porcelain: These tiles are able to be hand painted and customised with designs. Style can be created that match the surrounding of the space. Textured and glazed options are available.
Some designers choose to mix glass, stone, ceramic and porcelain tiles. With the right balance of colour, texture, size and style a beautiful, continuous design can be created.
Sizing – larger tiles often crack due to thermal shock. This tends to happen more with larger tiles along the water line. Larger tiles are also prone to cracking as they are less stable in the center.
Small Tiles 
Large Tiles
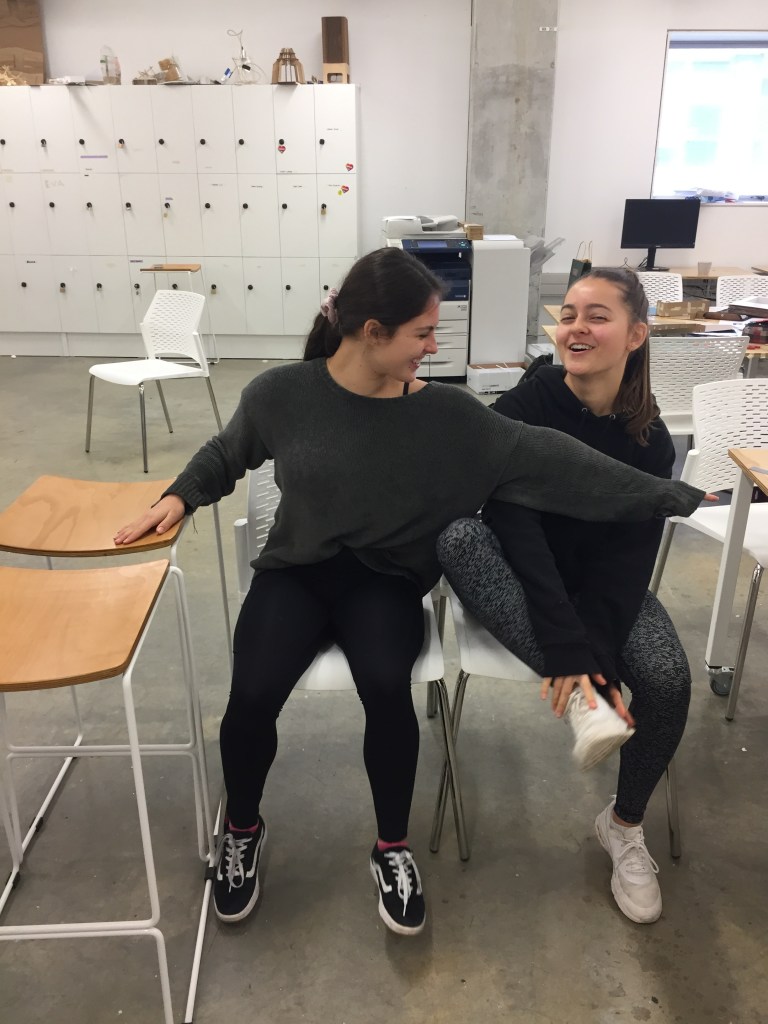
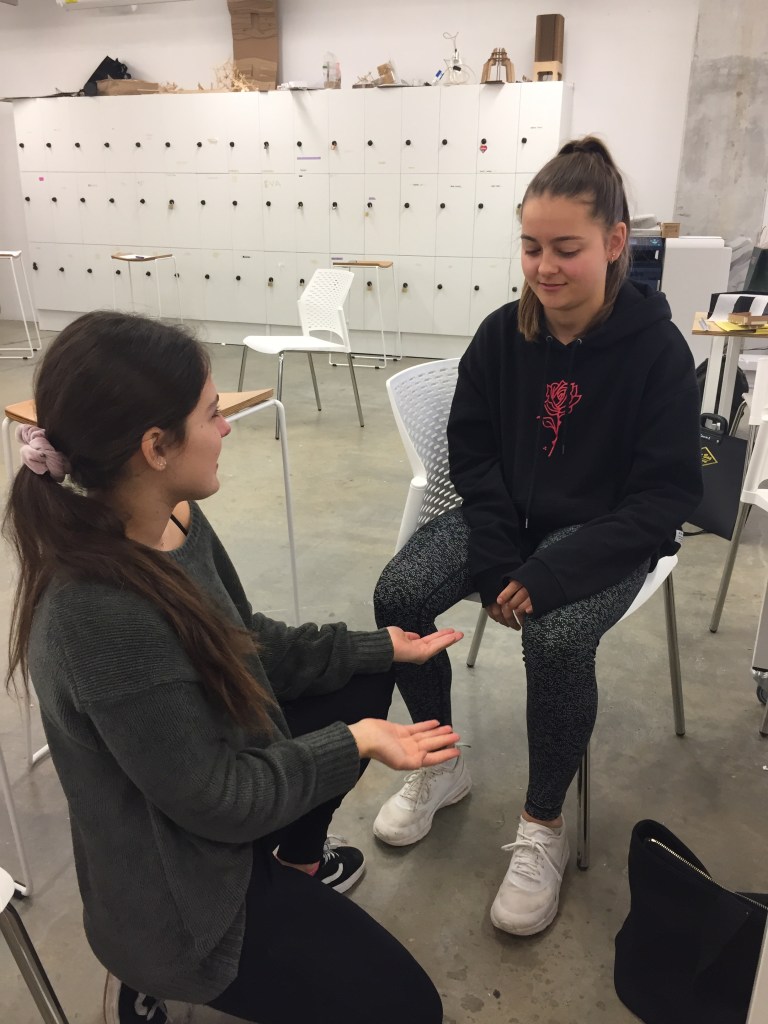
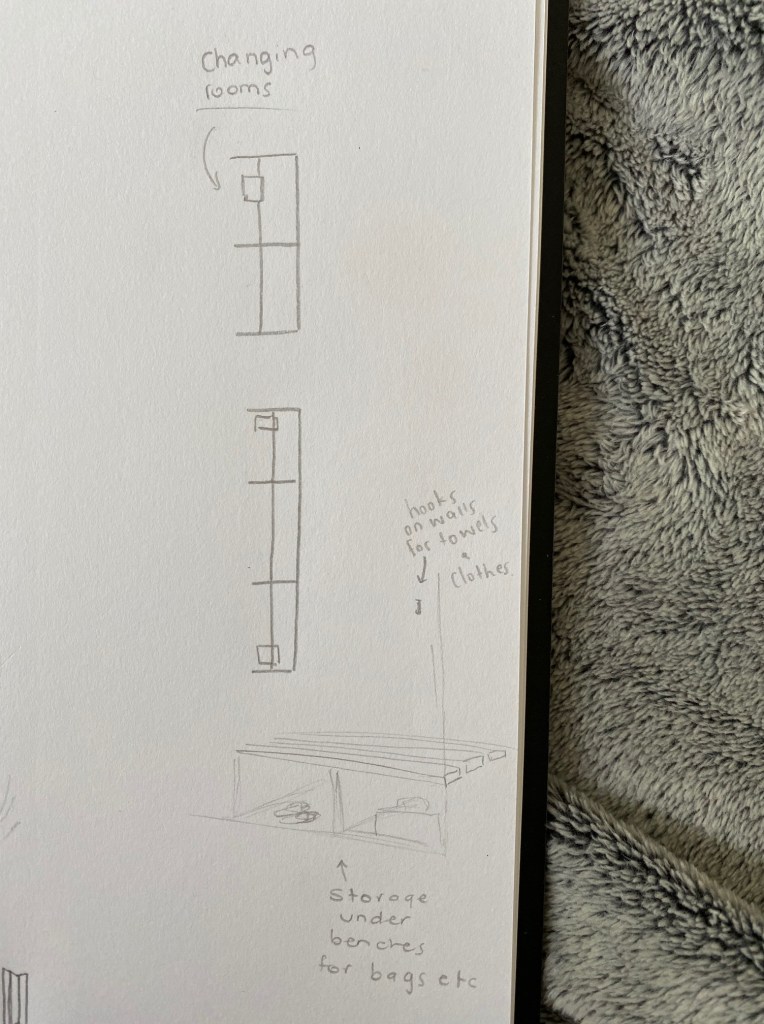
Proportions of spaces:
In small groups during class we acted out scenes that may take place in our bathhouse. This involved us acting as either a disabled person, an elderly, young children or someone who is there to assist. Below are pictures showing the space needed within the changing rooms and toilets for all types of people to easily move around in.

Week 6: Second Draft Model
This week I began working on a second more detailed model of my bathhouse design. Changes from my last model include new layouts for the bathroom, changing room, showers, refreshment area and entrances.
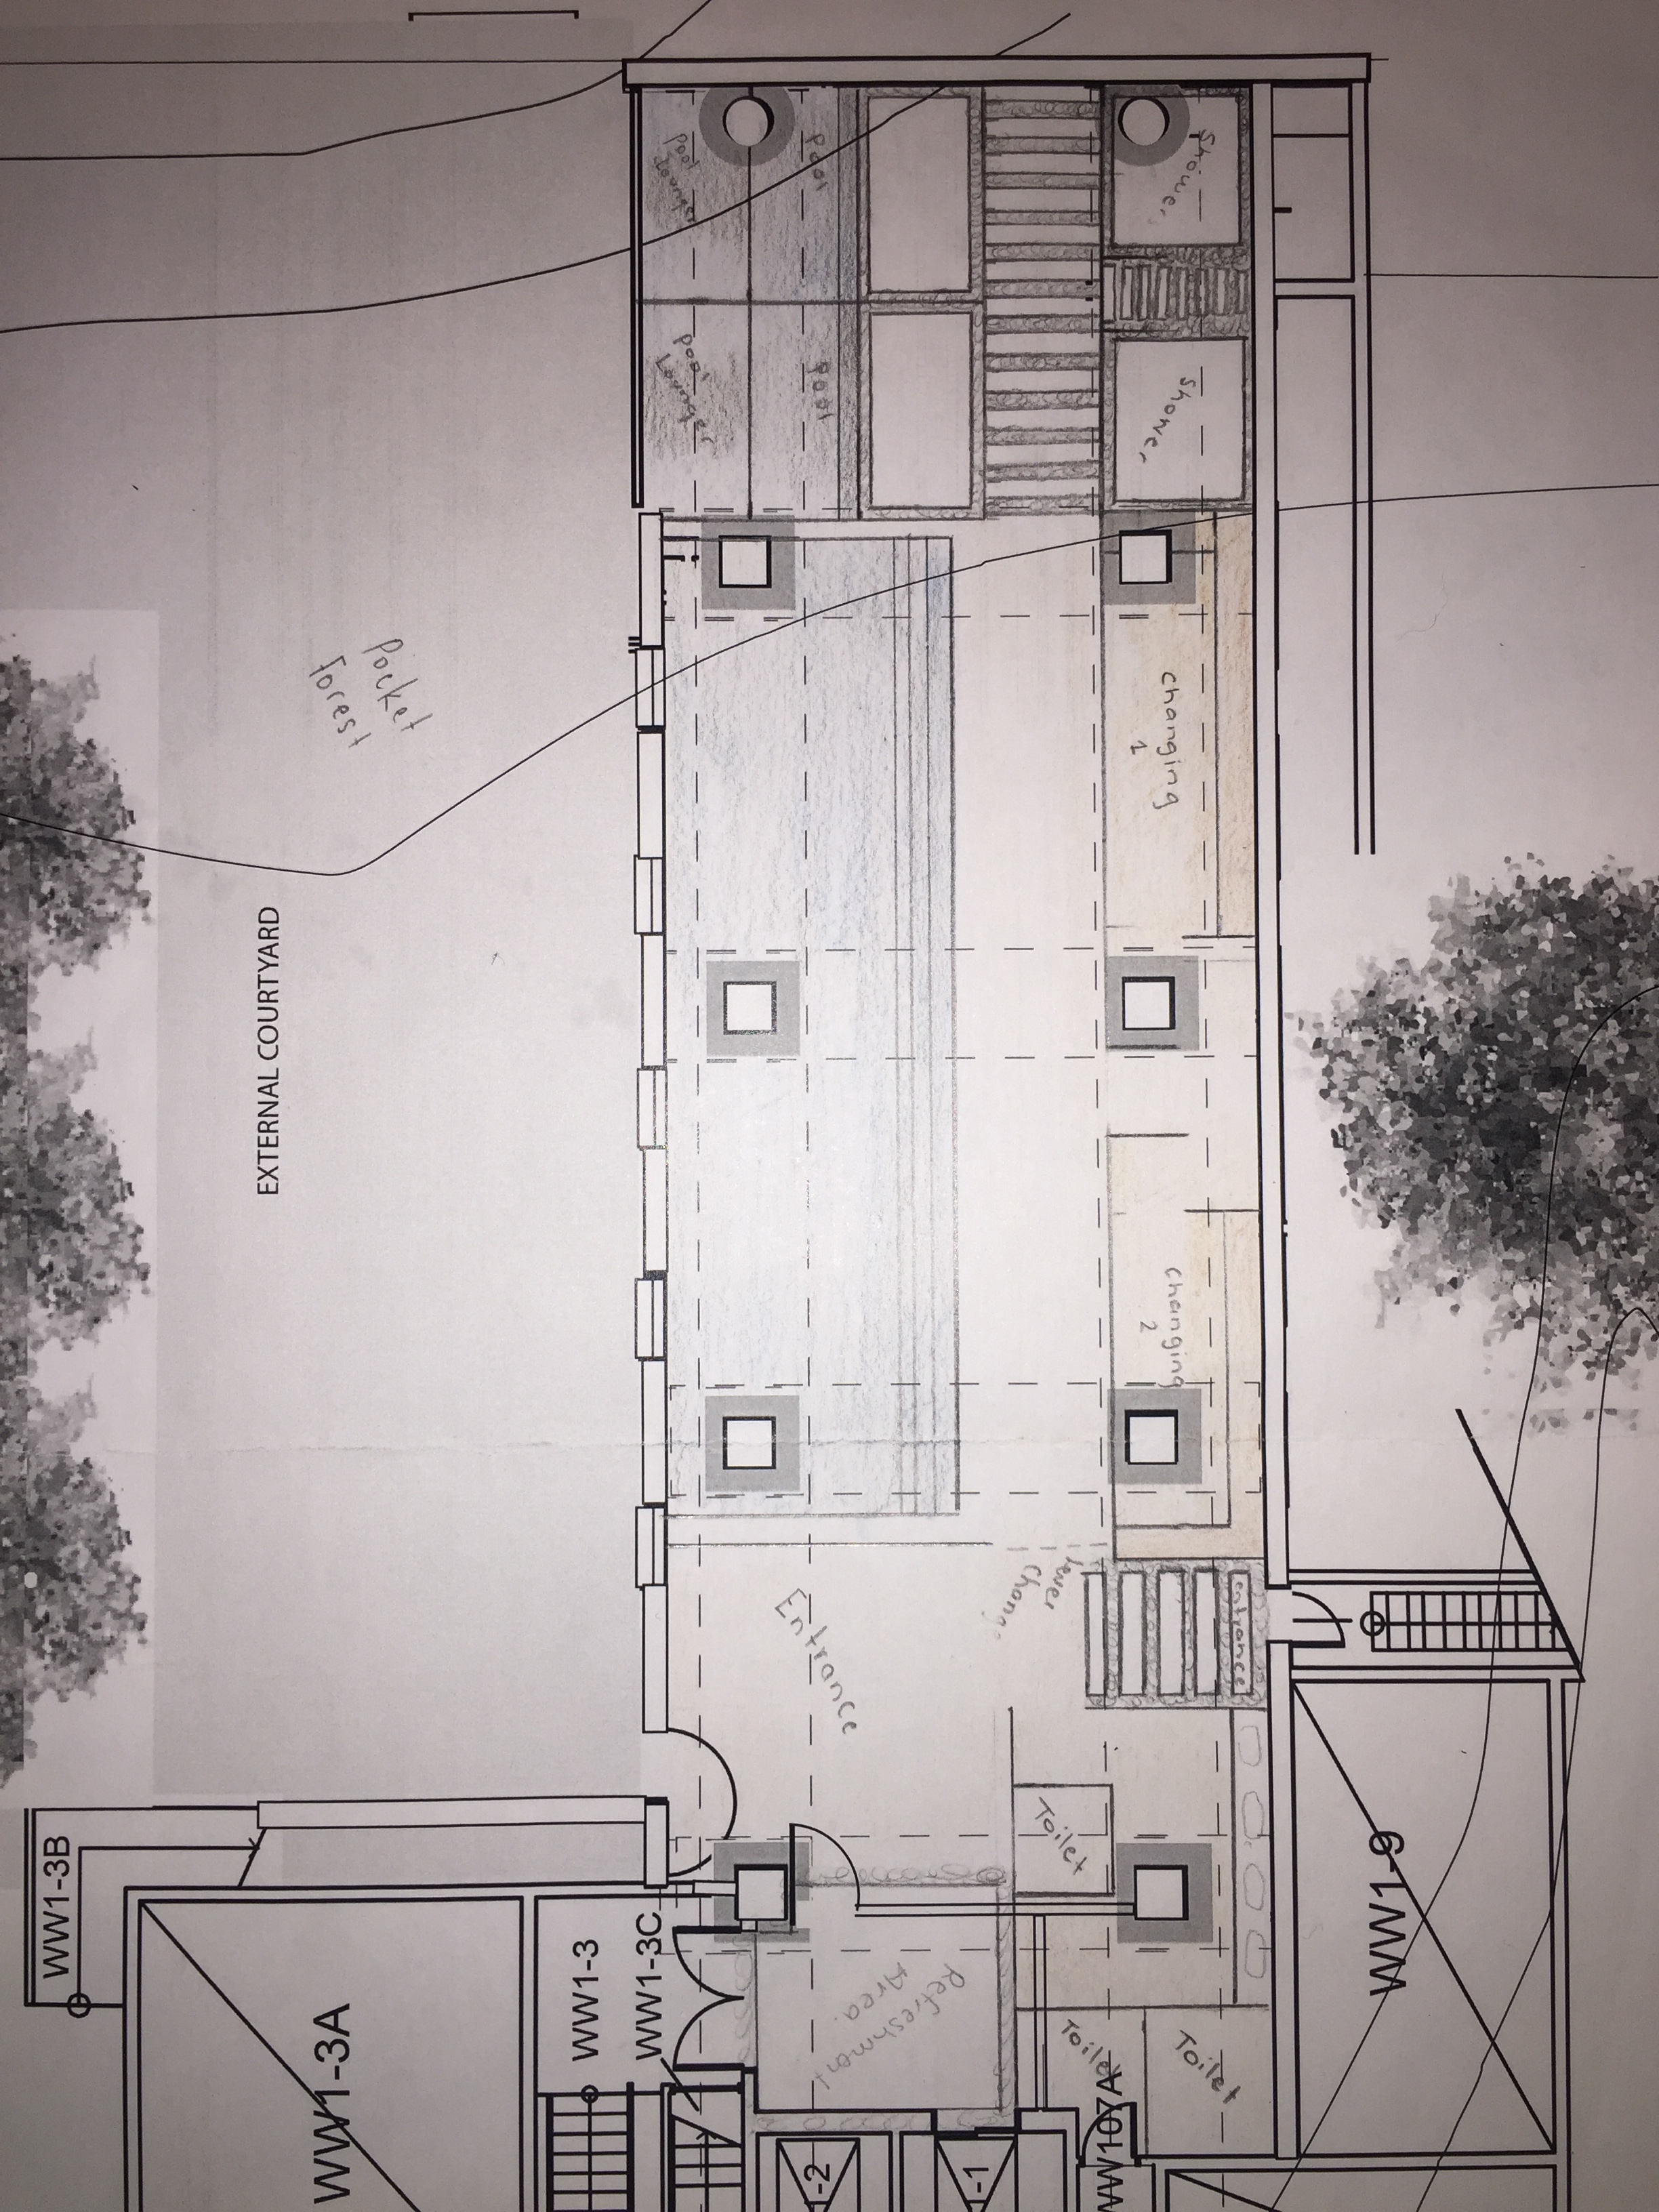
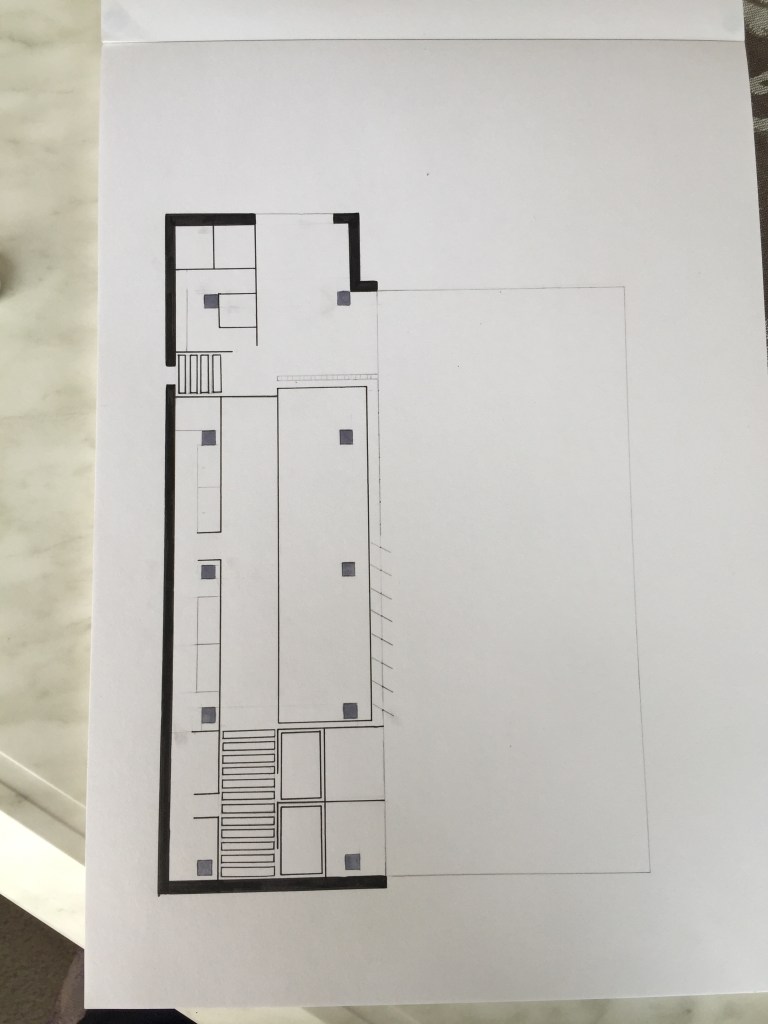
Sketched plan 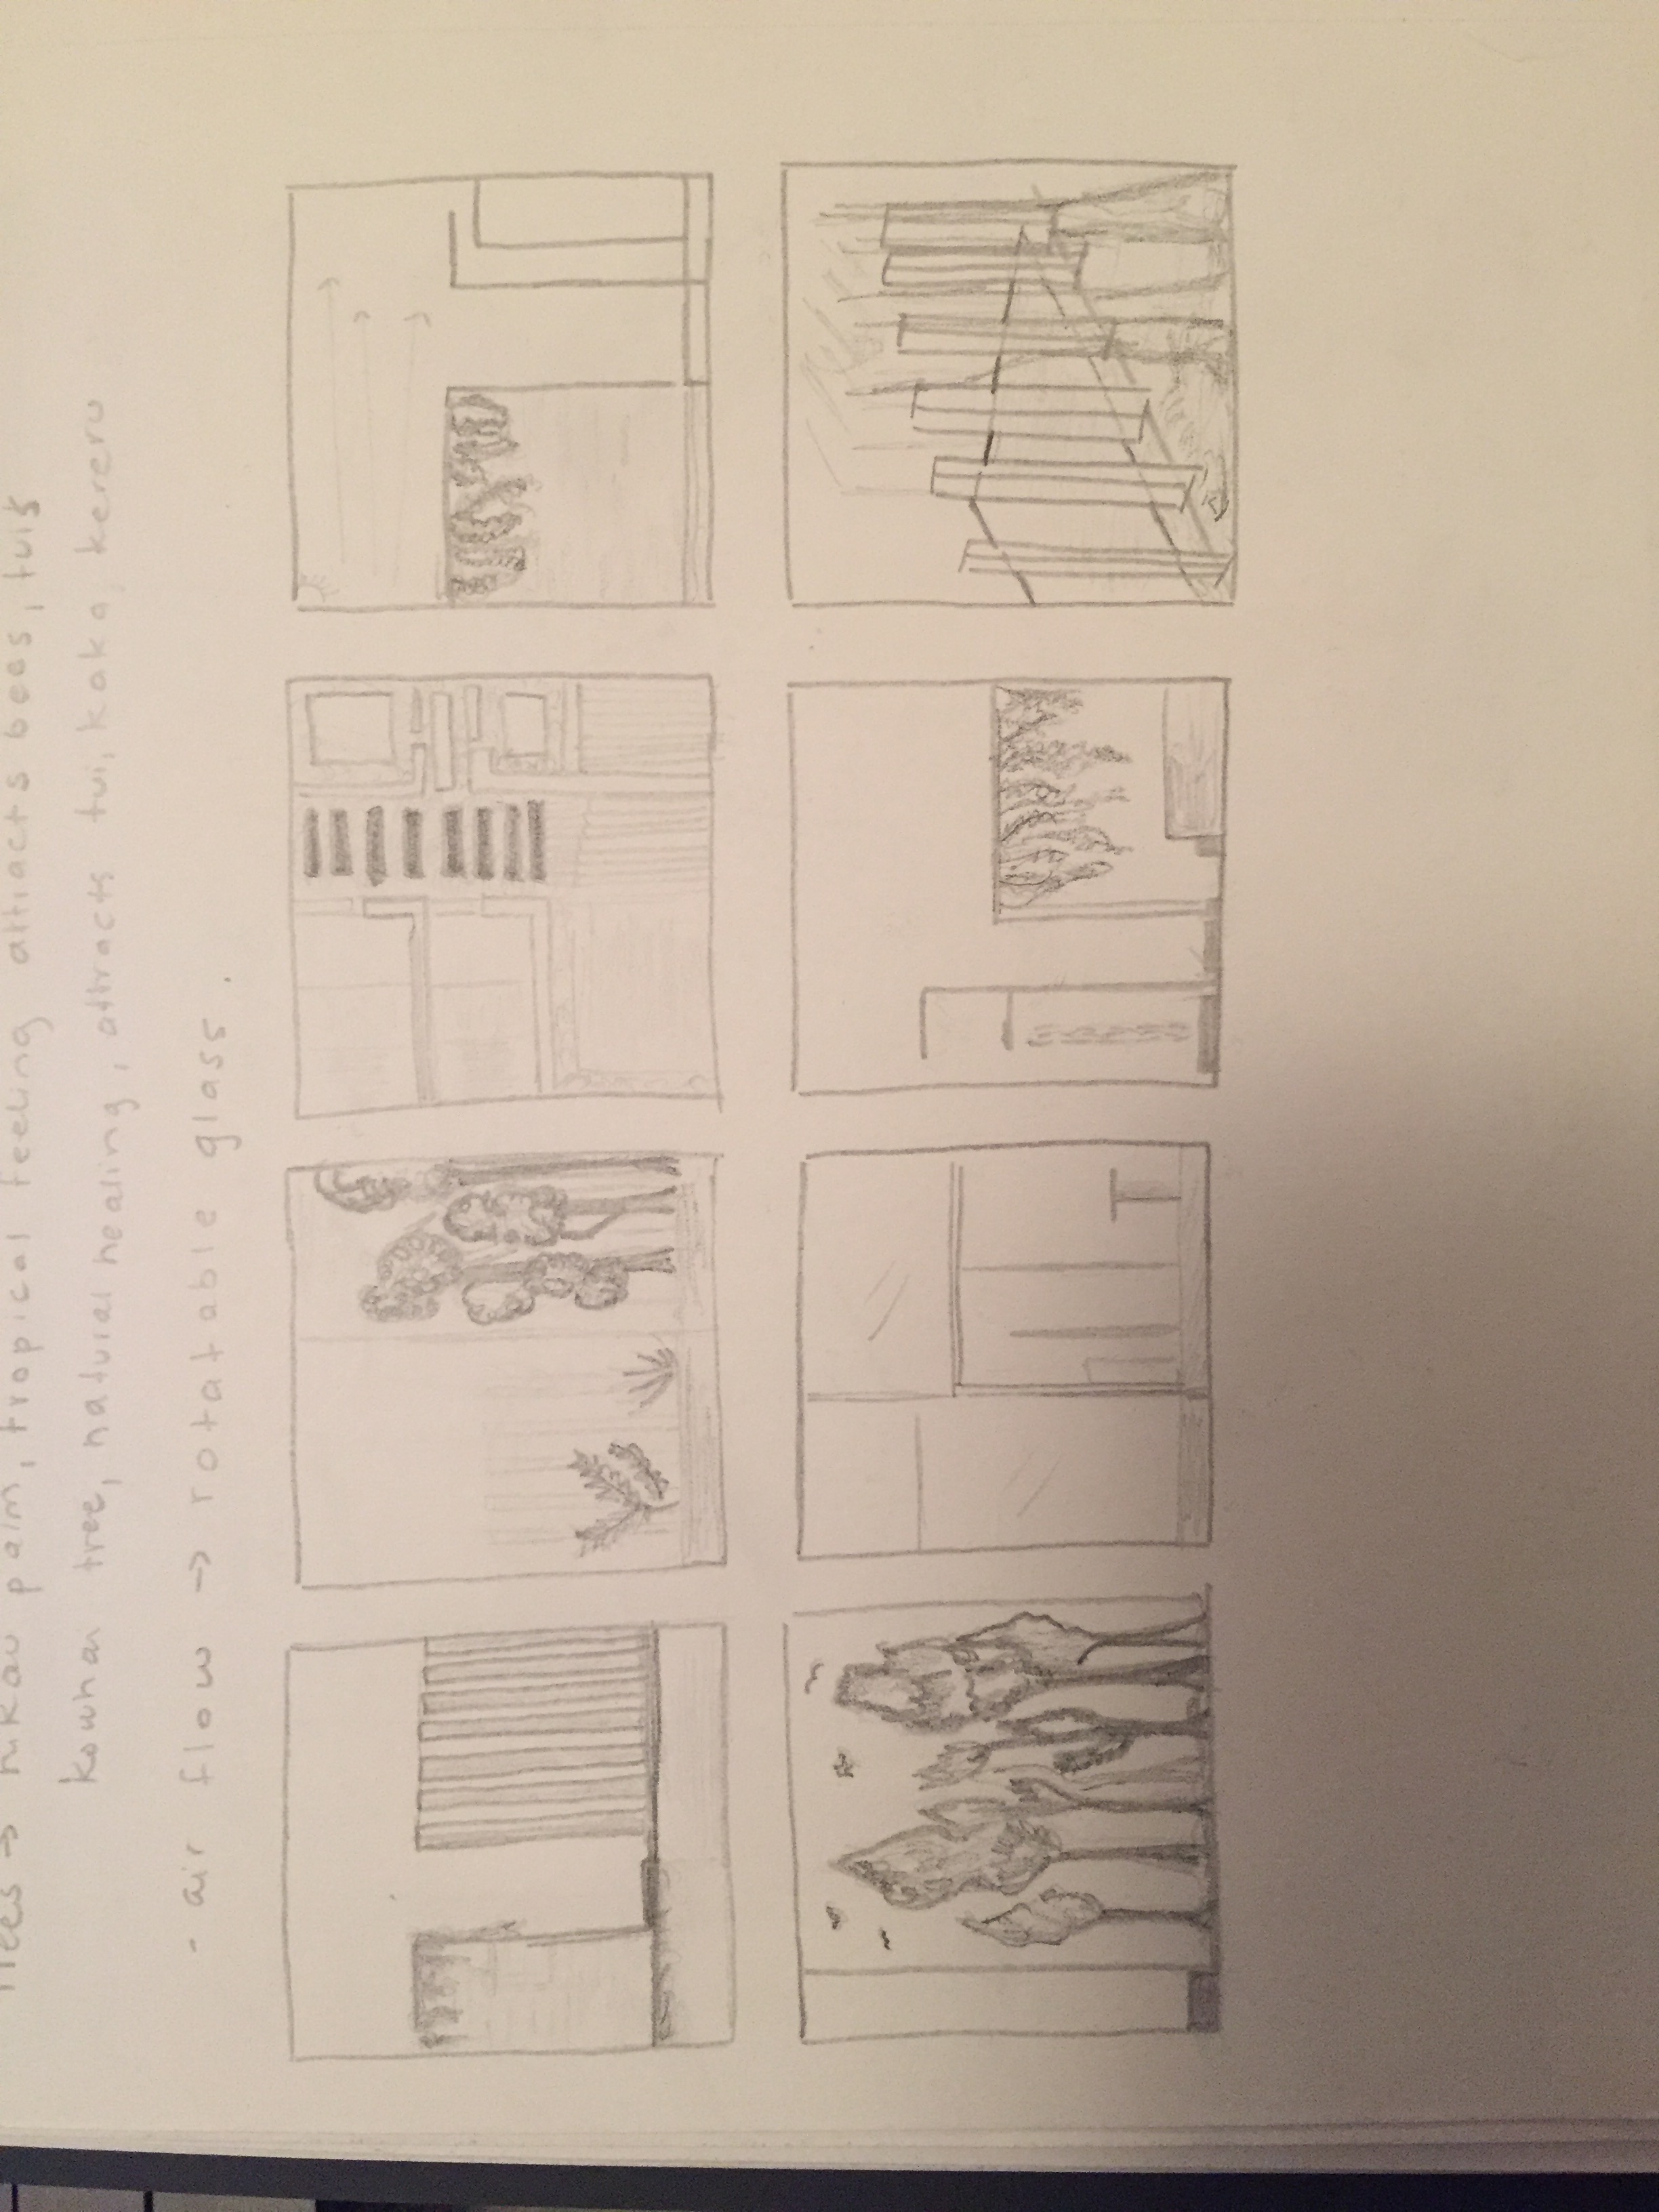
Thumbnail images
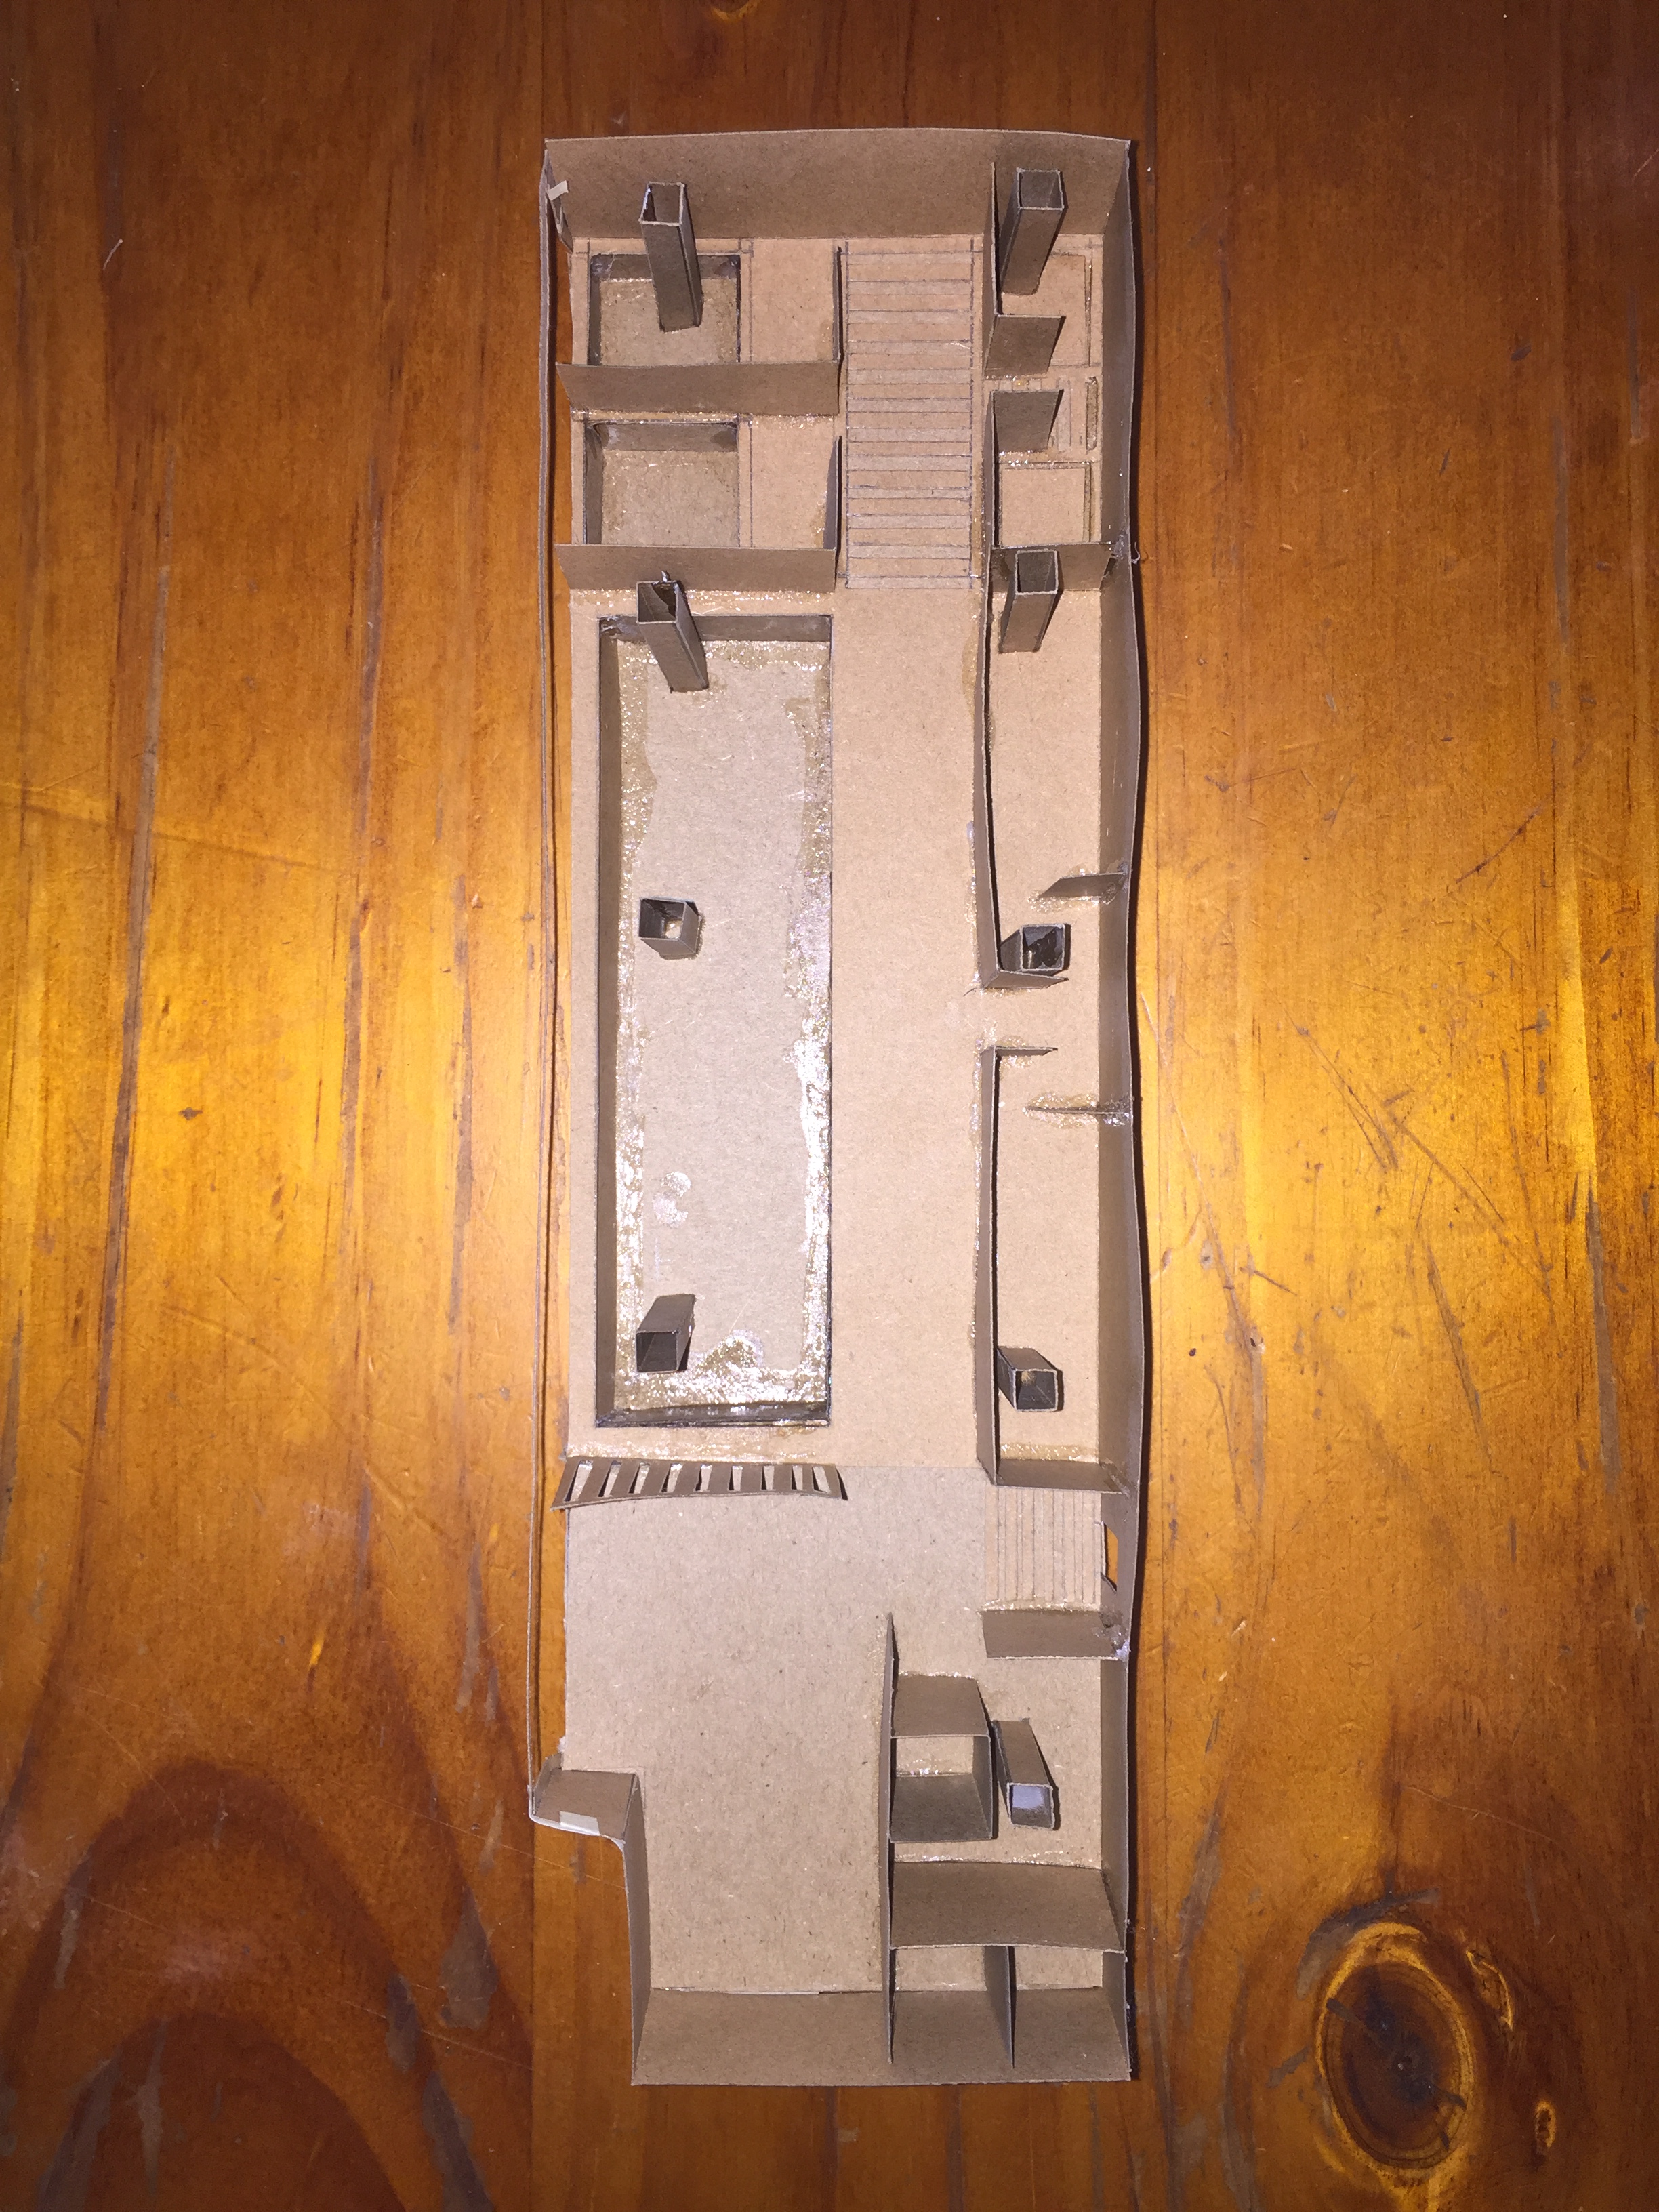
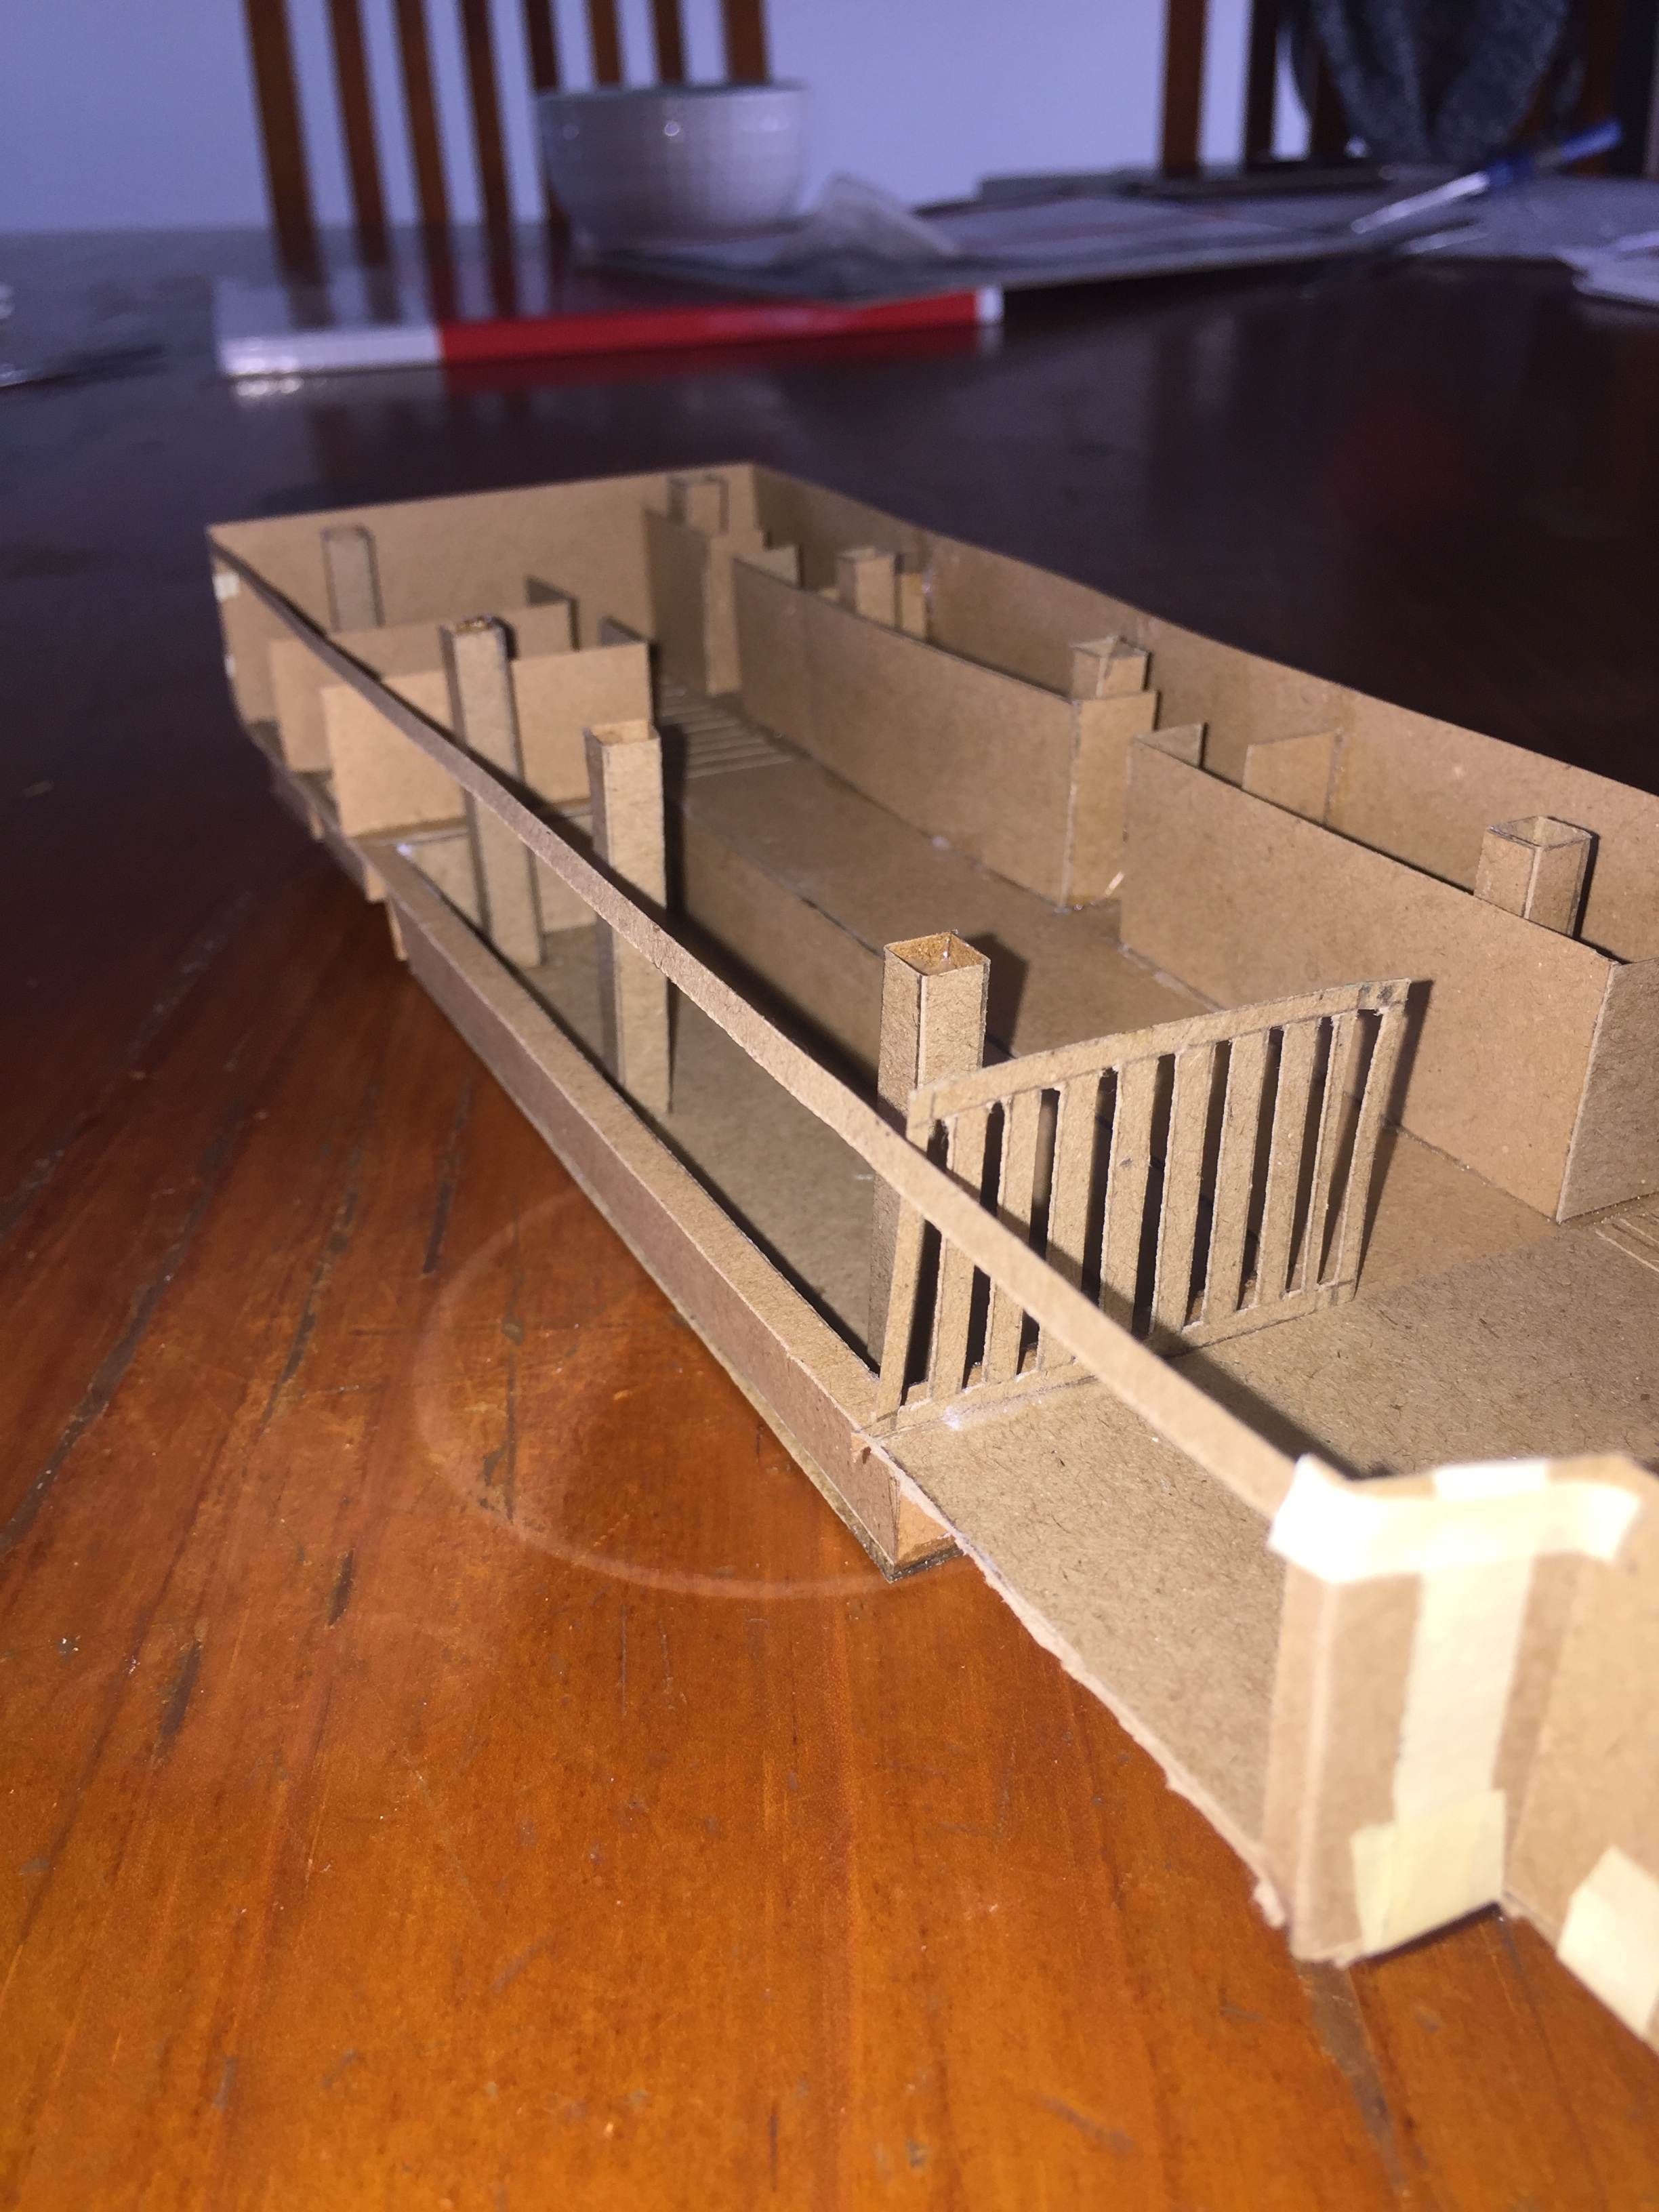
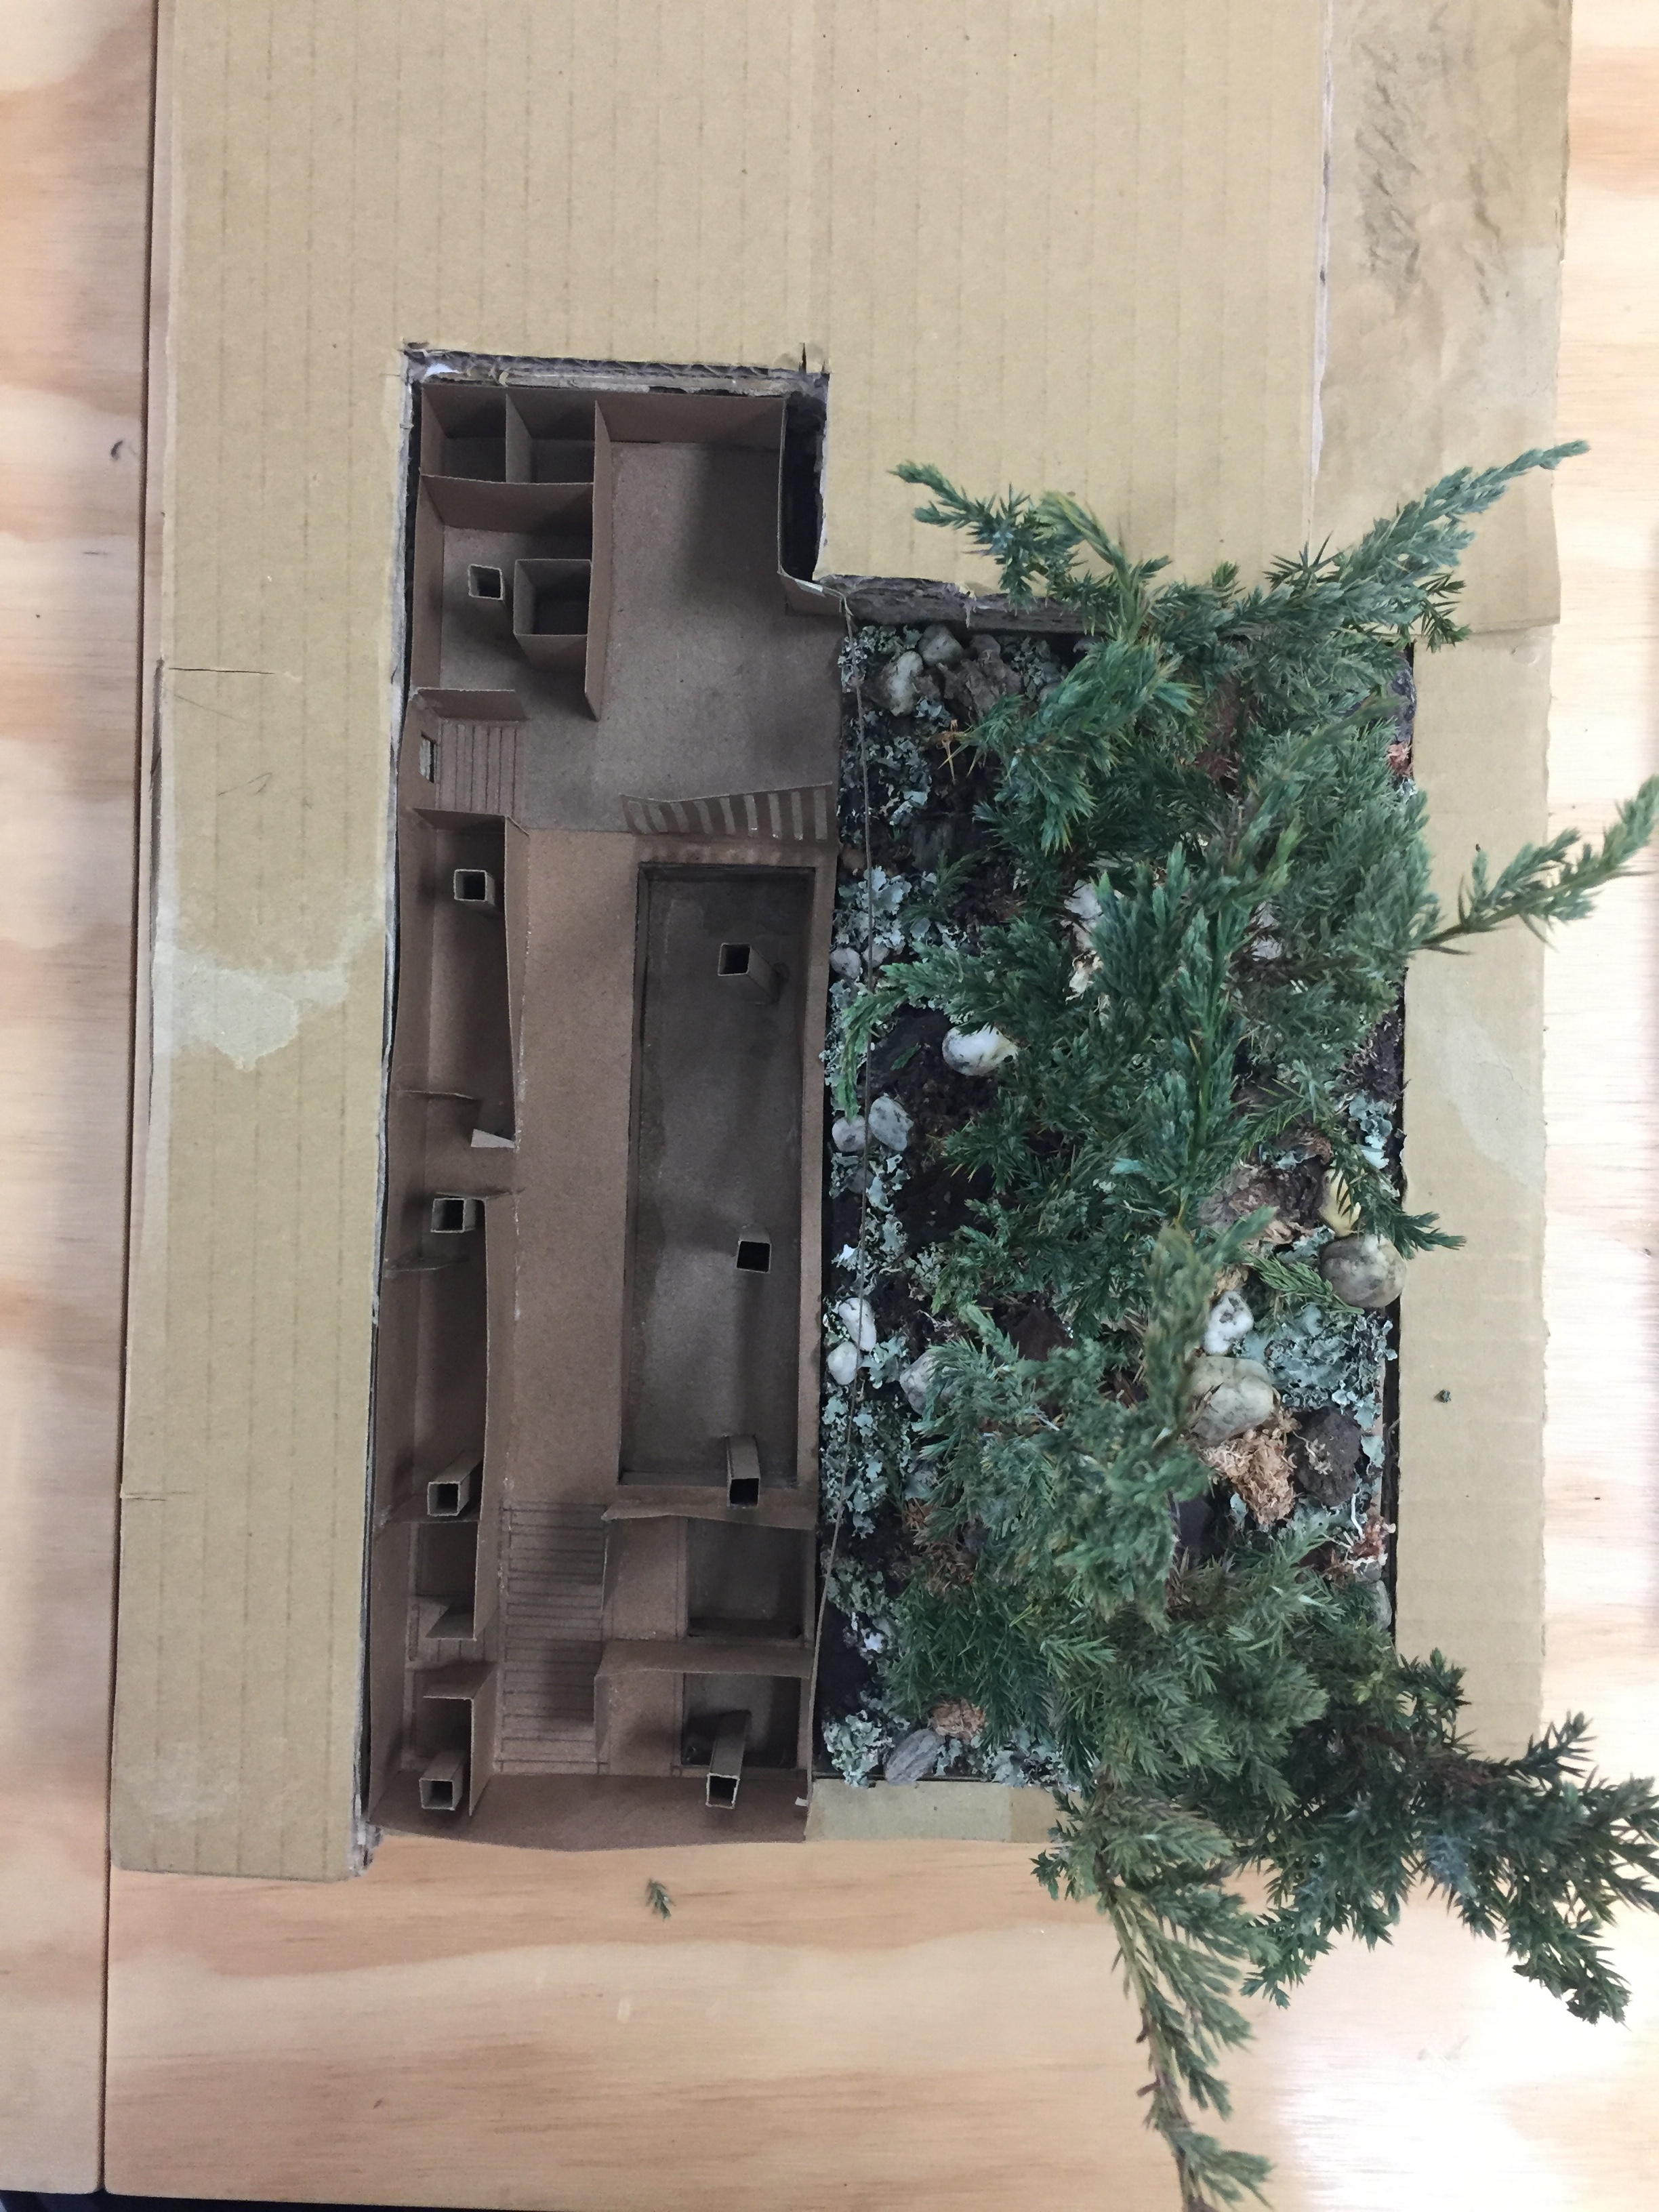
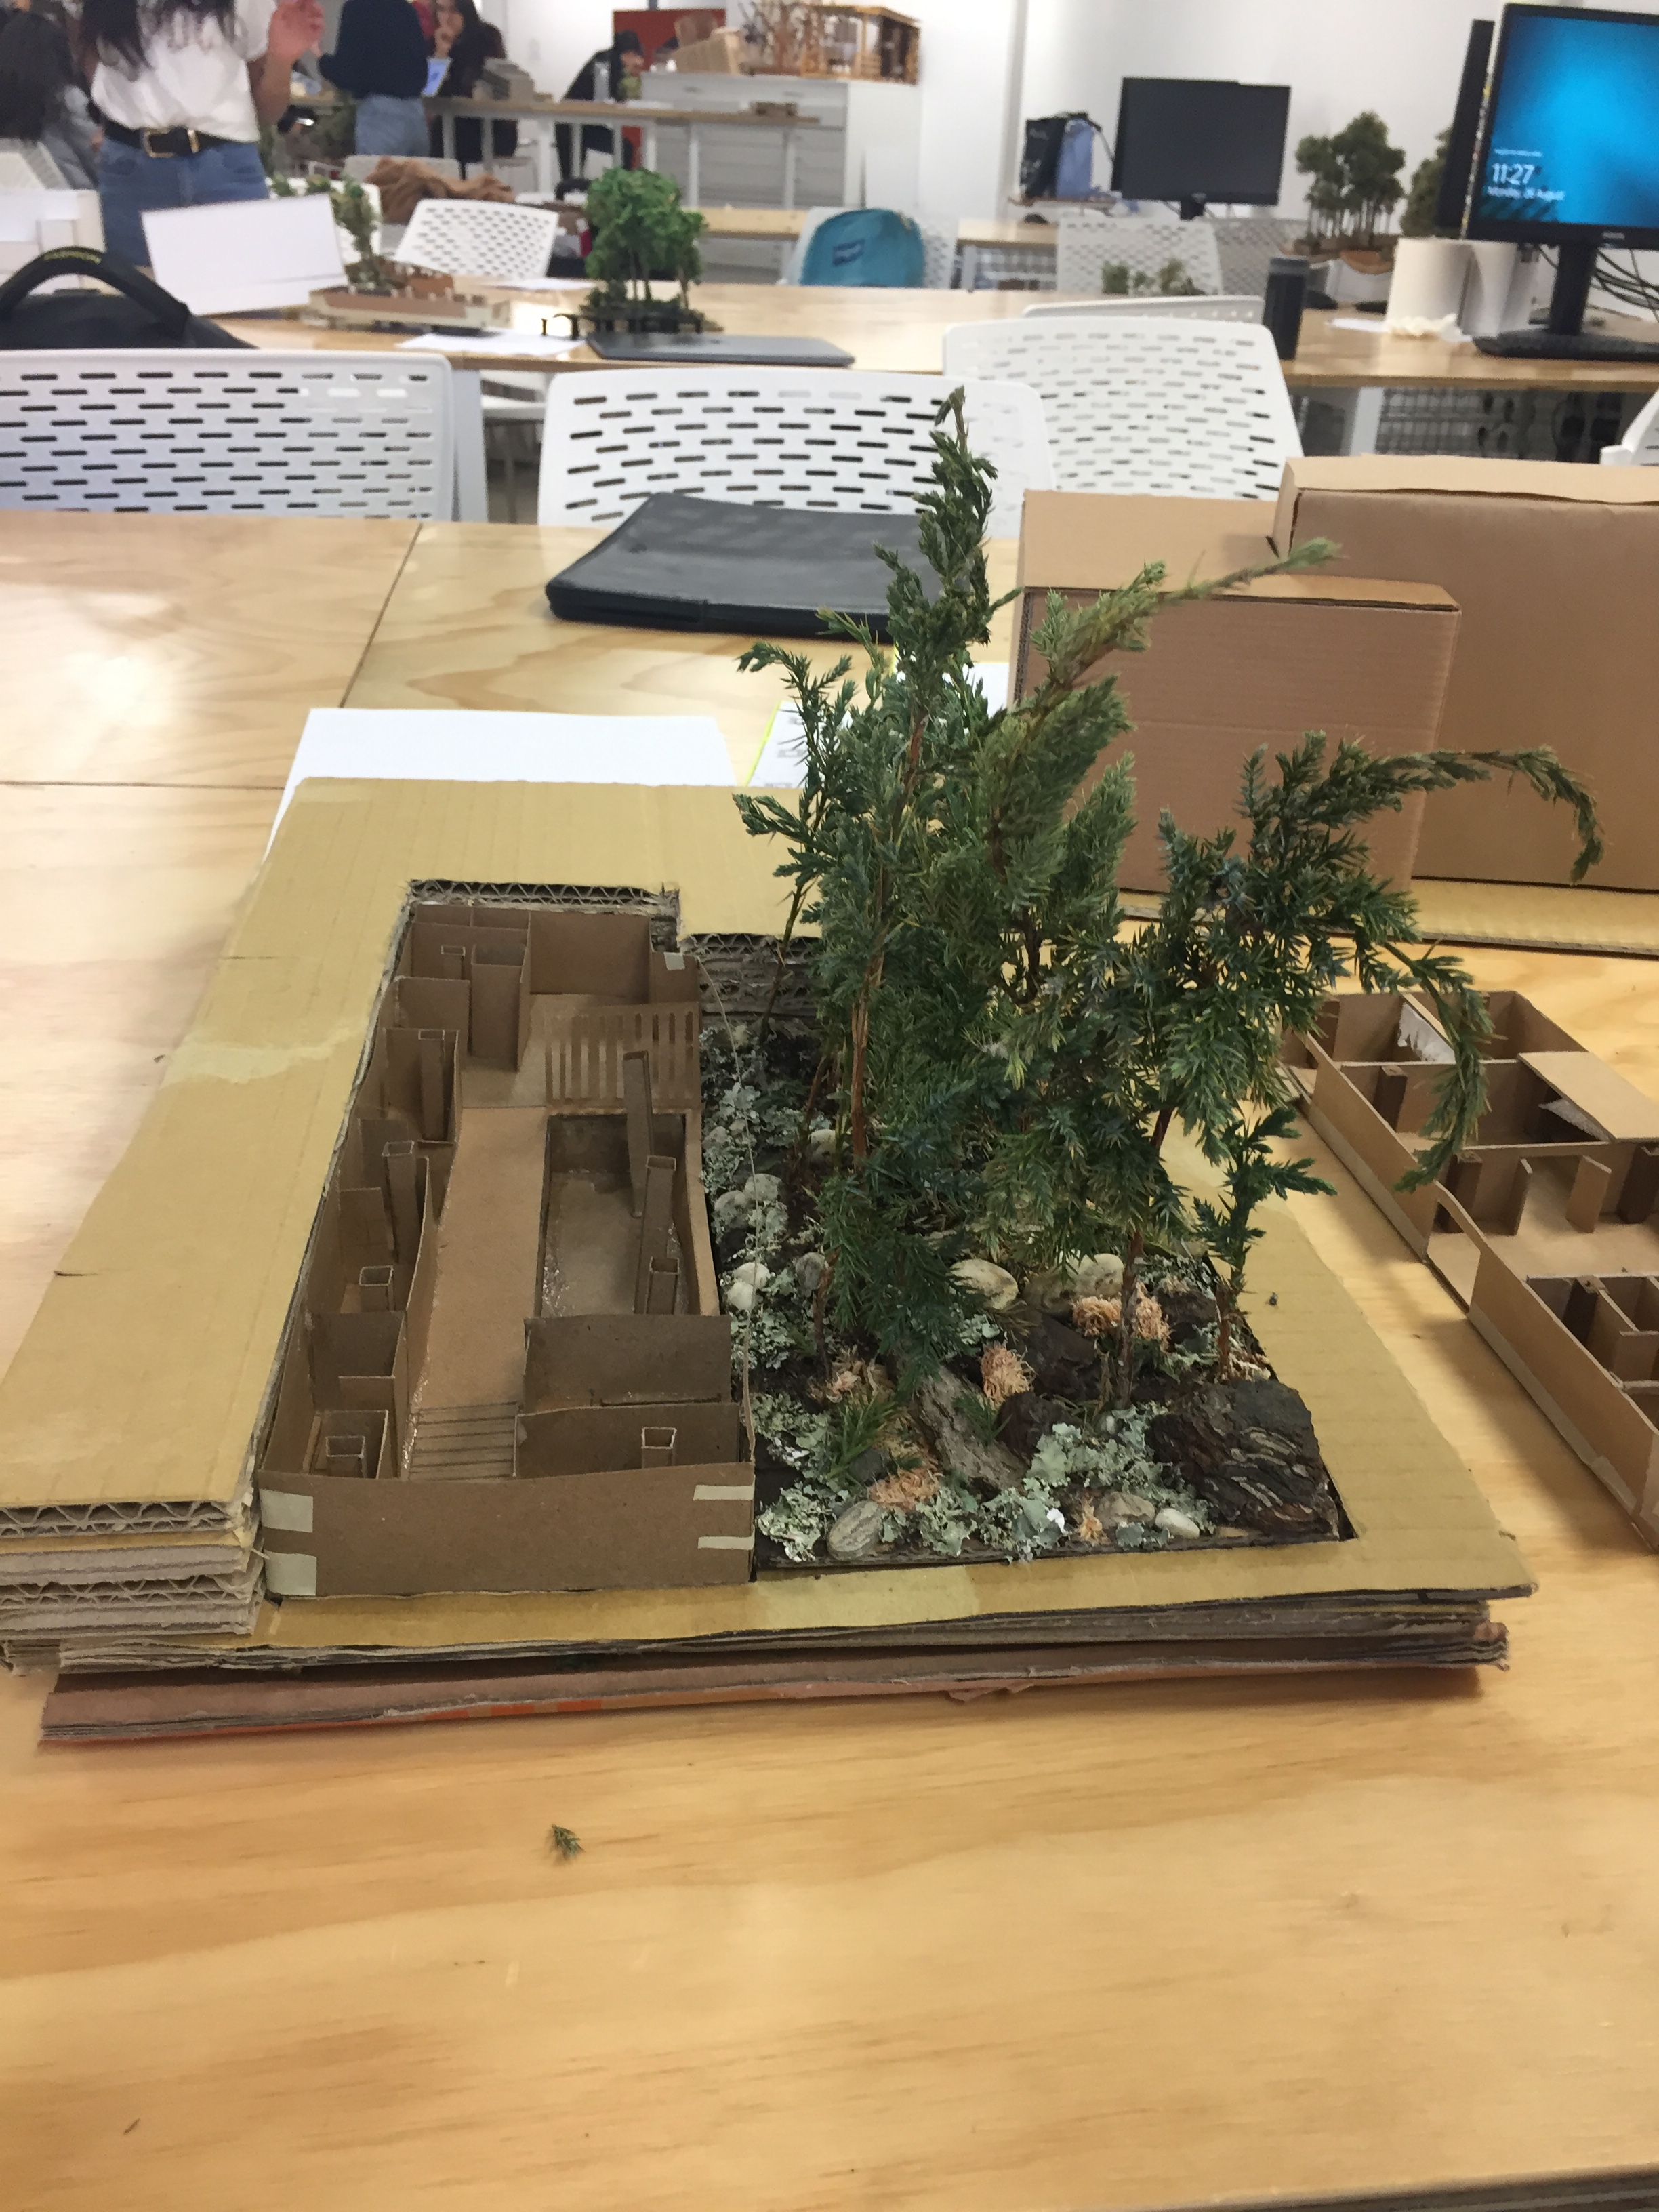
The images above show my second draft model that I will be using for the formative assessment. I have tried to take a modern approach on the Japanese bathhouse style. The large open spaces and clean straight lines create a simple floor plan. With the use of natural materials such as stone and timbers as well as the added range of indoor plants the space starts mimic the colours and feelings brought by the pocket forest outdoors. A main goal of mine was to make the interior feel like an exterior. I’m looking forward to continue expanding on this idea.
Maori Principles:
The main Maori principle I have focused on is Kaitiakitanga. This is because enhancing the biodiversity of the site has been a goal of mine throughout my design process. Researching types of native trees that bring native birds and insects to the the space has been something that I have looked into a lot over the last 6 weeks. I have also researched a lot about both indoor and outdoor plants that offer natural healing benefits. Through this research, plants I am looking into using are kowahi, nikau palm and puriri trees outdoors and a range of indoor plants including english ivy, snake plant and aloe vera. Outdoors, bird species such as tui and silver eye will be attracted to the yellow flowers of the kowhai and nikau palm. The kowhai, puriri and aloe vera all offer natural healing benefits while the range of indoor plants help to clean the air.
Week 7: Formative Presentation
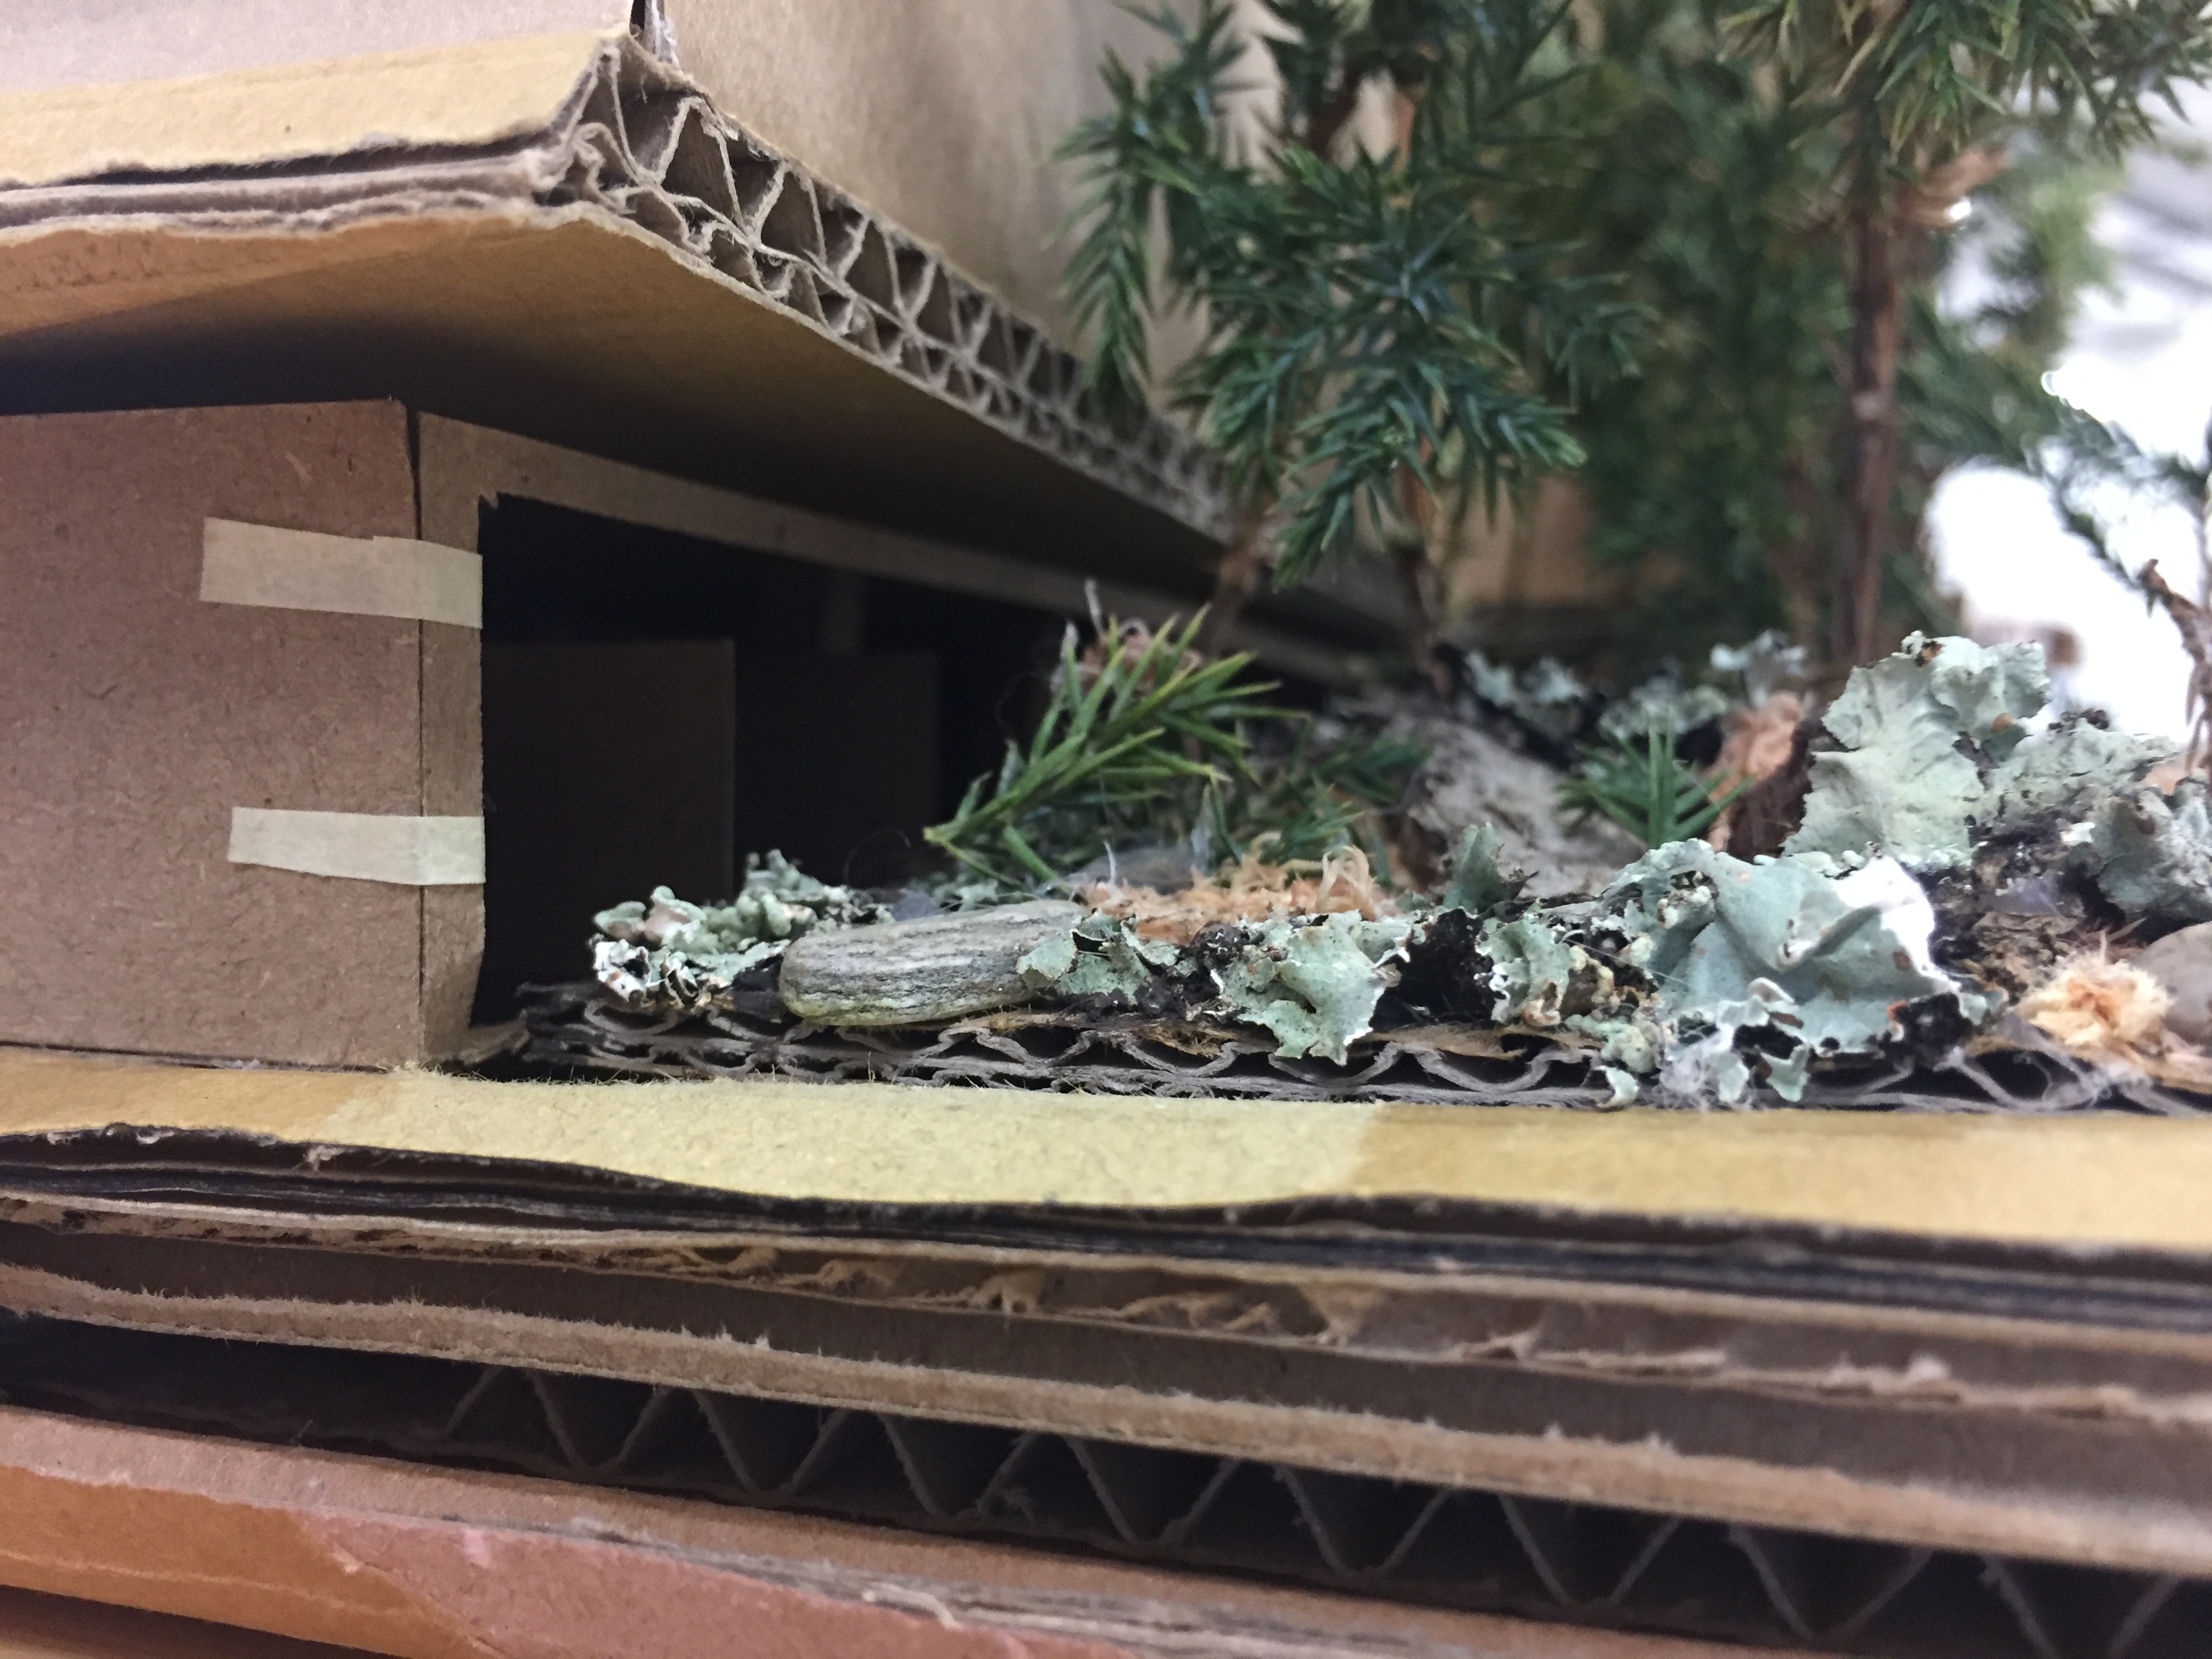
This week began with a ‘speed dating’ style of presentations. Each person in each group had two opportunities to present their design ideas so far. Below are images of the model that I presented this morning.

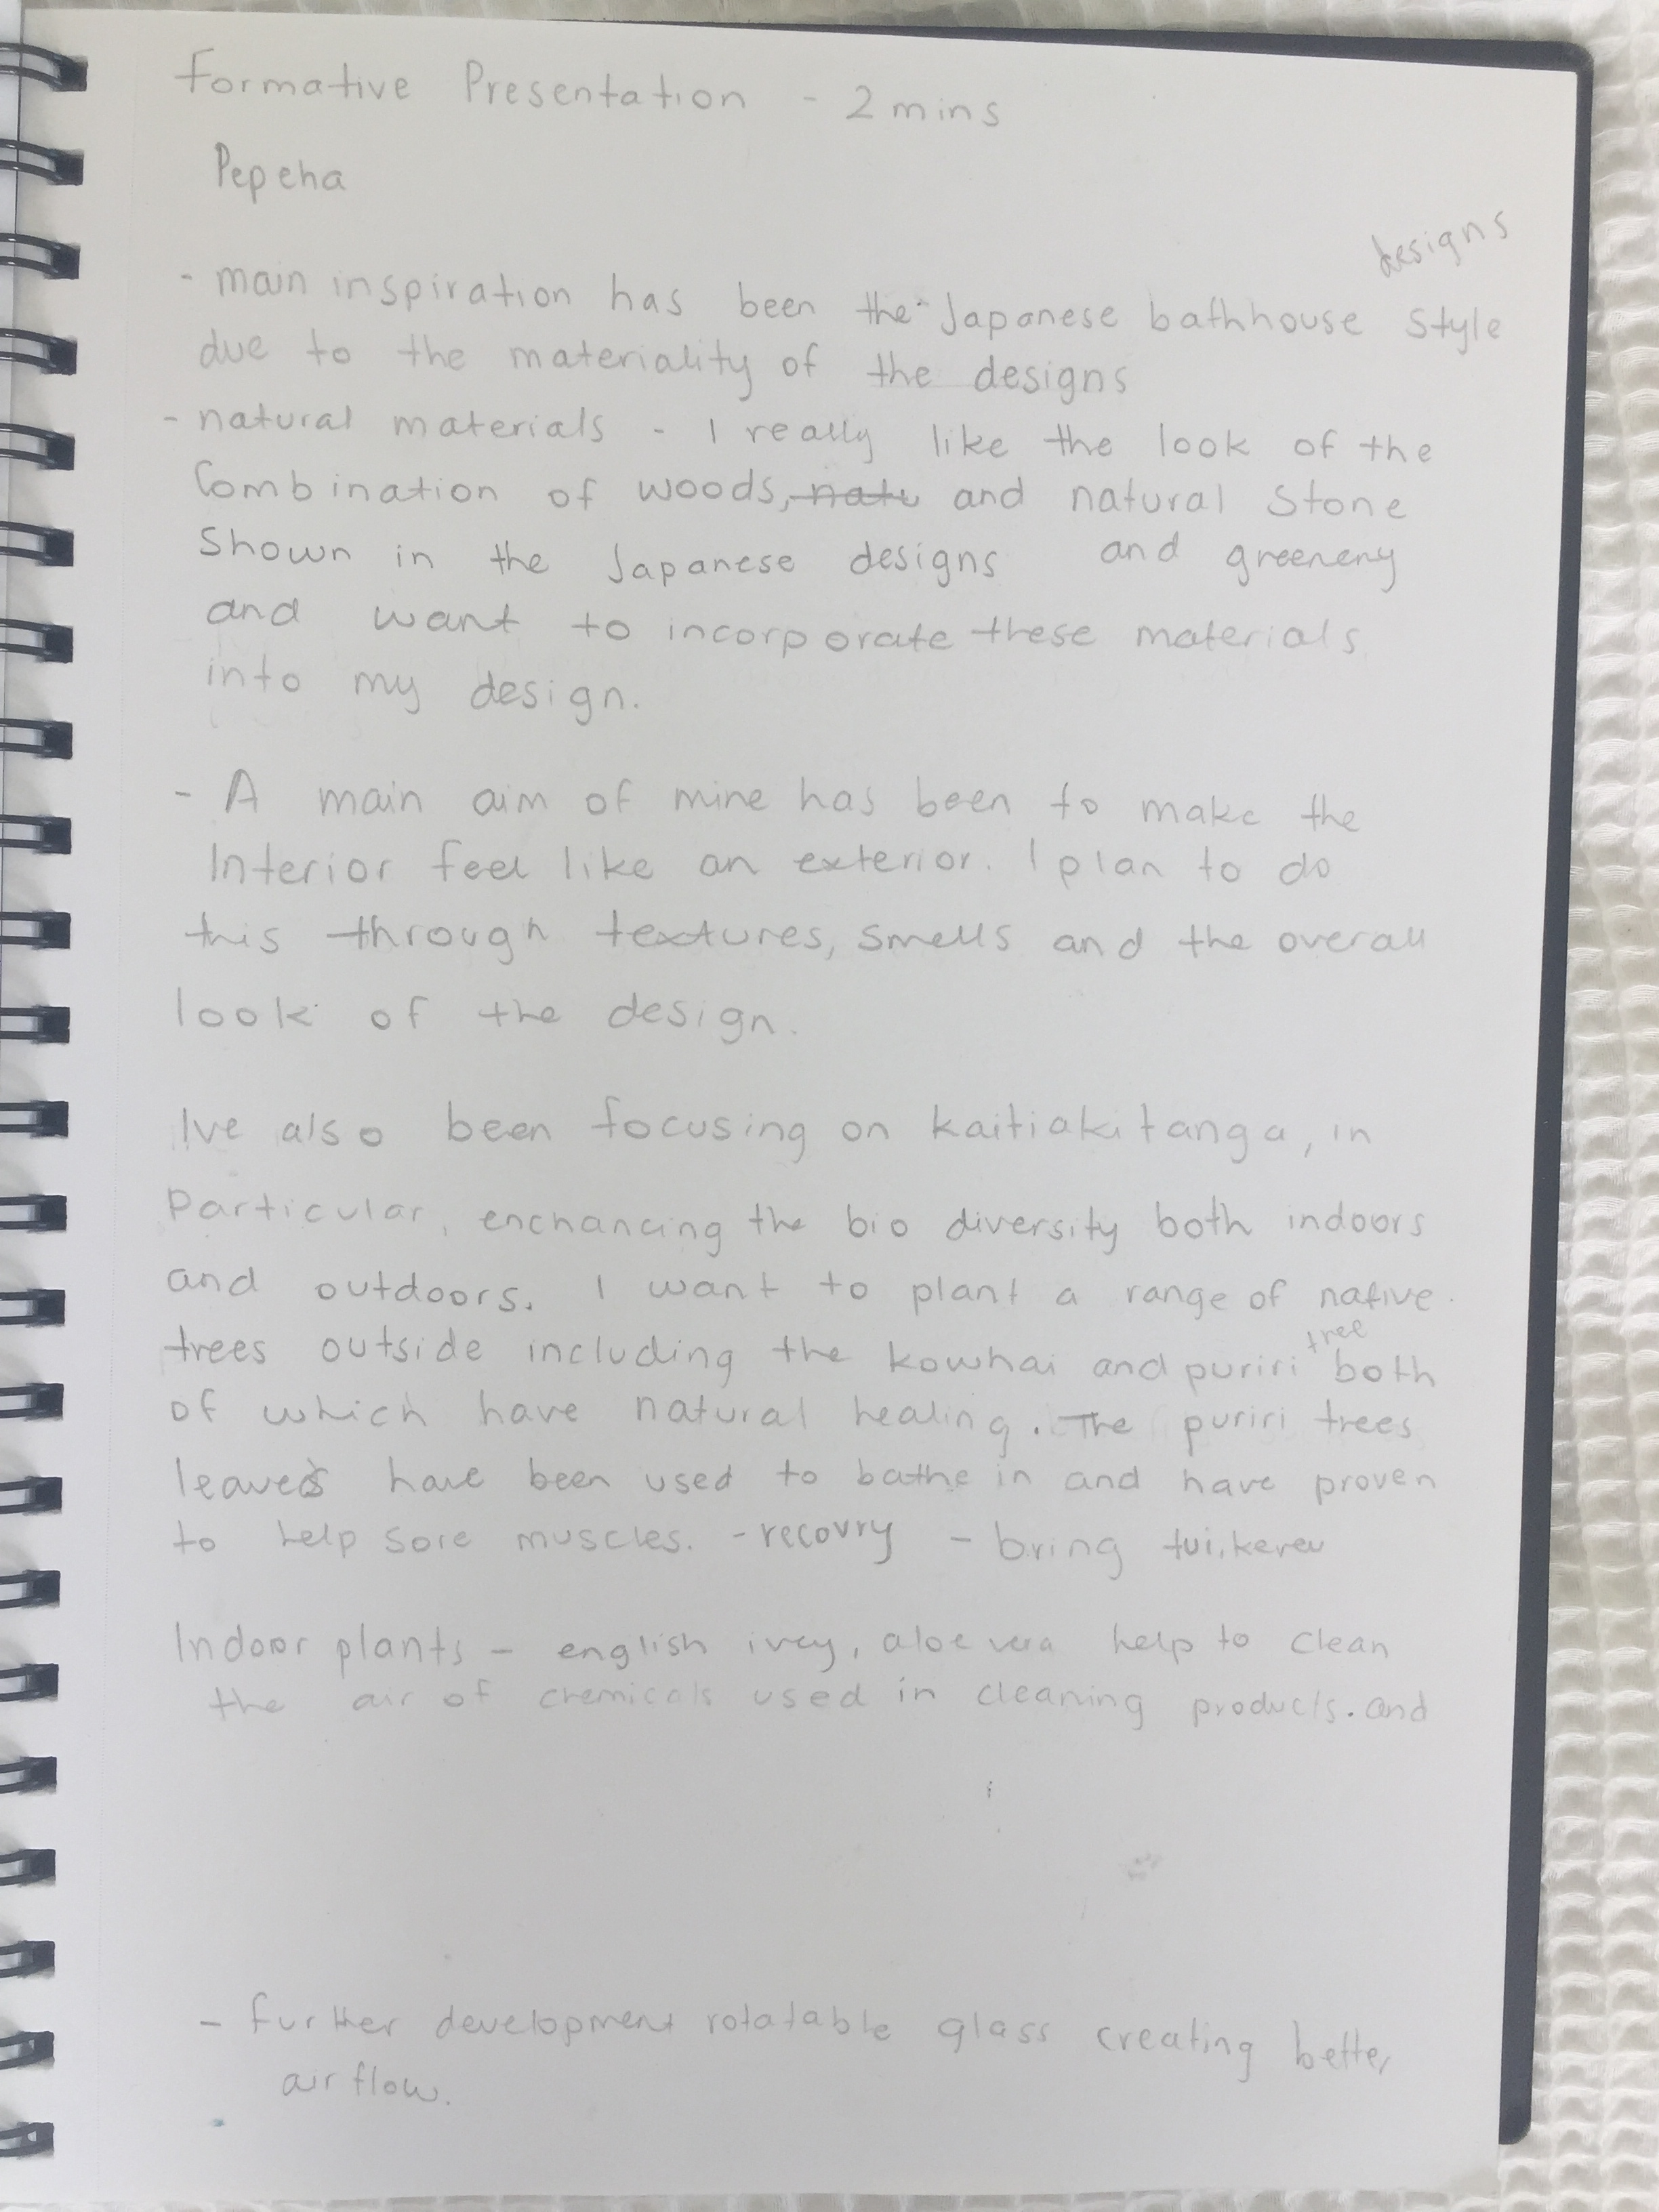
Above are some rough notes that I wanted to speak about during my two minute presentations. I’m hoping that I got most of my main points across throughout the time I had to speak.
I was only able to get small amounts of feedback from each presentation but one thing that was said was that I was able to get a lot of information across in the short time I had.
Mid Semester Break
Over the break I worked on drawing up some simple plans and sections of my bathhouse design.
Right Elevation 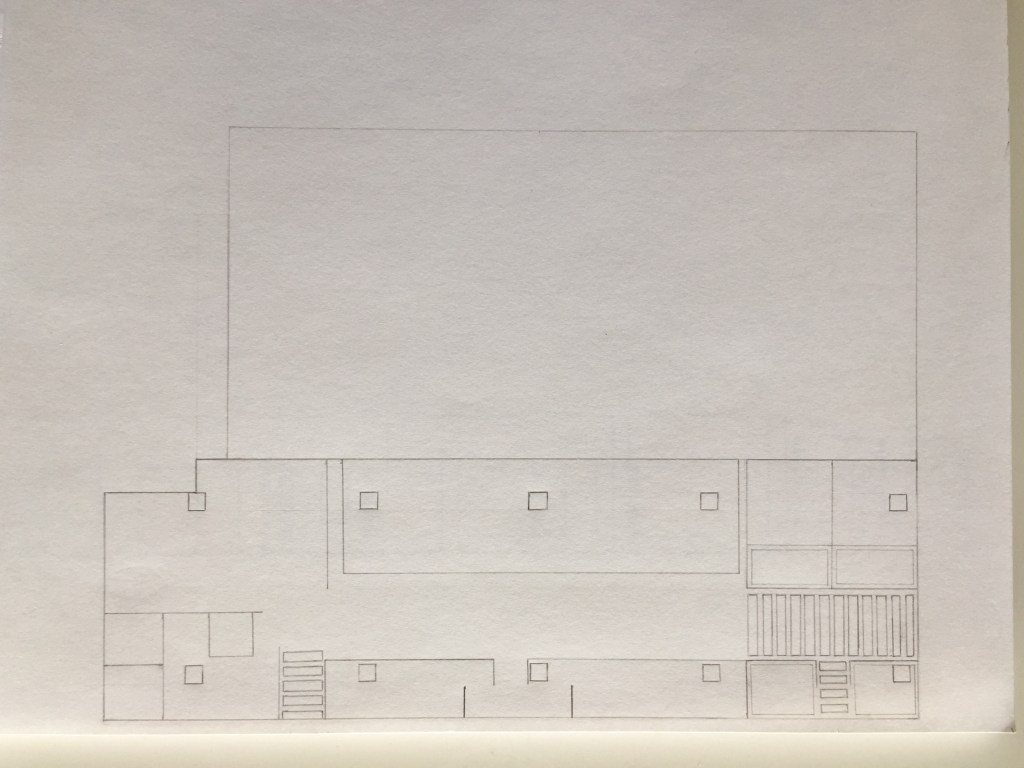
Plan View 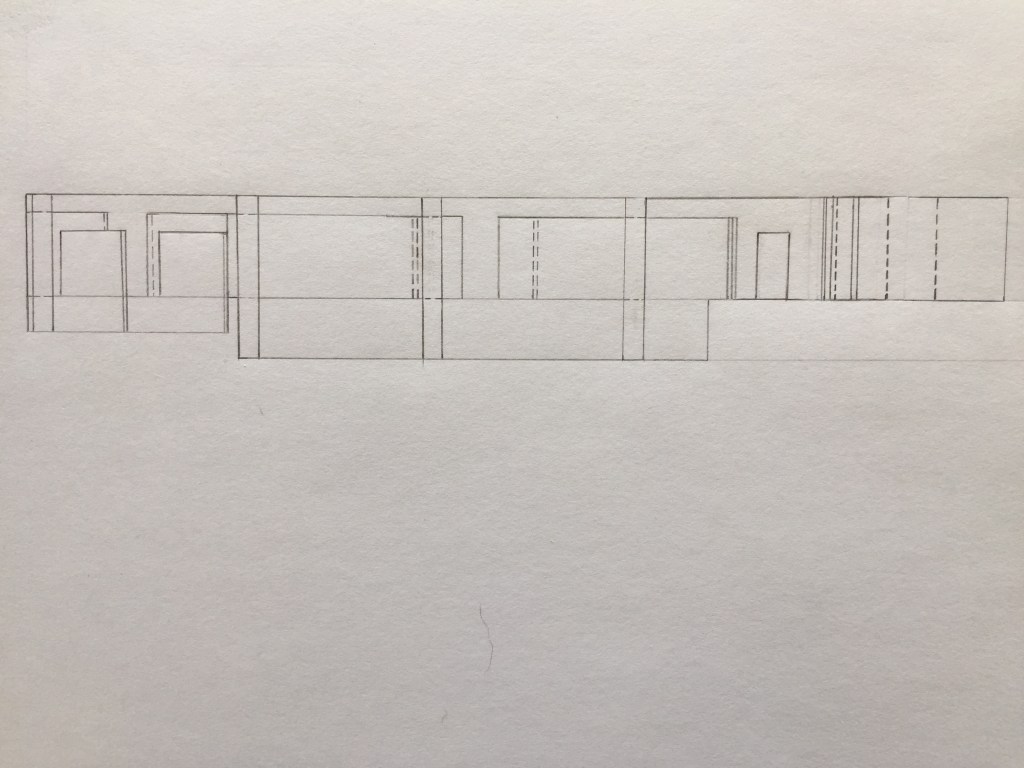
Front Elevation
Native New Zealand plants with medicinal uses:
After reading through the feedback I received from my formative presentation I decided that I needed to do some further research into the shrubbery I was going to plant in my pocket forest. Below are my chosen plants as well as the reasons why.
Horopito is an evergreen shrub or small tree with red blotched yellow-green leaves. The leaves of this plant are useful for both culinary and medicinal purposes. Maori traditionally used the leaves to treat skin diseases and disorders. Moderns science has since confirmed that the plant is effective when it comes to healing. The greater the red margin of the leaf the more effective it is. The plant is also astringent (contracts body tissues and reduces bleeding) and antiseptic so it’s still used today. This plant would be placed outdoors amoungst the pocket forest.

Koromiko is typically grown for its mauve-tinged white flowers that appear on stems up to 15cm long. In rongoa maori it is commonly used steeped in water, creating a tea that helps treat dysentery and other gastrointestinal problems. During World War II, the dried leaves were sent to New Zealand troops to treat dysentery. The fresh leaved were used as a poultice for wounds, ulcers and venereal ulcers.
Traditional Māori healers used manuka potions to treat wounds, skin disorders, eye and mouth problems, muscle inflammation, rheumatism, fevers, burns and a host of other complaints. When European settlers first arrived in New Zealand in the 1800s, they often drank a tea made from the infused leaves of the manuka bush.
https://www.stuff.co.nz/life-style/homed/garden/102945111/5-healing-native-herbs–how-to-grow-them
Week 8: Practice Plans/Sections + Final Forest
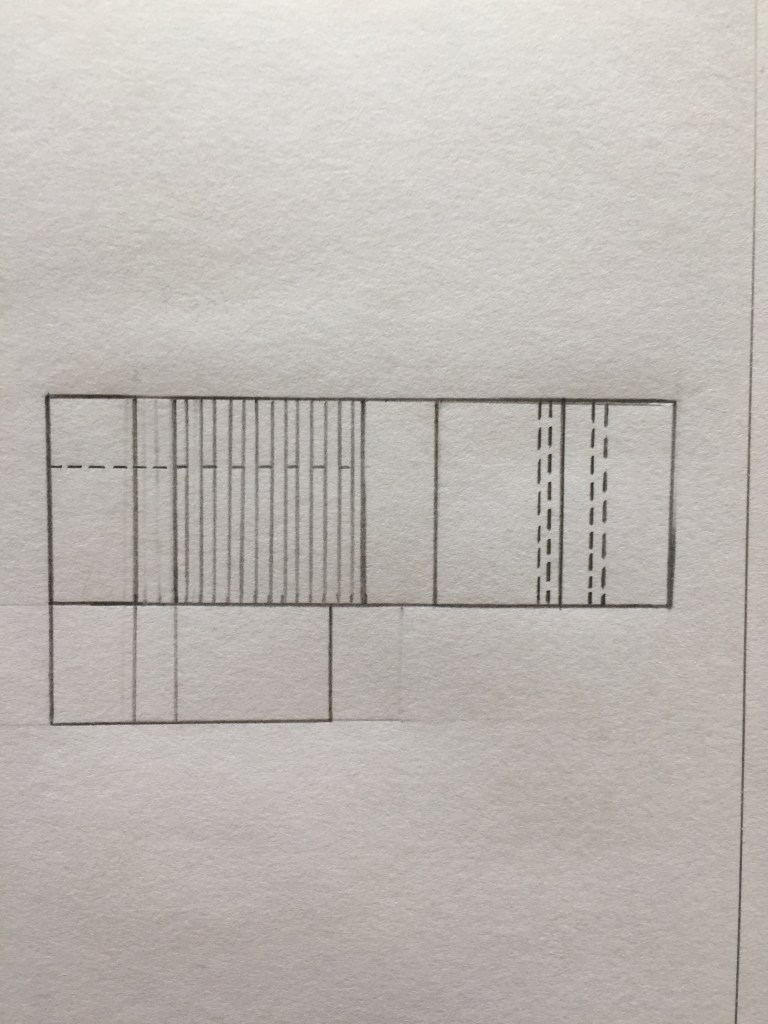
Progress of my section drawing:

Front and right elevations of my design:

Plan Drawing Progress:
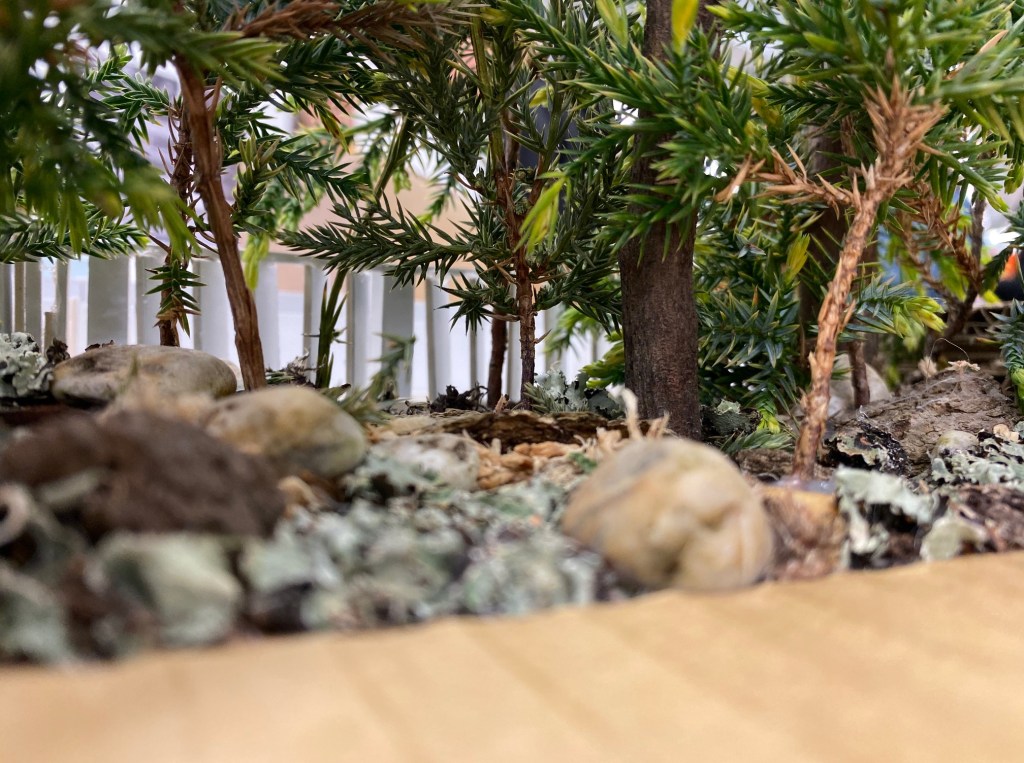
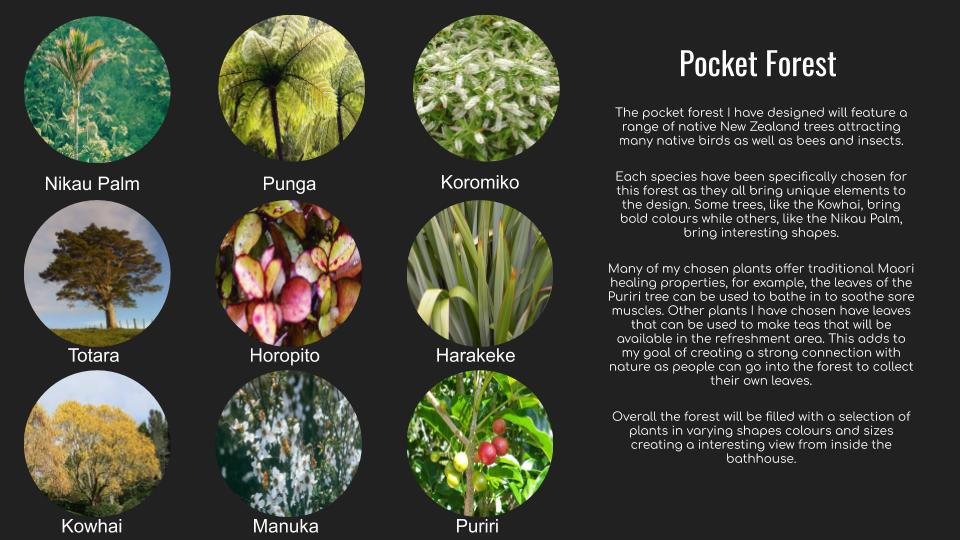
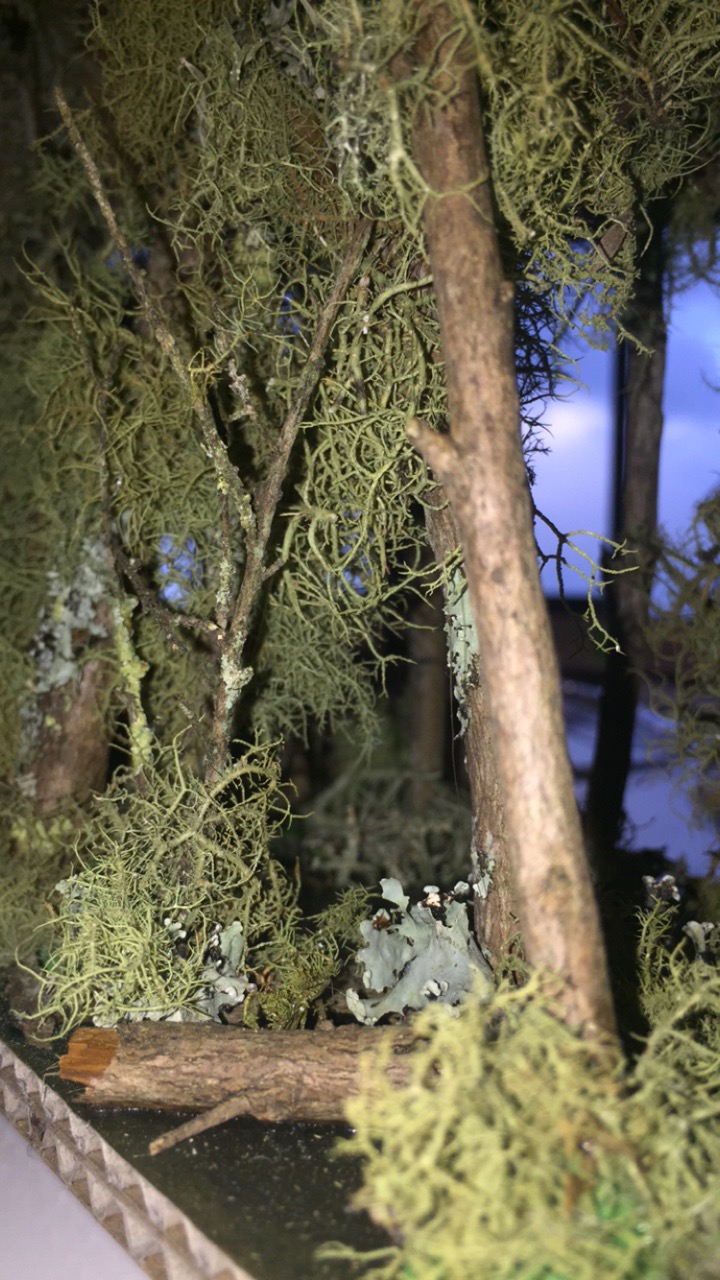
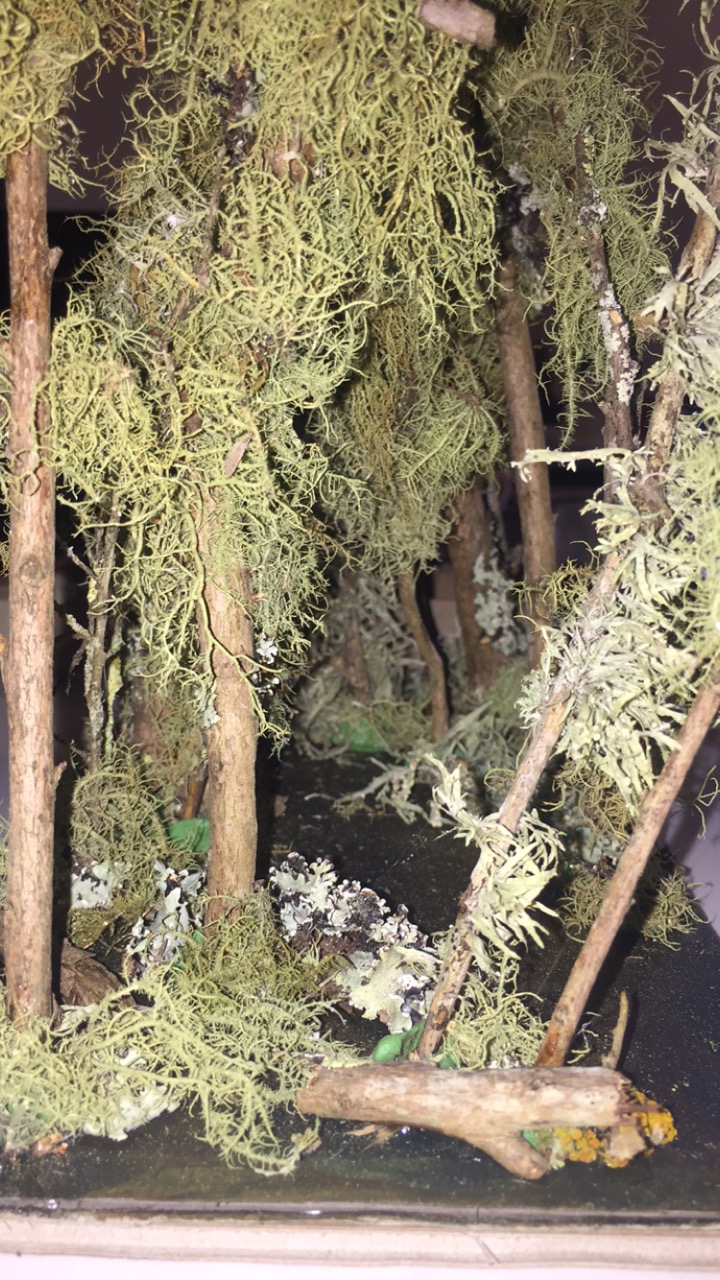
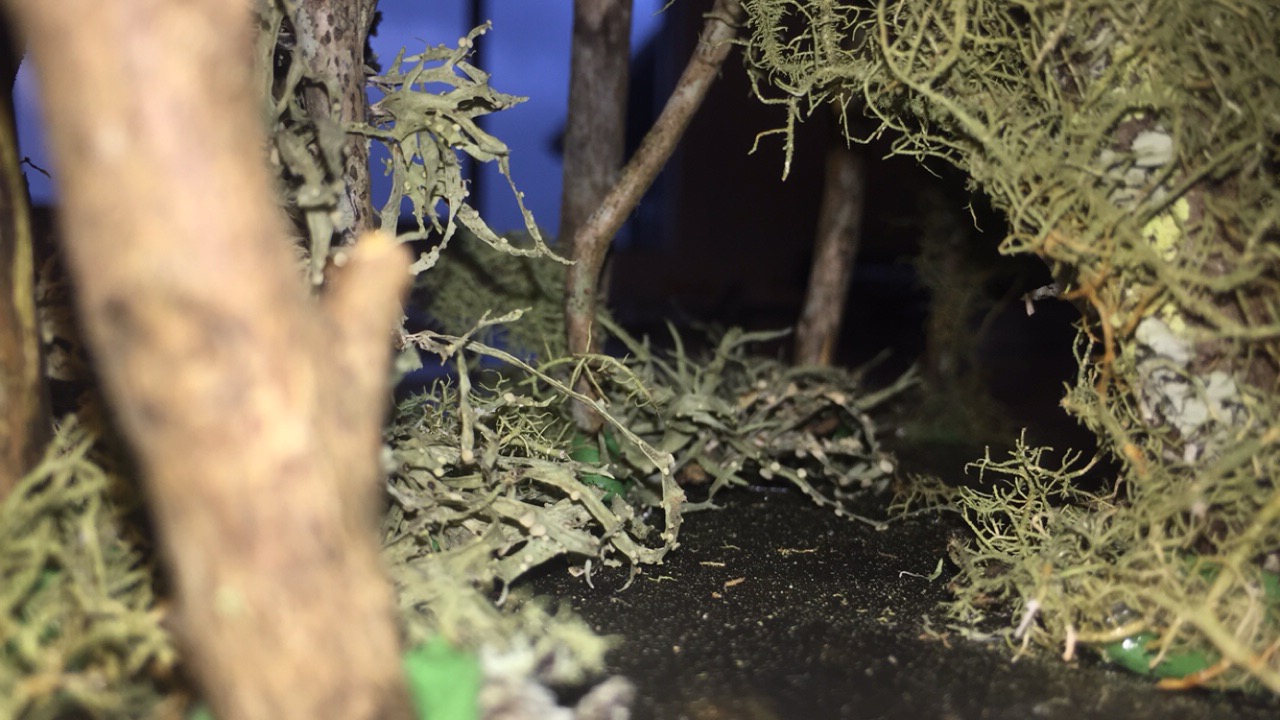
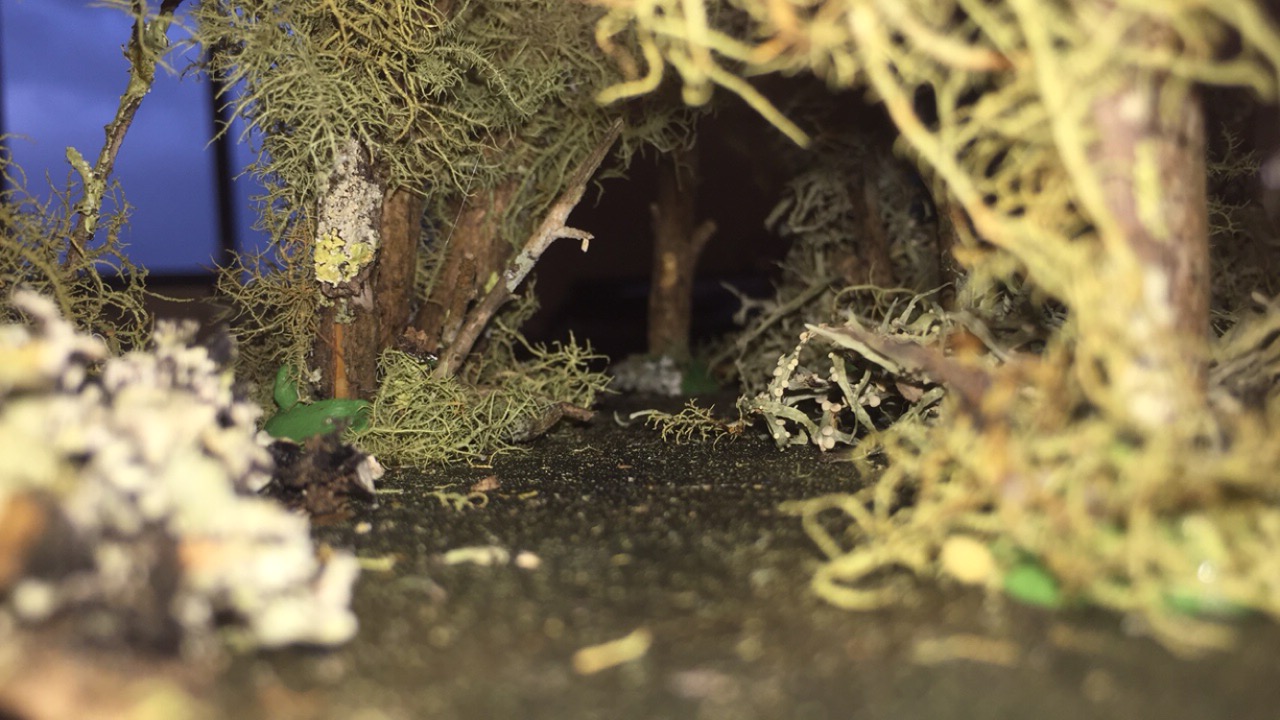
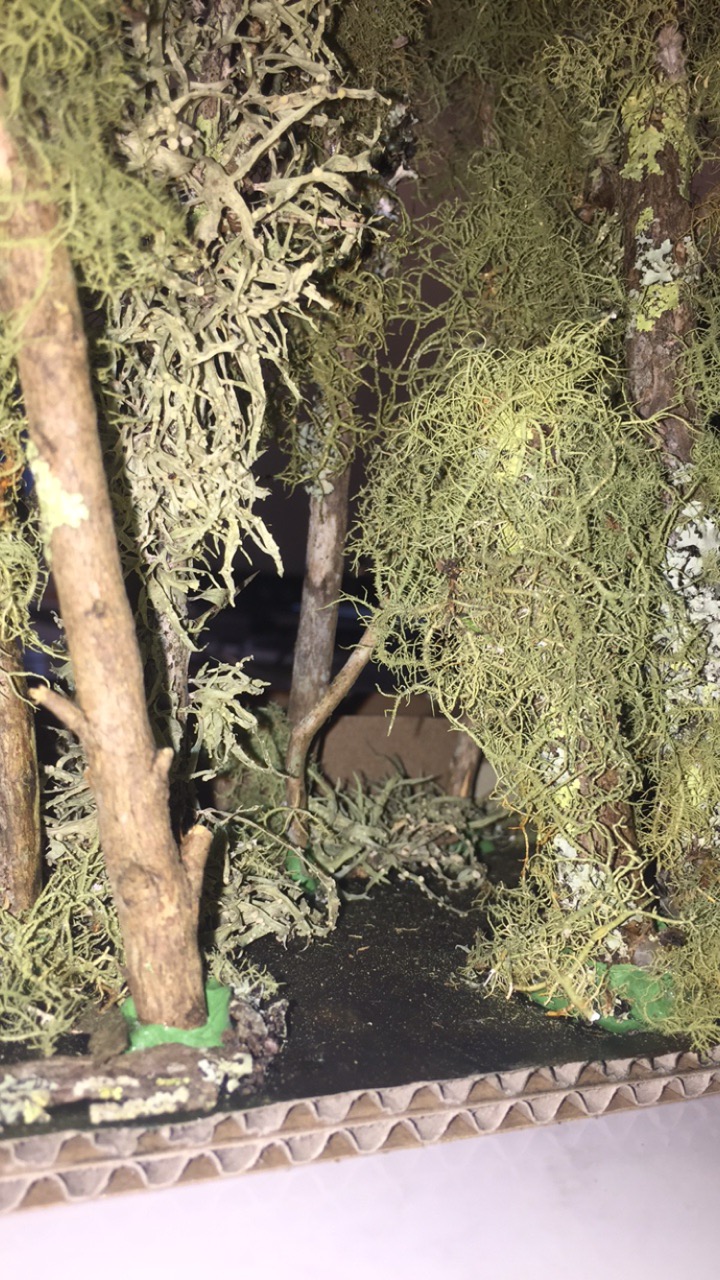
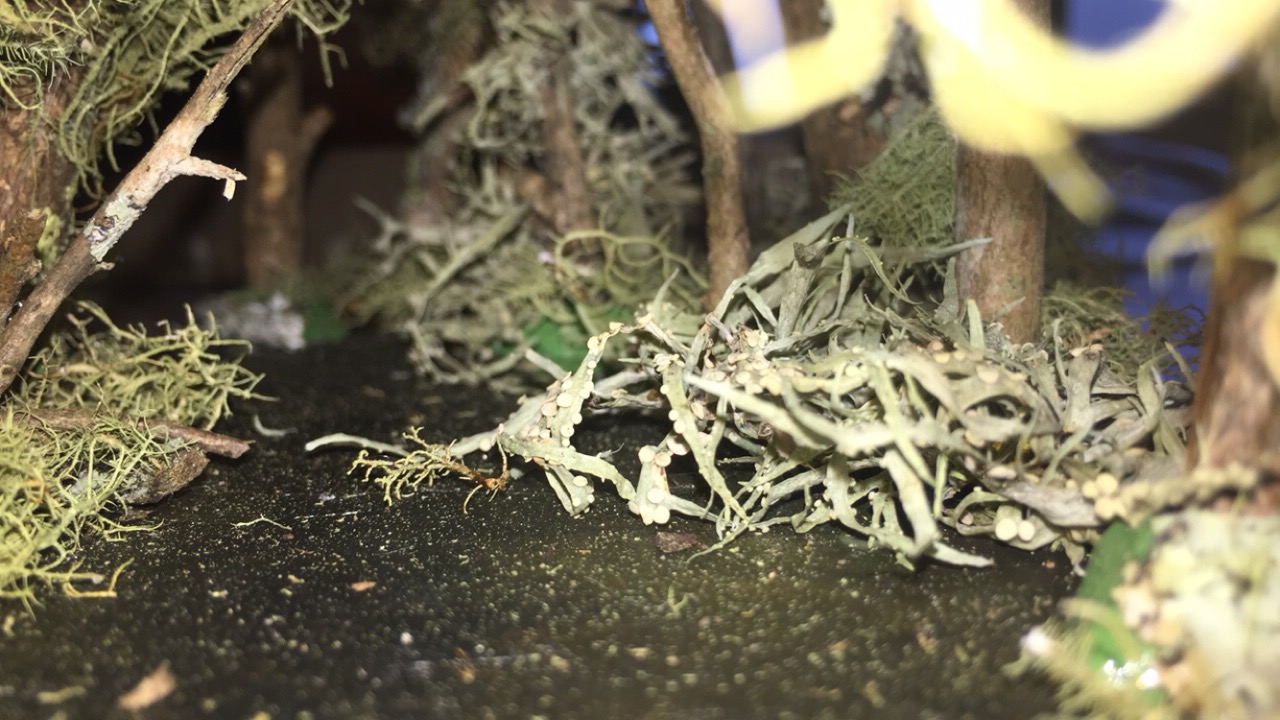
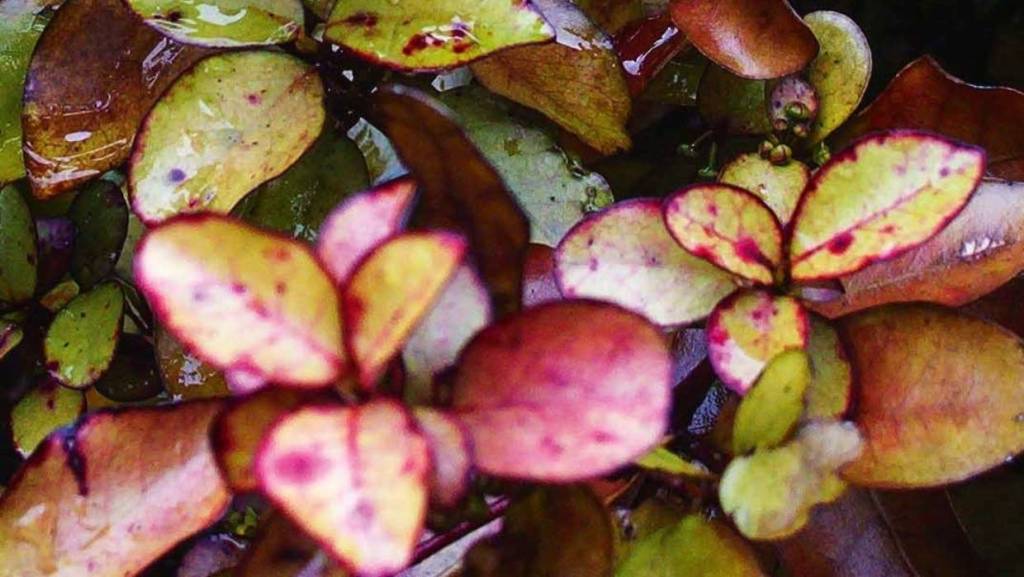
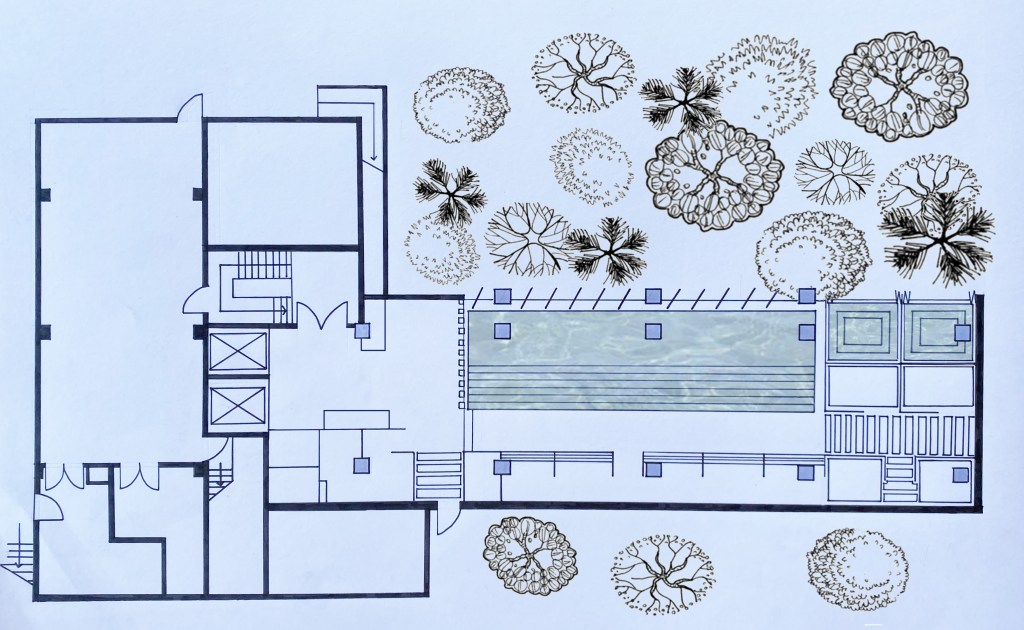
Final Pocket Forest
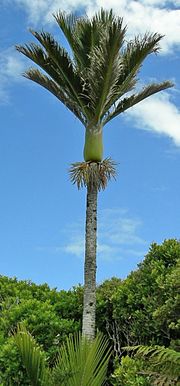
Nikau Palm 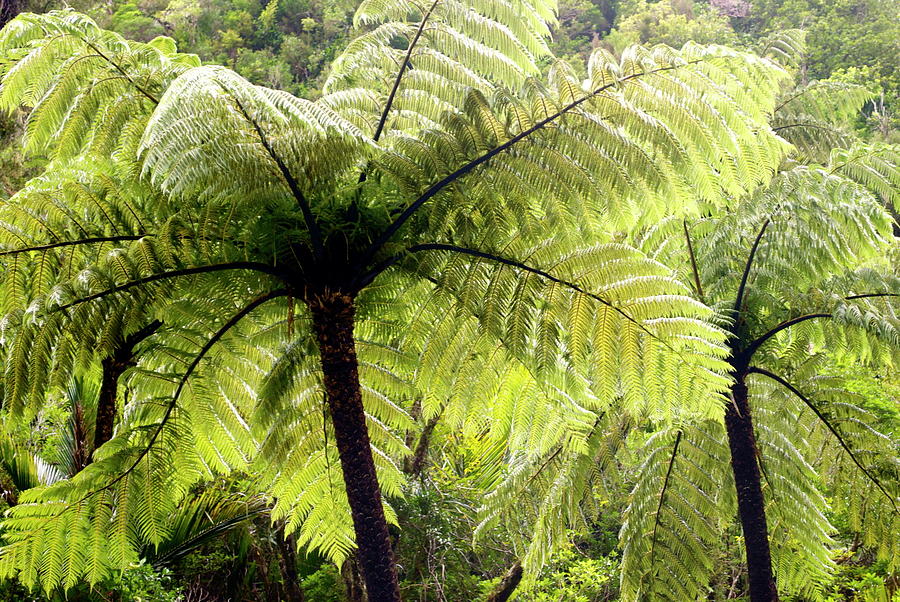
Punga Tree 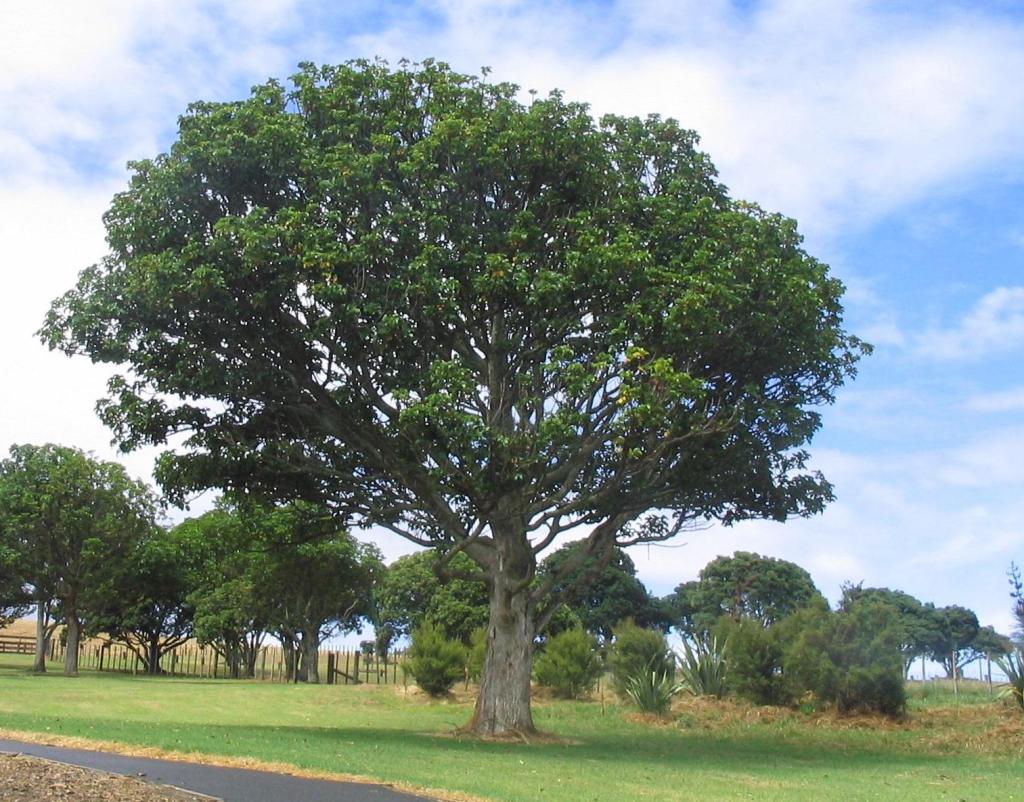
Puriri Tree 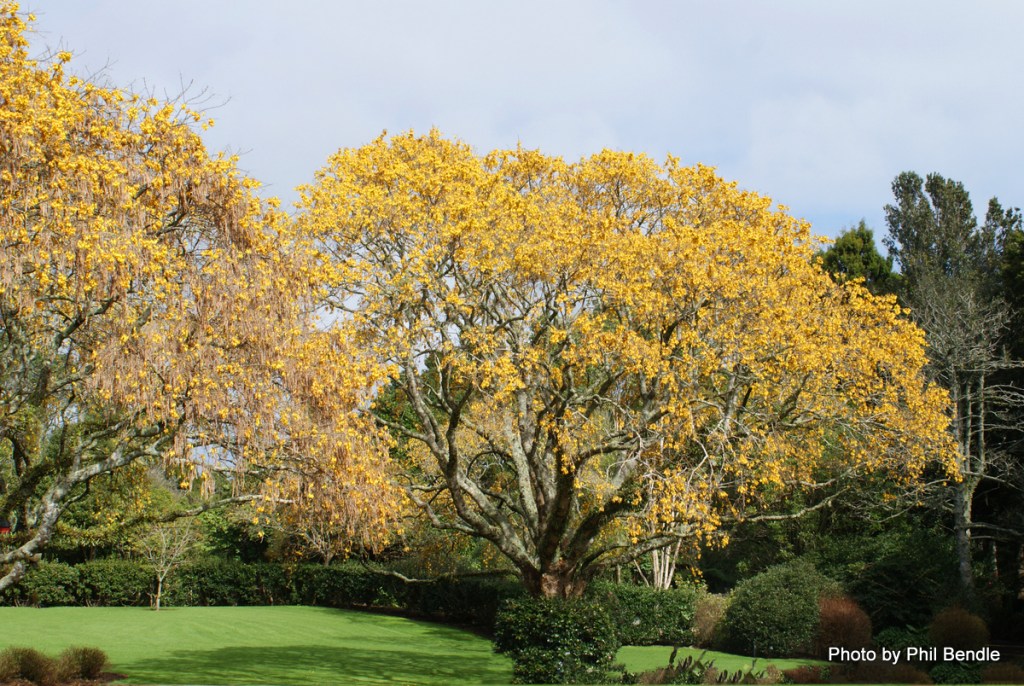
Kowhai Tree 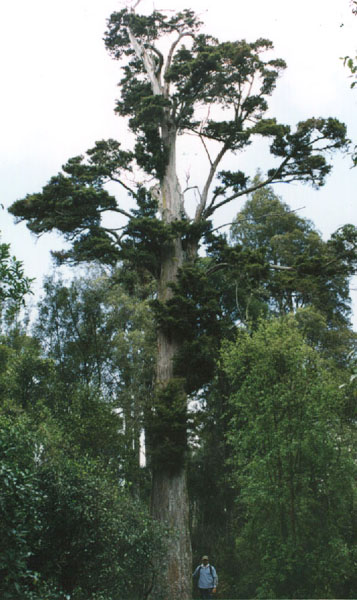
Totara Tree
Above are a selection of native New Zealand trees that I am including in my final pocket forest design. After a lot of research over the last weeks I have decided that these trees are the best fit for the space. The range of trees I have chosen will create a forest with varying heights and shapes as well as pops of red, yellow and silver colours throughout the seasons. Both the Kowhai and Puriri tree often used for many natural healing remedies in the Maori culture. These remedies will be available inside the bathhouse.

Horopito 
Manuka 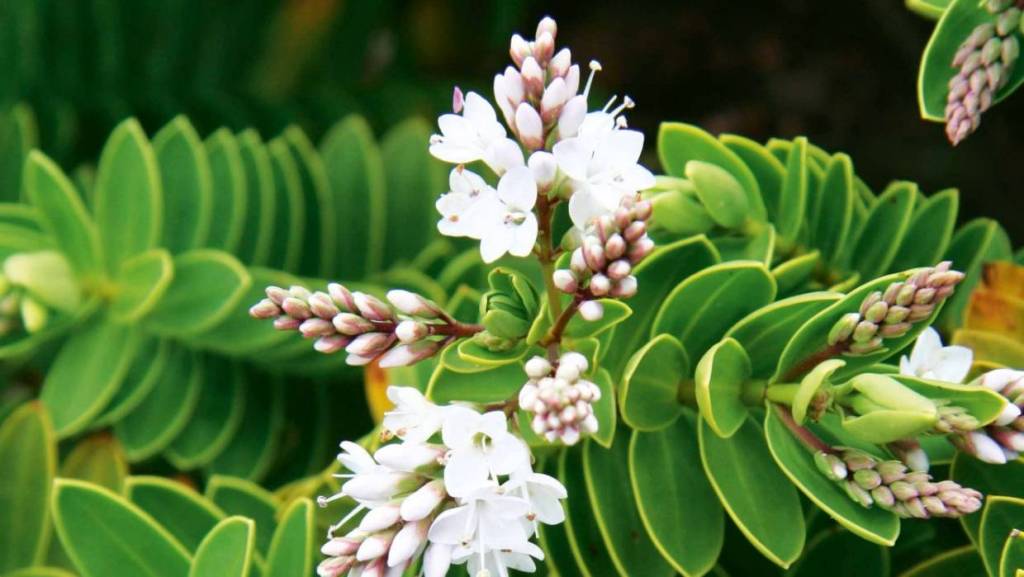
Koromiko 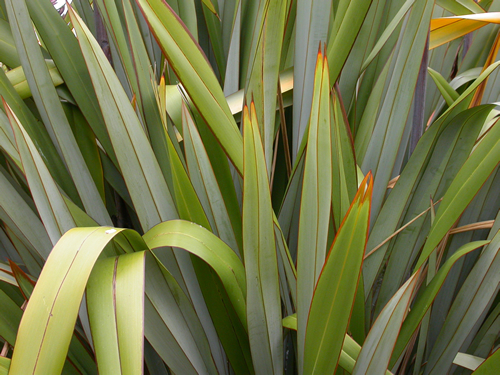
Harakeke
The three images above show the native shrubs/small growing plants that I have chosen for my pocket forest. Each of the plants have unique features such as flowers or colours. Horopito, manuka and koromiko all have the ability to be turned into teas which will be available within the bathhouse. Harakeke (flax) is commonly used in rongoa Maori and can also be weaved to create environmentally friendly plates and bowls to use.
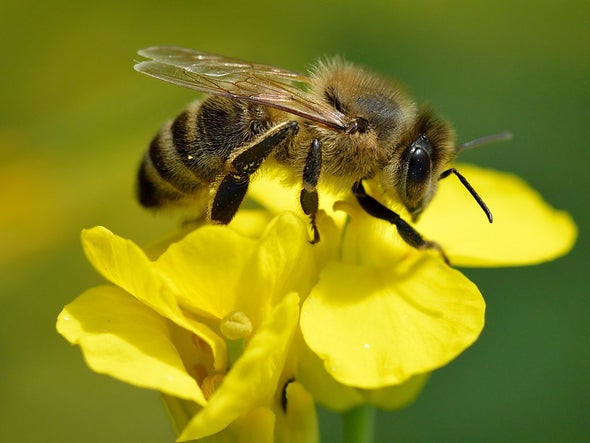
Bee 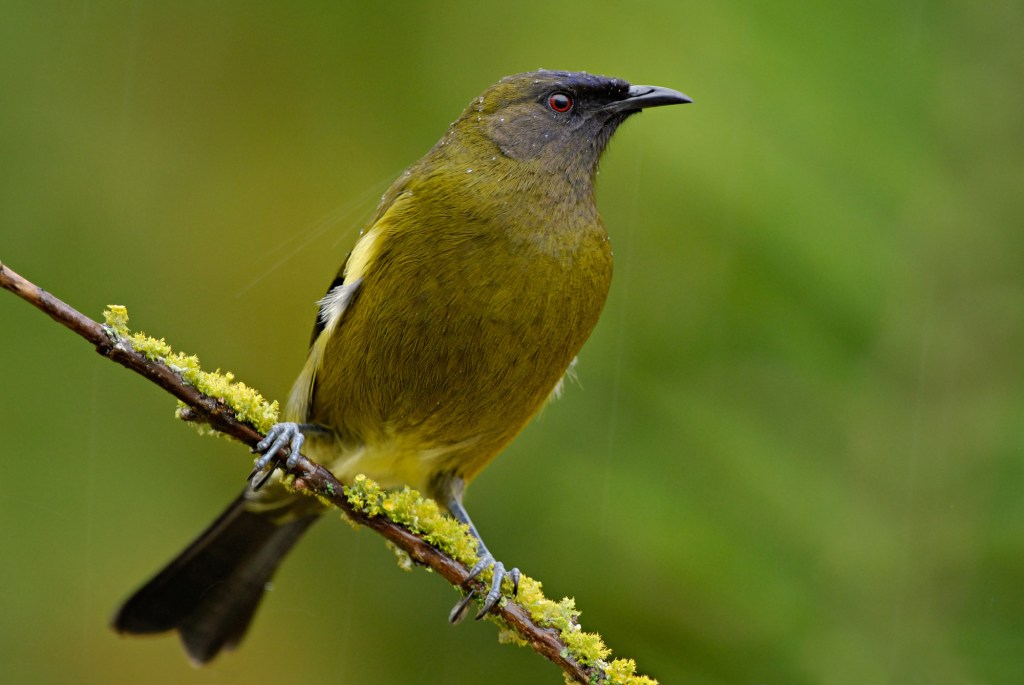
Bellbird 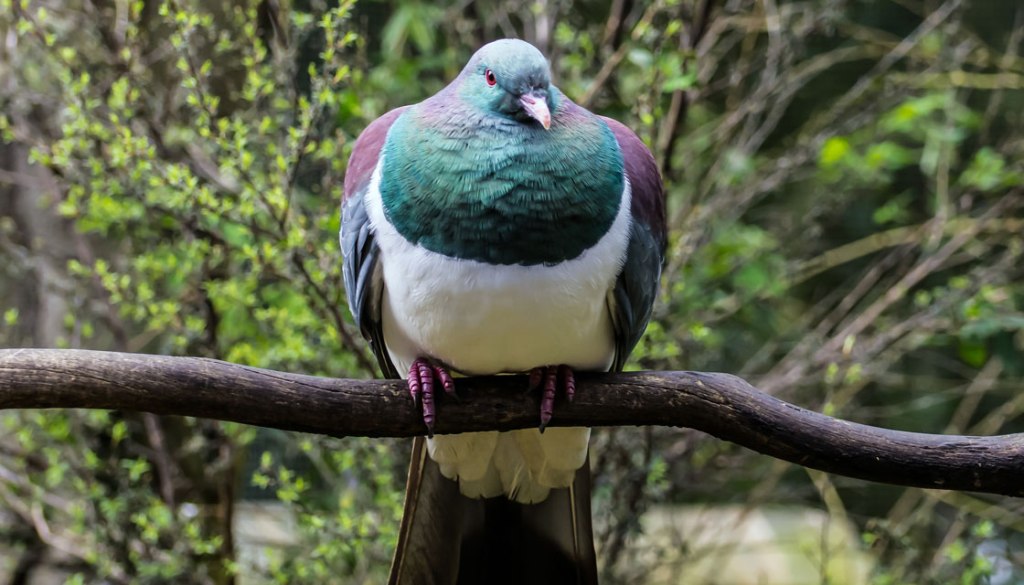
Kereru 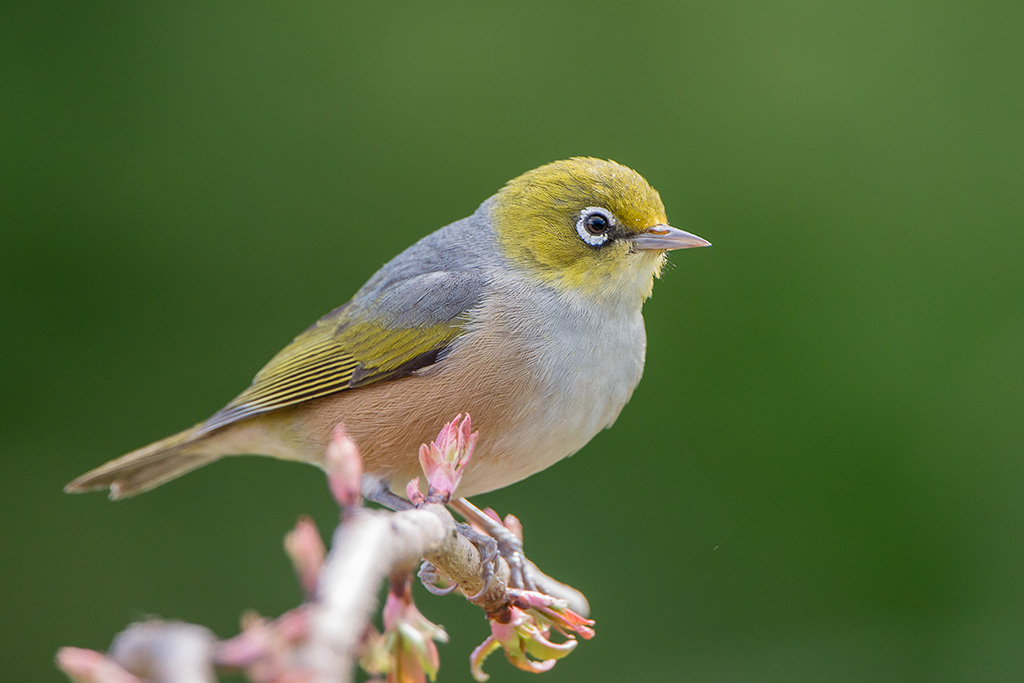
Silver Eye 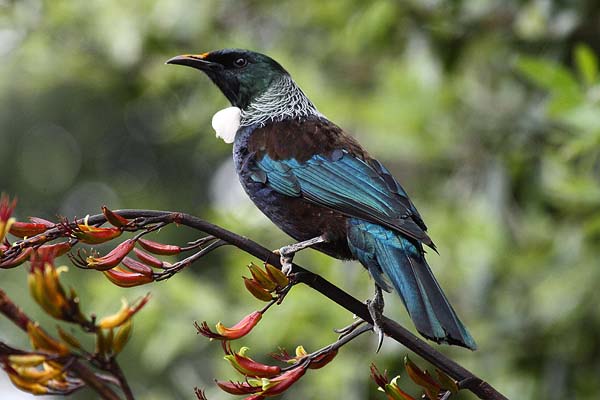
Tui
From the begining an aim of mine has been to increase the biodiversity of our given site. Through introducing many native plants and trees to the pocket forest space many animals, such as native birds, will be drawn to the forest. Tuis are known for being attracted to both kowhai and harakeke (flax) both of which have been included amoungst the forest. Smaller bugs and insects will also find themselves creating homes throughout the forest increasing the biodiversity both above the ground and underground.
Week 9: Details of my Design
Design Development:
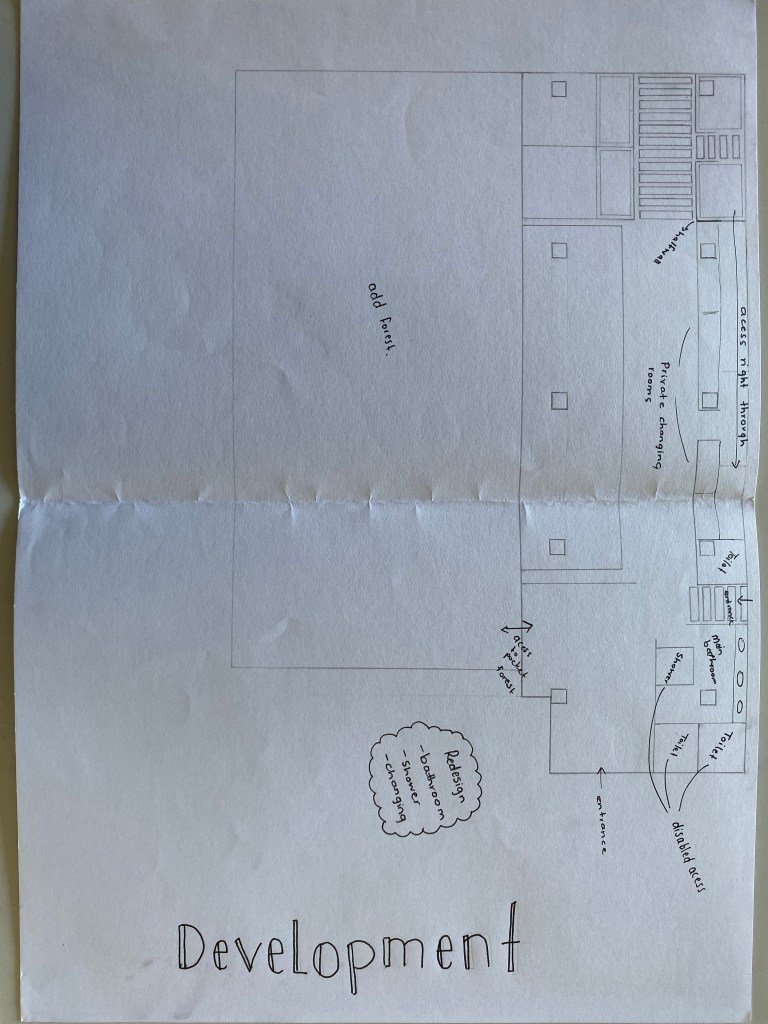
After further thinking about my design I have made some minor changes to the bathroom, shower and changing room spaces.
An important change that I made was creating a half wall between the shower and changing rooms allowing easy movement between the to spaces. Originally a guest would have needed to walk out of the showers and back past the main pool to enter the changing rooms. This is not practical and it would be easier to move straight from the showers to the changing rooms.
I also developed the main bathroom into a more user friendly space. I have created the space so that people in wheelchairs are able to easily move in and around it. I have a changed one of the toilets into a shower as wheelchairs would be difficult to get into the main shower area.
Colour palette:
During this mornings class we discussed colours ways and how they can create a feeling amoungst a space. I have focused on using colours found in the natural environment such as green and brown tones. I plan to bring these colours in through materials in my design.
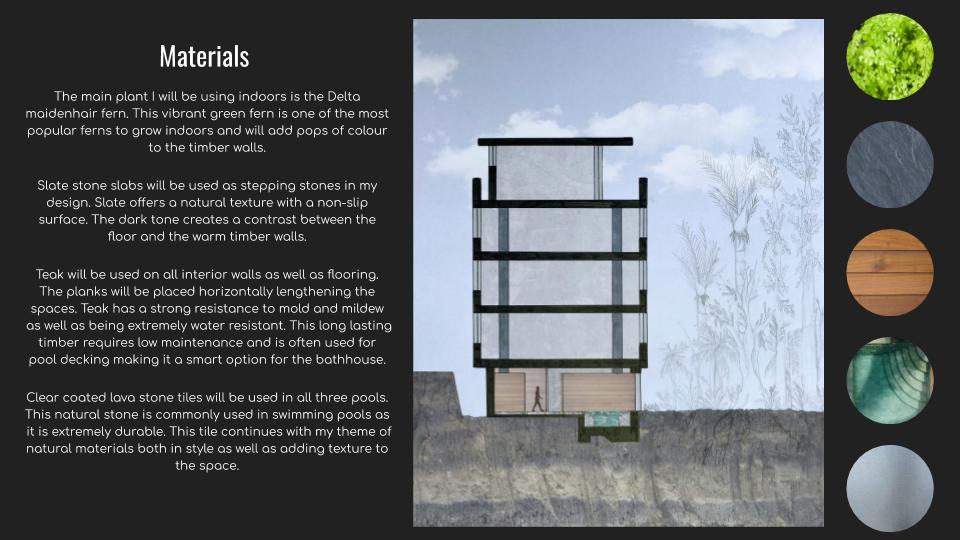
Specific materials:
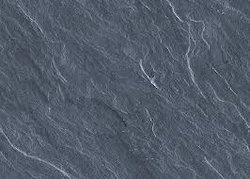
Slate Slabs 
Lava Stone pool tiles 
Stained Teak 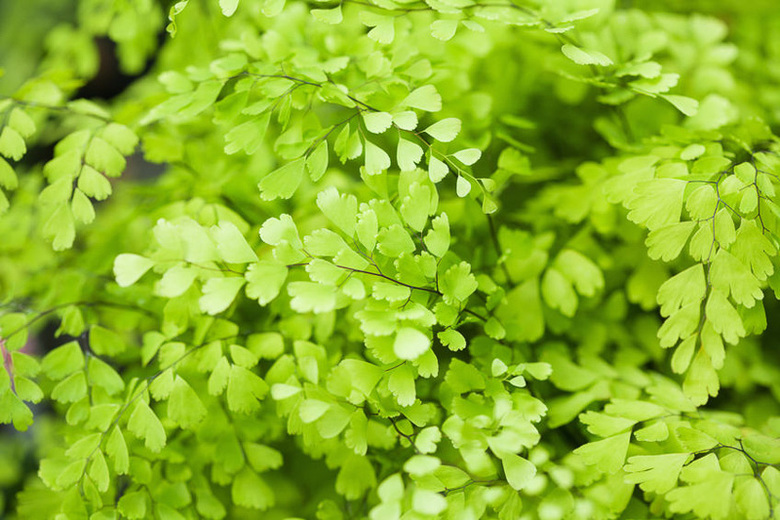
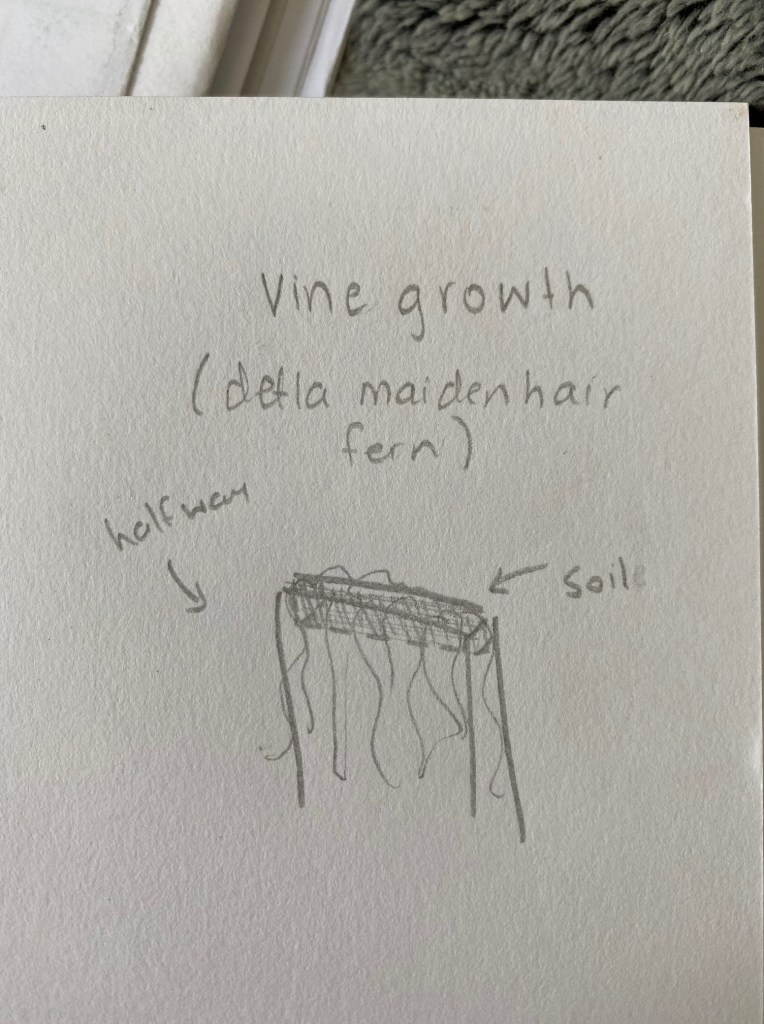
Delta Maidenhair
Slates slabs: Slate stone offers a natural textured look that works well within my design. Slate is a non-slip surface while being extremely durable and long lasting. This material will be used for the stepping stones throughout the space.
Lava stone pool tiles: Lave stone tiles are ideal for swimming pools due to their durability and non-porosity.
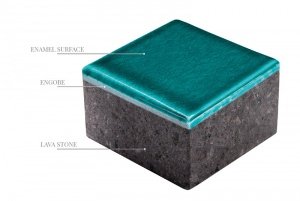
The close-up of a lava stone tile makes clear the benefits of enameled lava as a coating surface for swimming-pool flooring.
The enamel layer the ceramic is layered and finally covered by a crystal coating and then fired. Thus, the enamel is an impervious layer of a vitreous substance which has been fused to a stone body through firing.
Through glazing, the lava stone surface becomes unaffected by UVs and is frost-resistant, almost indestructible, and waterproof.
Non-slip glazes can be applied to lava tiles used for staircases and poolsides.
The engobe layer is the layer underneath the enamel, a clay that closes micro holes or imperfections of the stone.
The stone layer the volcanic stone is ideal for any outdoor swimming- pool coatings, thanks to its heat-accumulation capacity.
Teak: After researching about the best type of timber to use within wet spaces over the last few weeks I have decided to use stained teak on the walls and some of the flooring. Teak is known for its resistance to mold and mildew which is necessary within a wet space. Teak requires little to no maintenance and has a longer life span than most timbers due to the fact is doesn’t absorb any water.
Delta Maidenhair: This native fern is one of the most popular indoor ferns in the country. The vibrant green adds pops of colour to the timber walls that it will grow on.
Transparent glass will be used for all window features.
The water in the pools themselves will be salt water as it is proven to be more gentle on the skin and eyes compared to chlorine pools. the main pool with a depth of 1.6m will be at a temperature of 28 degrees and the smaller private pools with a depth of 1m will be 37 degrees.
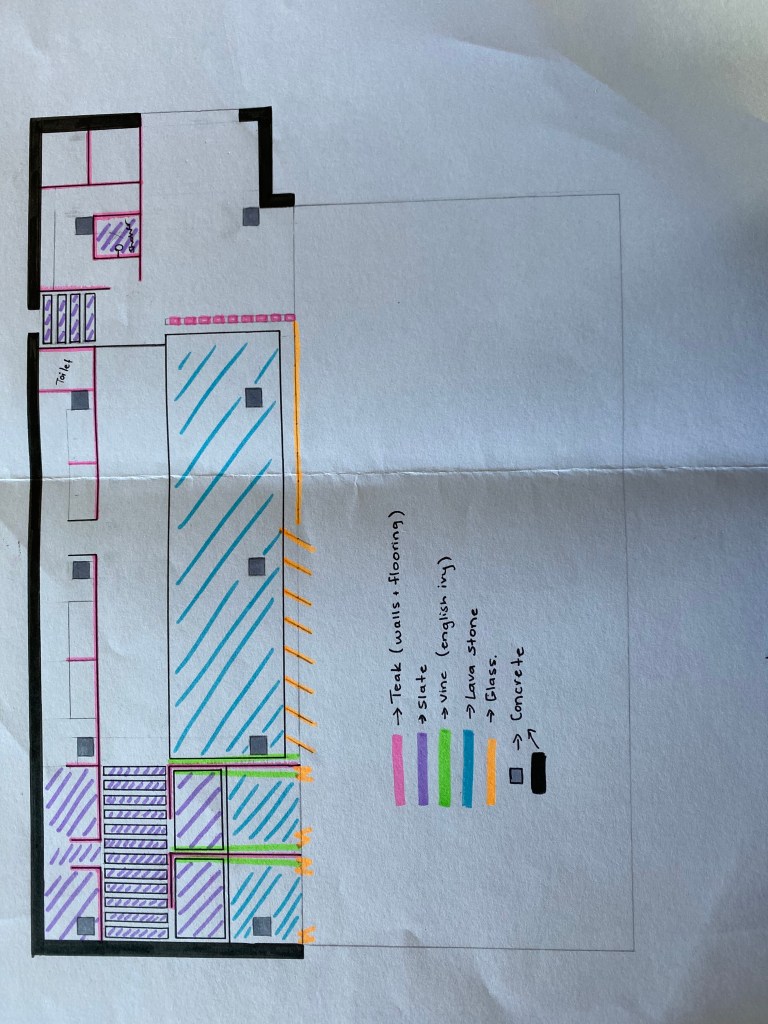
Material placement:
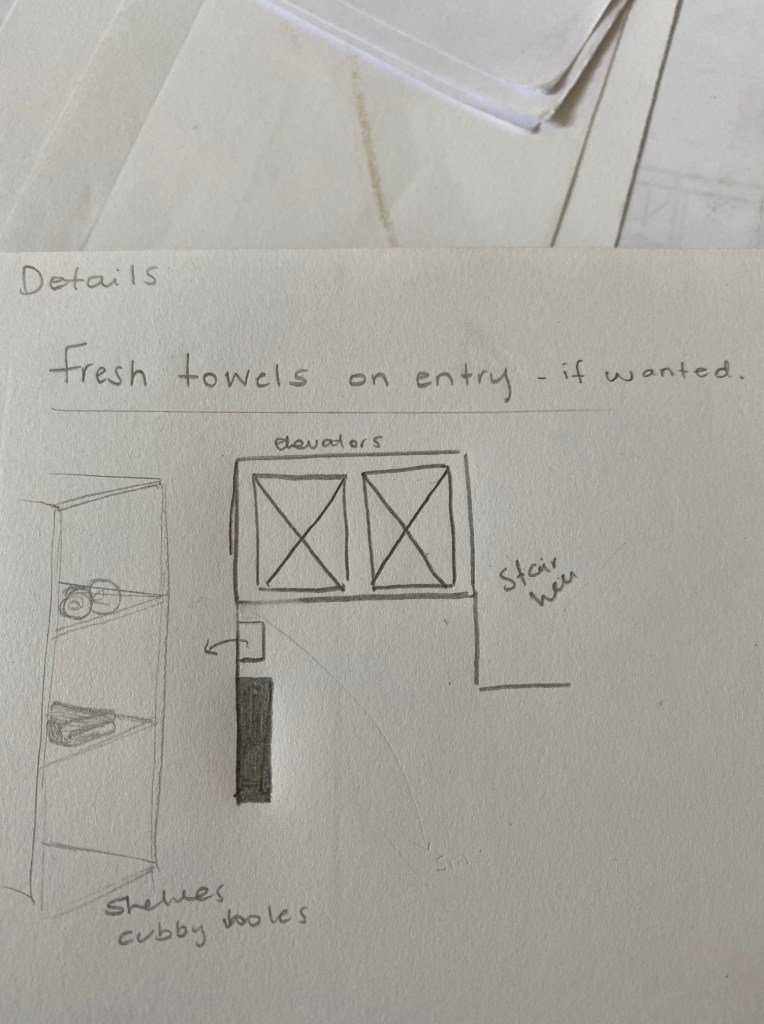
Refreshment area layout:
Design details:
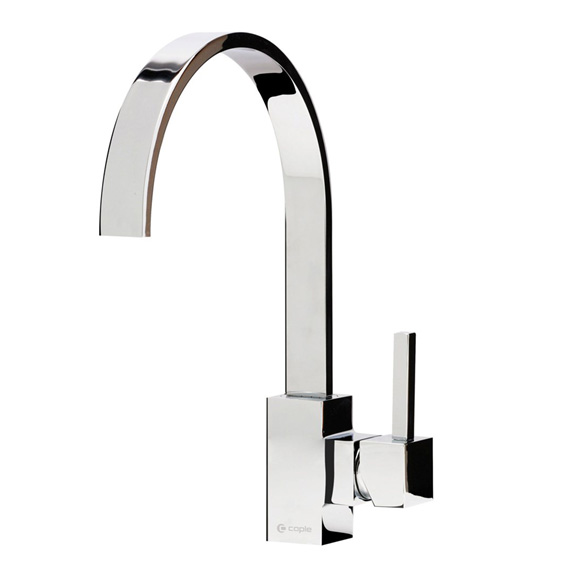
Aluminium tap ware 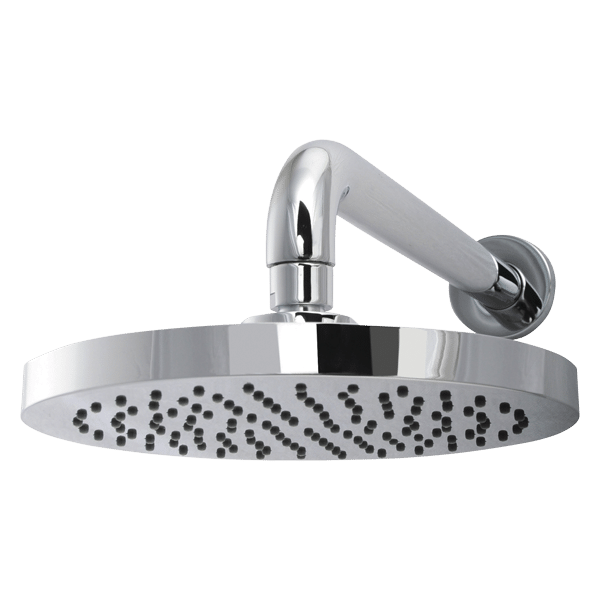
Aluminium shower heads 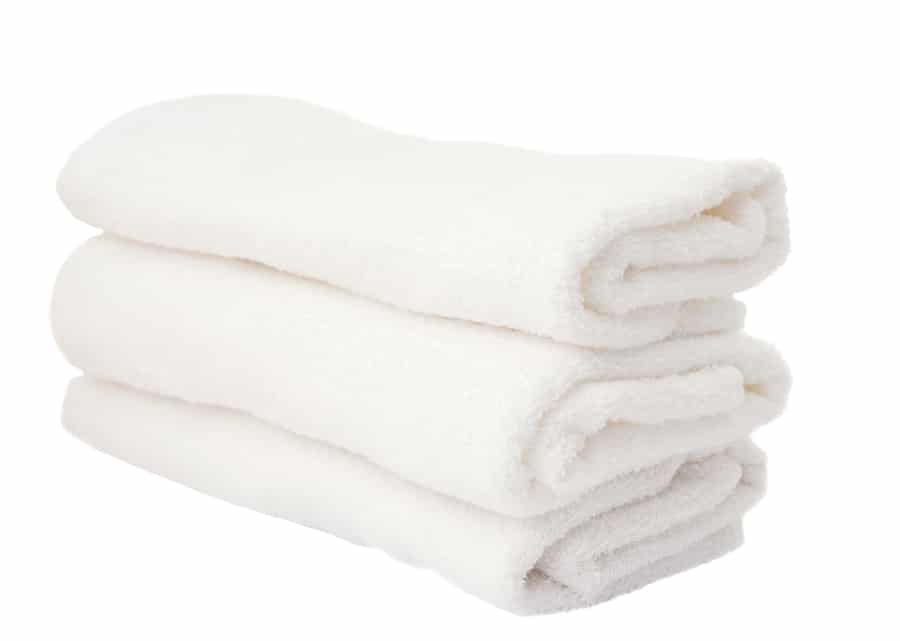
White cotton towels 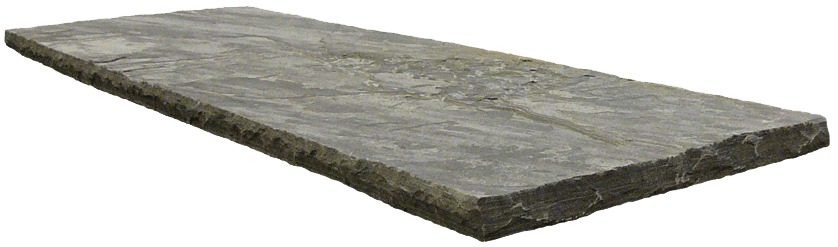
Stone table tops 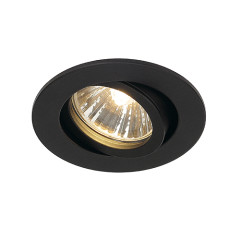
Matte black down lights. 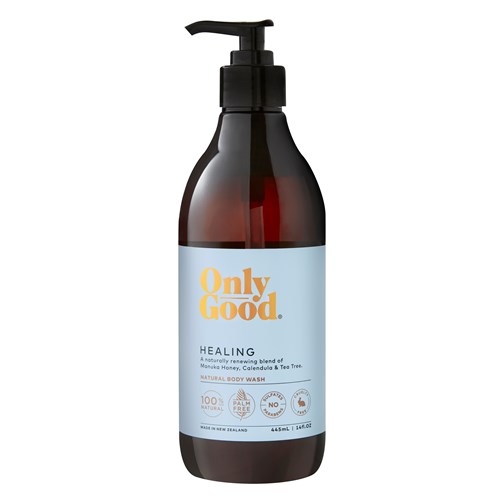
Only good soaps etc 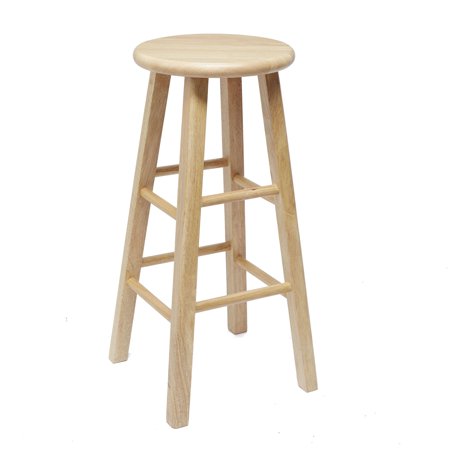
Wooden stools
Refined Design Concept:
My original concept was to create a connection between the interior and the exterior spaces I have expanded on this concept by designing a space that can be used for both mental and physical recovery. I have decided to include many plants that provide traditional Maori healing properties that can be used to soothe pain and aches. Through research I have found that relaxing and connecting with nature can result in stronger health and a positive overall well being. Each of the three pools are located directly in beside the forest to create the best experience for the guests.
Week 10: Details Continued
Pool edge detailing:
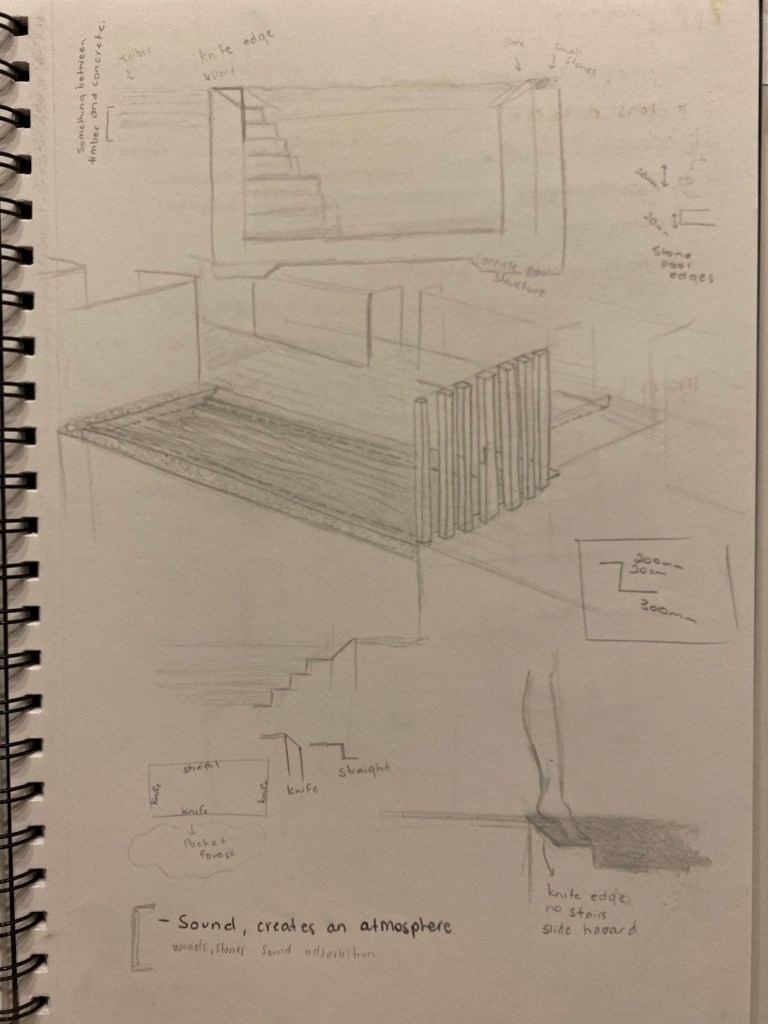
The details of the pool edges can change they way the pool looks entirely. I have decided to use a mixture of two pool edges for both safety and aesthetics. All three of my pools will have stone tile edges.
My main pool will have three knife edges and one flat edge. The flat edge will be where the steps into the pool are located. I originally wanted to have the sleek knife edge on all four sides creating a seamless look, but due to safety and the possibility of slipping a sloped edge into steps was not a good idea.
The private pool will have a flat edge on all four sides as the steps go around all edges.
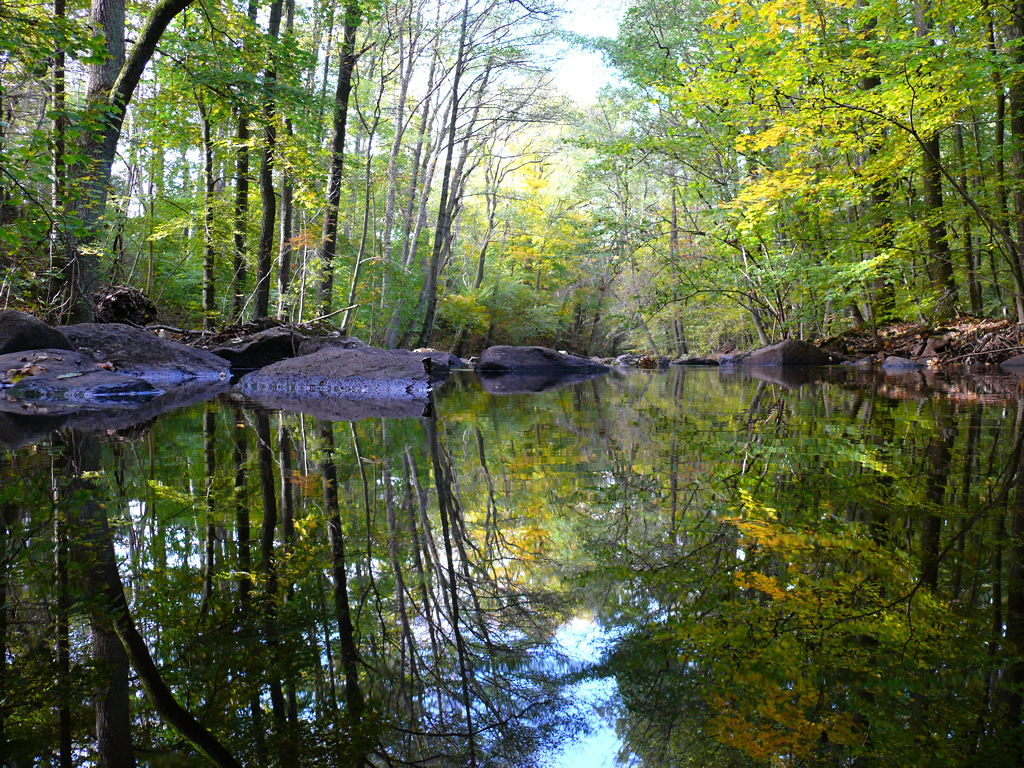
Reflections:
Reflections can be used to create colour palettes within spaces. In this specific design the reflections will be of the pocket forest as well as the surrounding interior and exterior walls. The colours seen amoungst the reflections will be mixtures of brown and green earth tones, this works well with the materials I have chosen to use creating a cohesive space. Below are a few images that have similar colours shown in the reflections that will be seen within my bathhouse.

Sketching exercise:
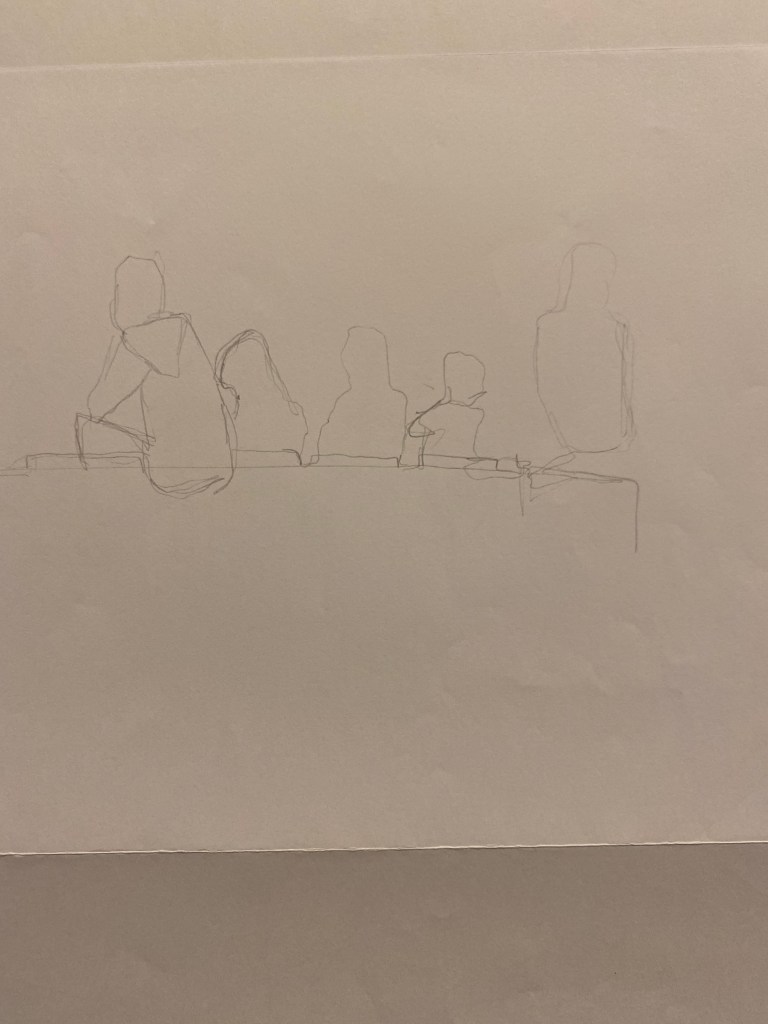
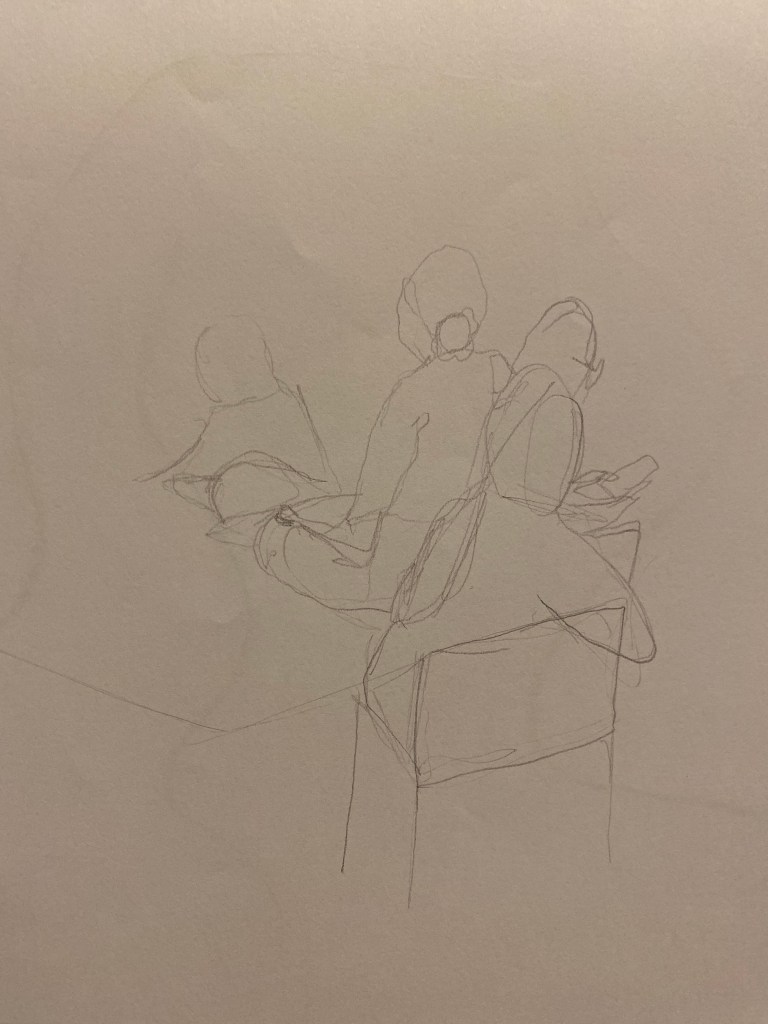
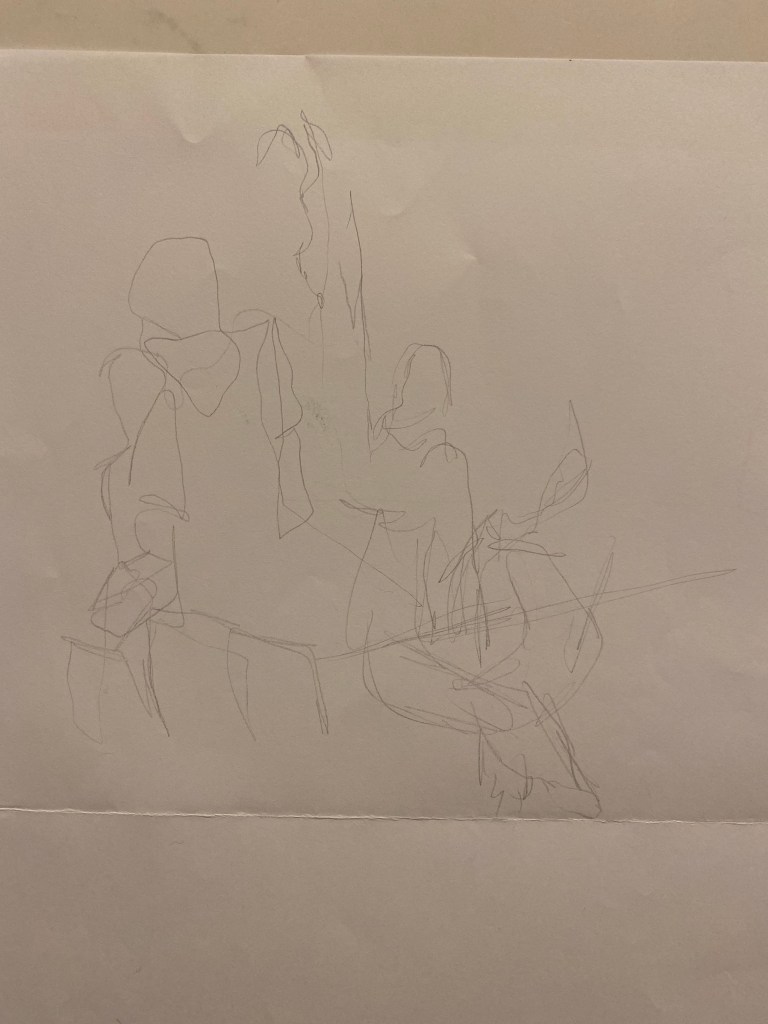
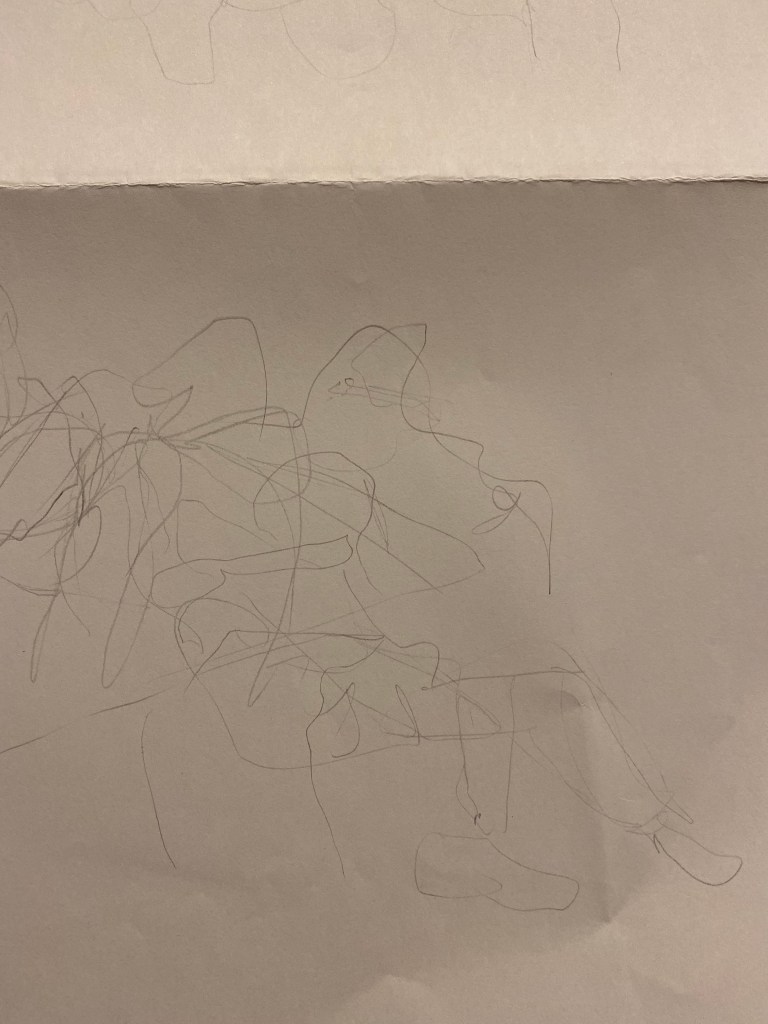
During class we had a short sketching session where we focused on loosening up our drawings and using different pencils and pencil edges. We drew each image within a short time frame, some with our eyes open and others closed. I can definitely see a change in the way I was drawing in the beginning to the end.
Rhino modelling:
This week I began modeling my bathhouse design on rhino. Seeing everything from different perspectives has definitely helped and has resulted in me making a few minor changes, particularly to do with the size of hallways and doorways.
Extra details:

Week 11: Plan + Section Development
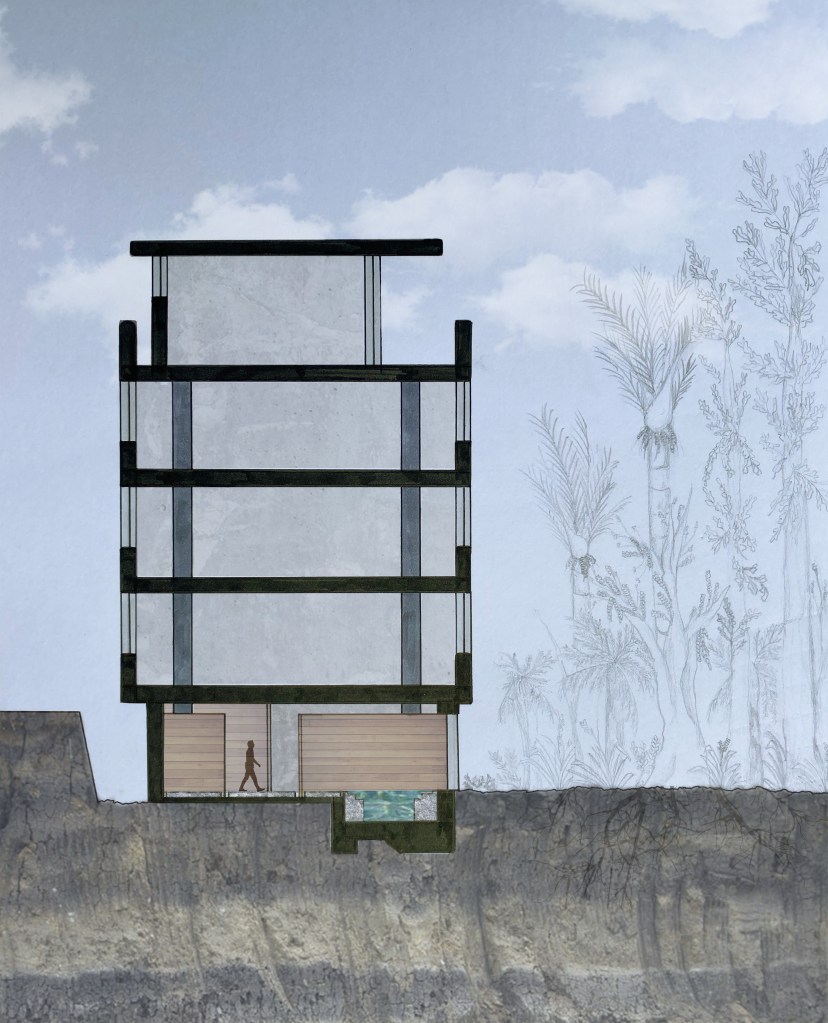
Section:
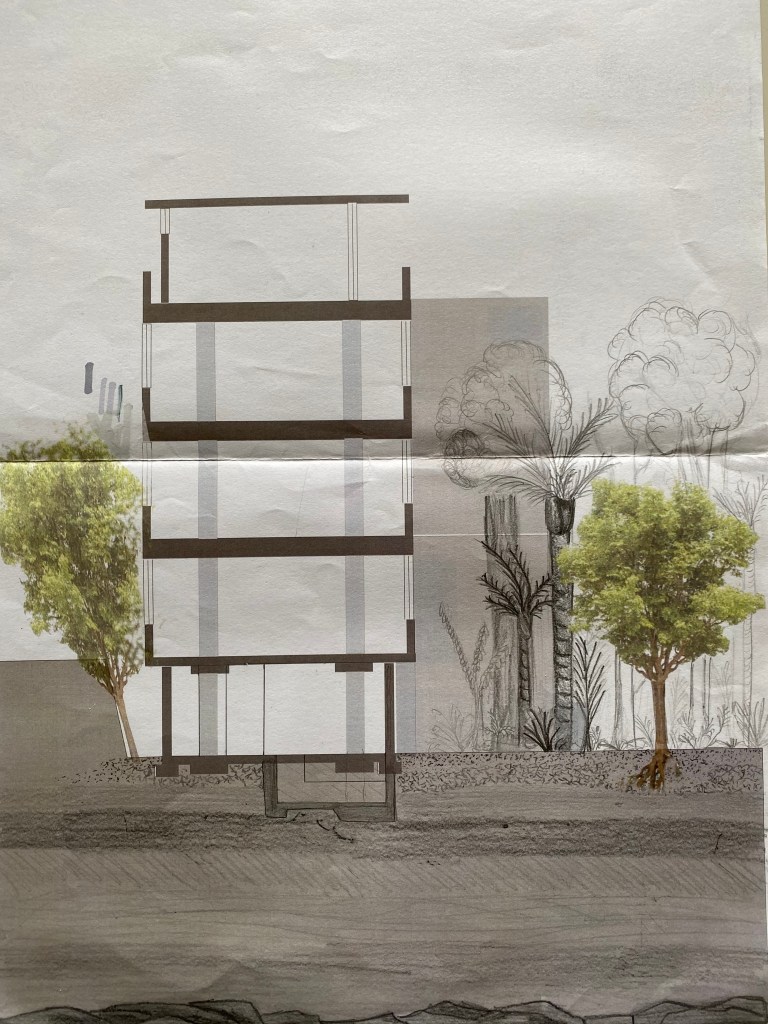
First section 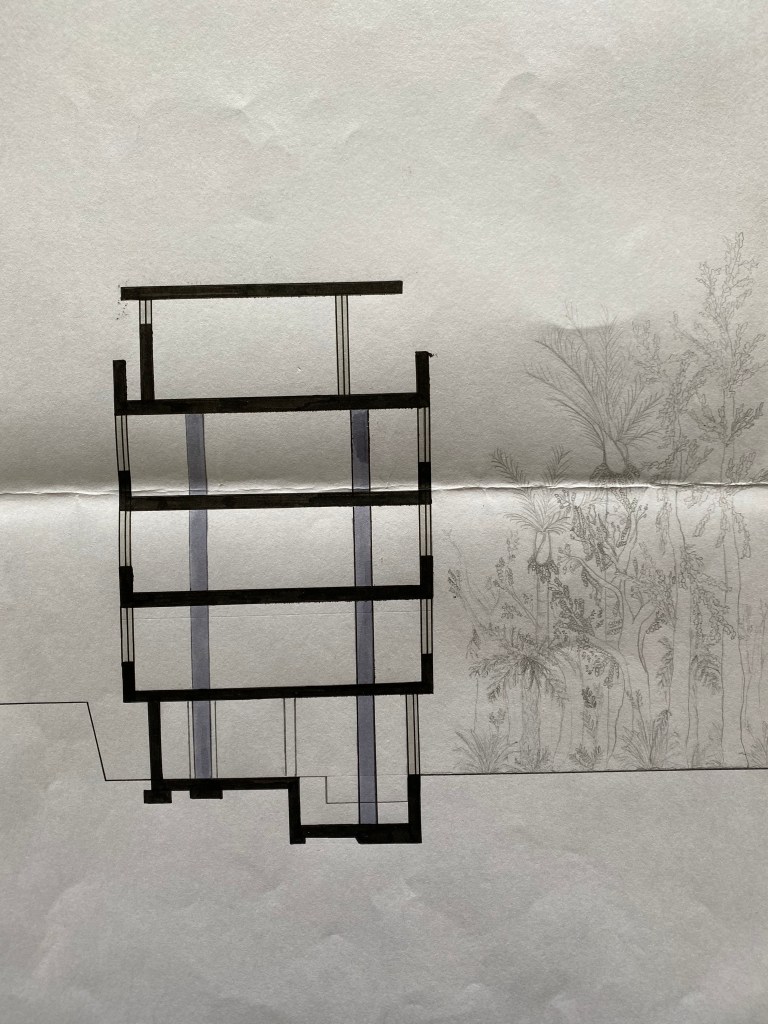
Second iteration 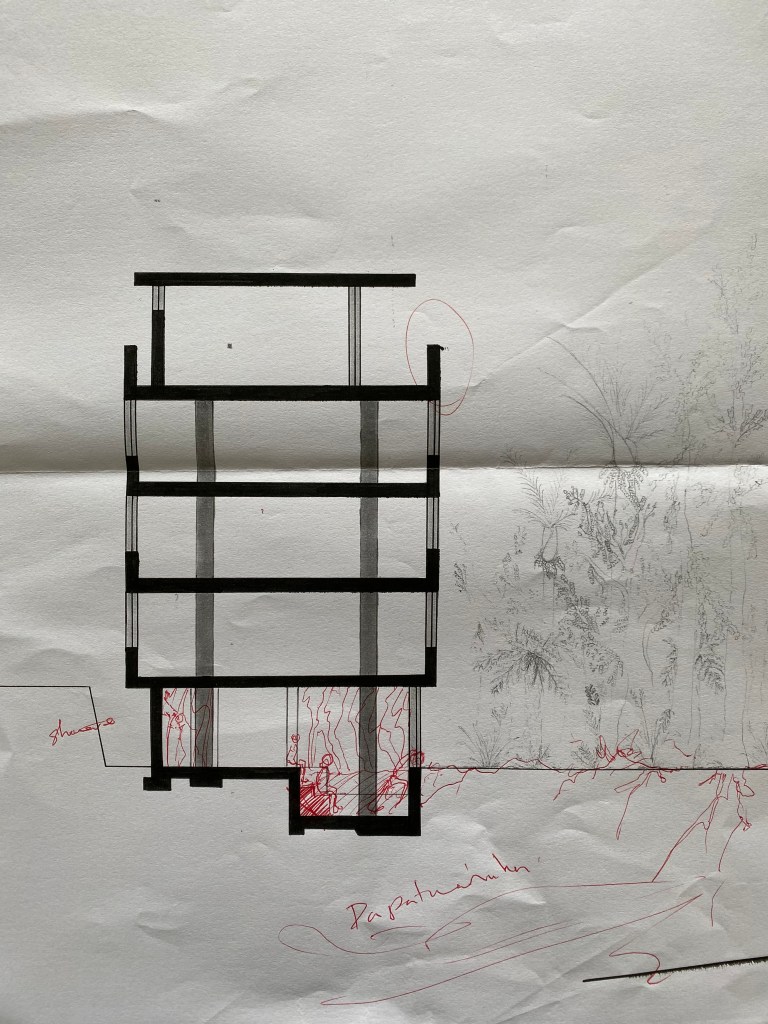
Feedback 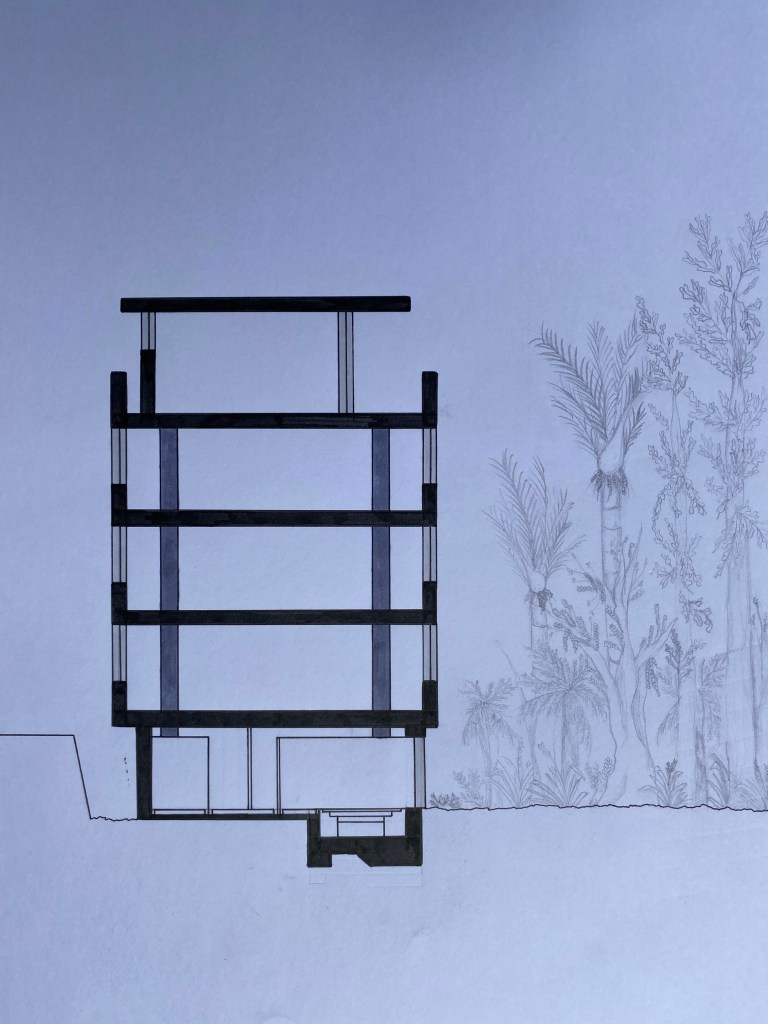
Final drawing
Plan:
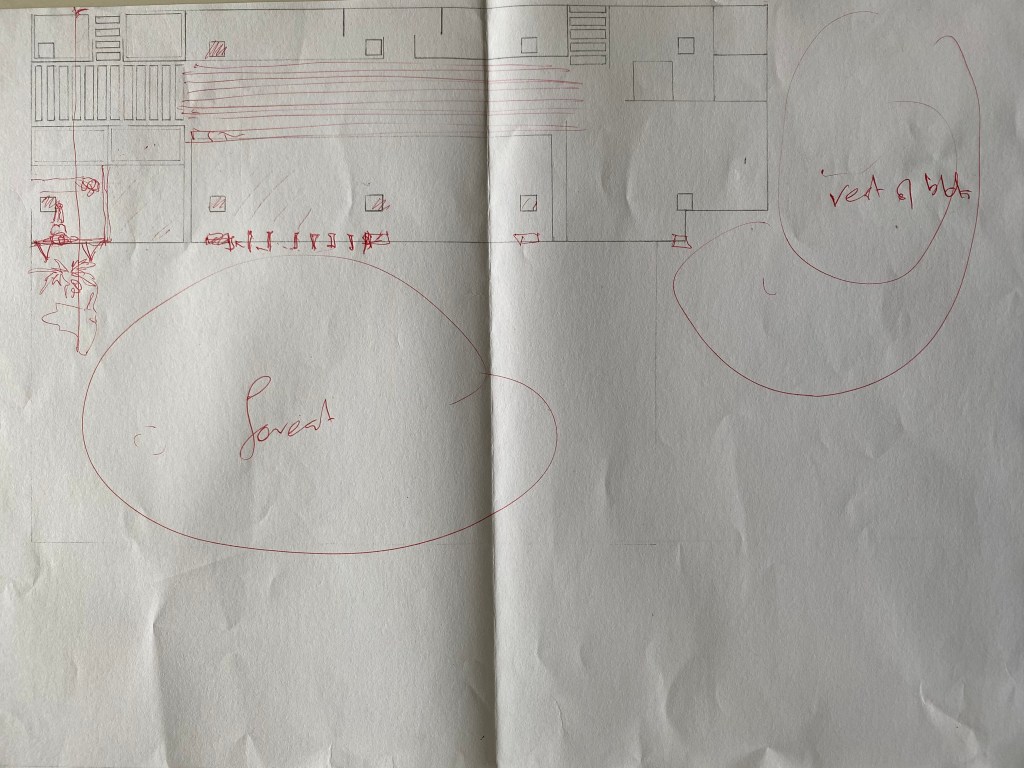
Feedback 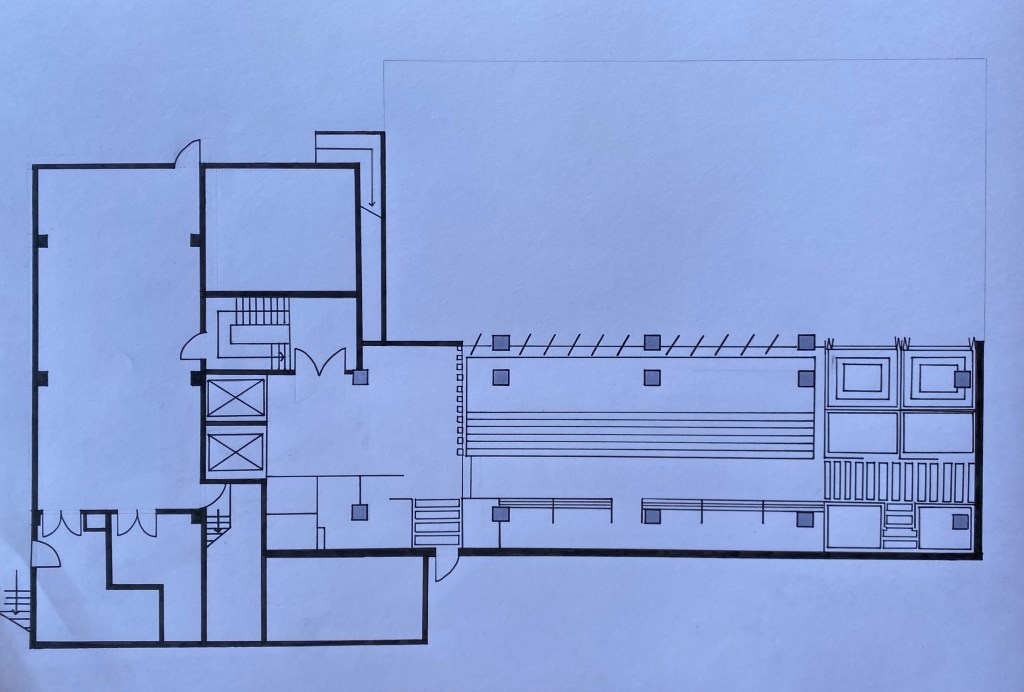
Final Drawing
Rhino model progress:
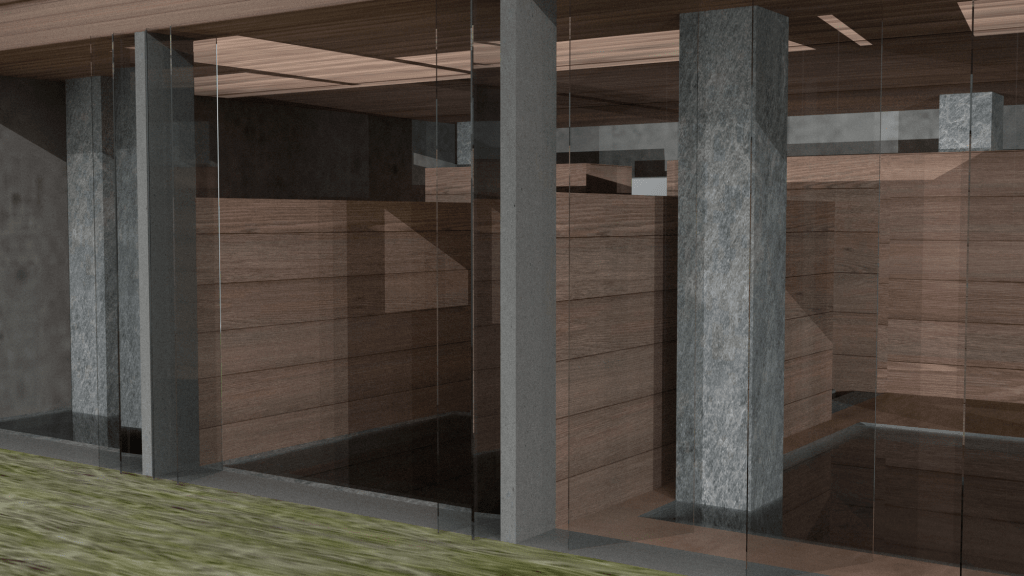
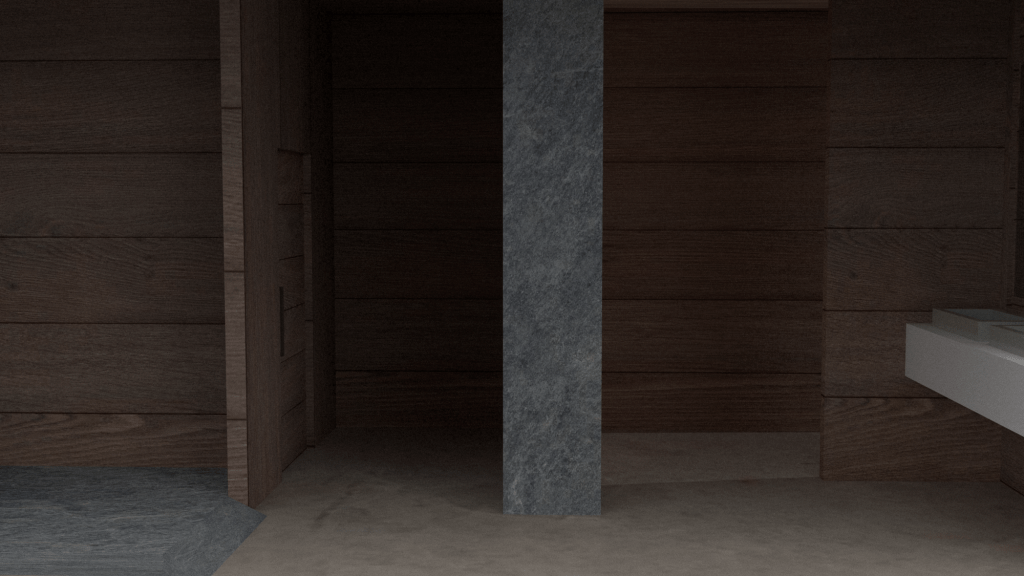
I’ve continued to work on my rhino model over the last week and have started to capture a few different perspectives of my design. Below are some of the images I have captured.
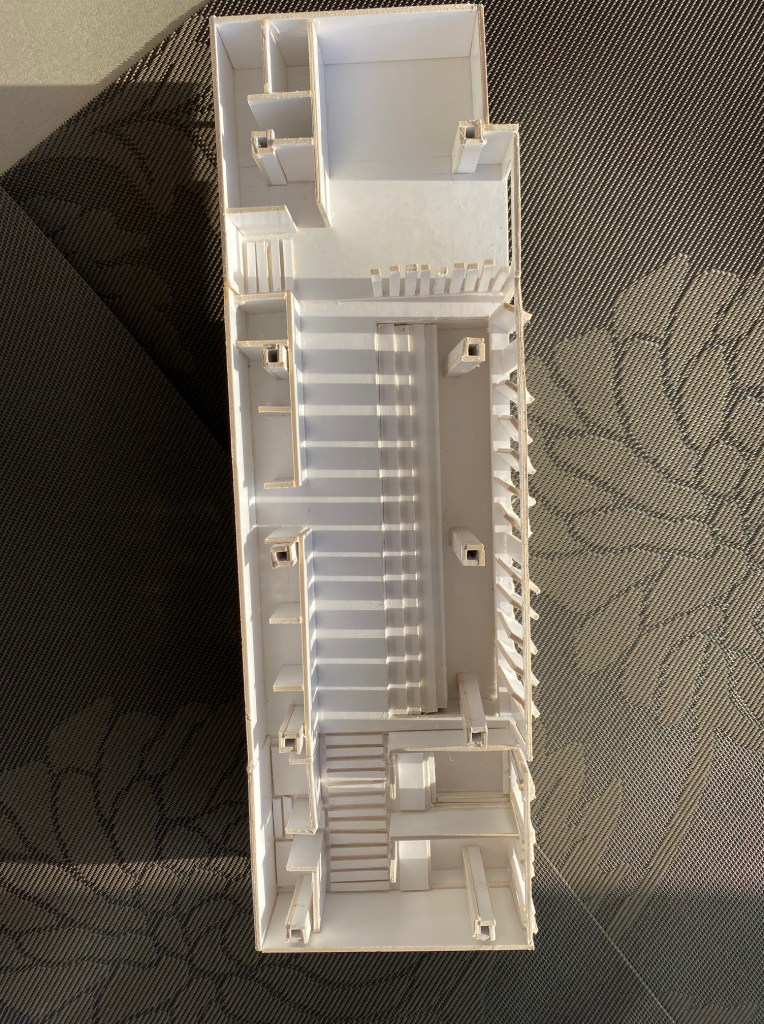
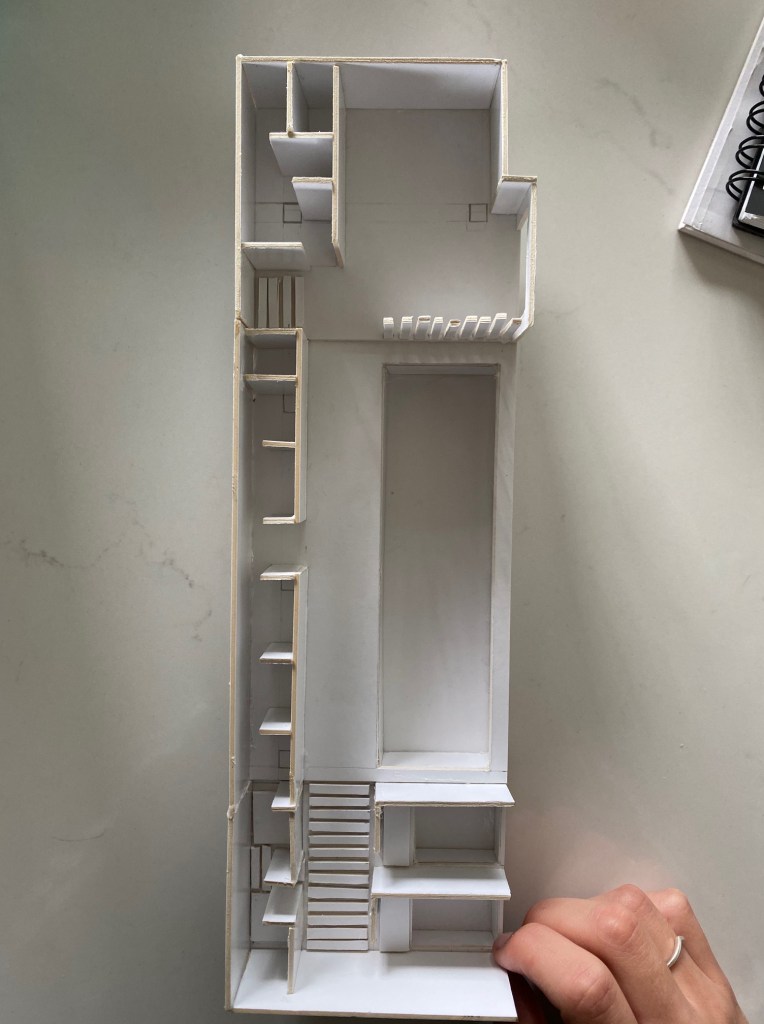
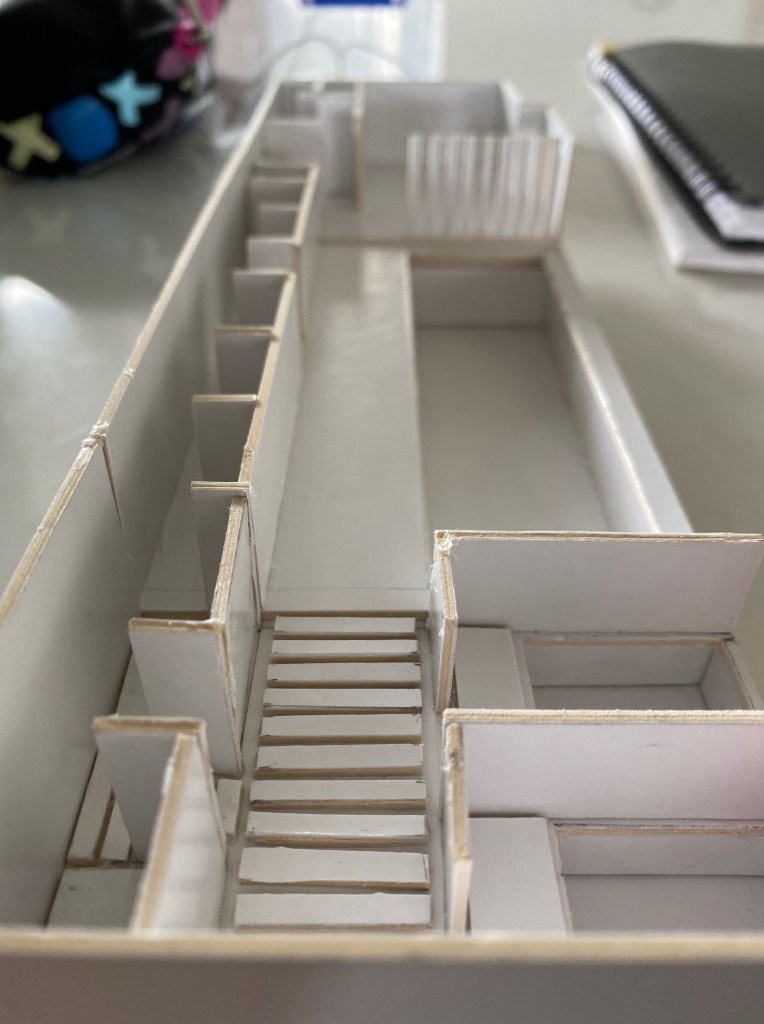
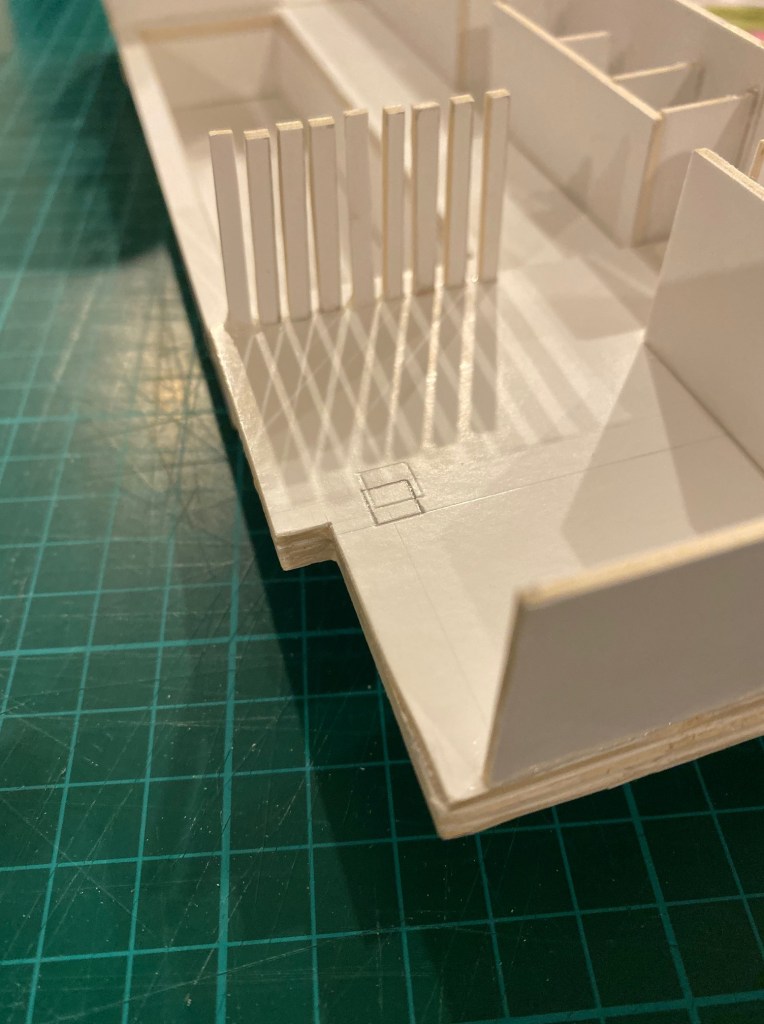
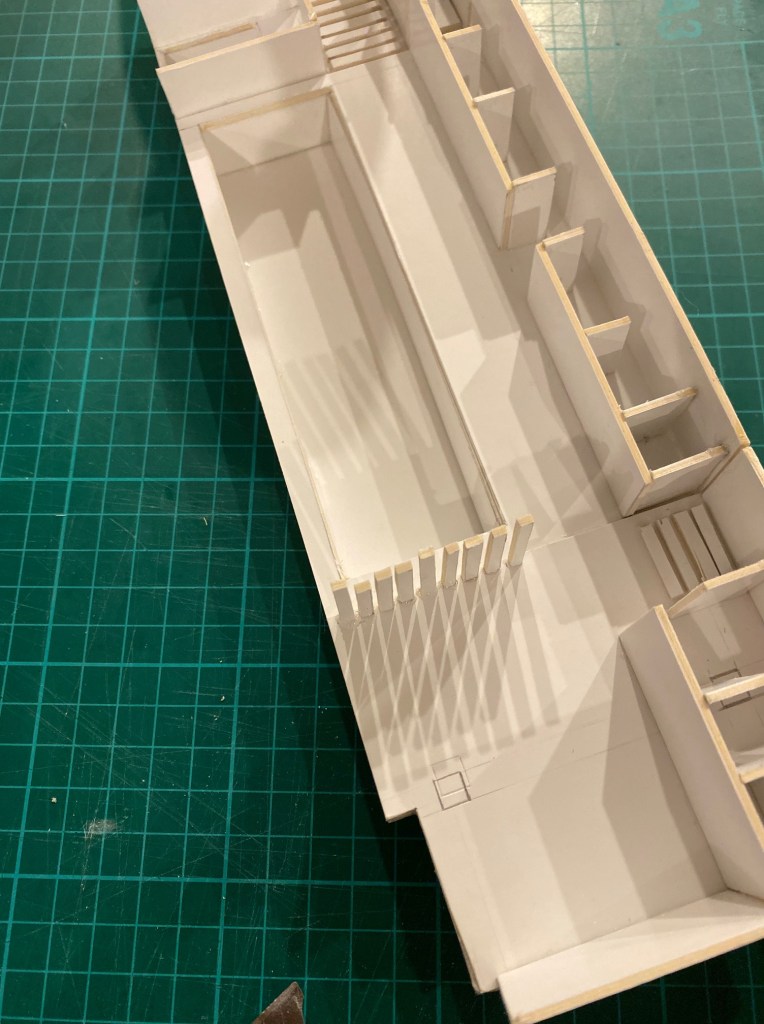
Physical model progress:
Due to making some changes to my design and wanting a more sturdy model I decided to make a new one for the presentation. I used a thicker white cardboard to give the model more structure as my second model was quite flimsy. Below are images of where I am at, some elements of the design are still missing.
Below are images of how different angles of light can create interesting shadows on the pool and entrance/refreshment area.
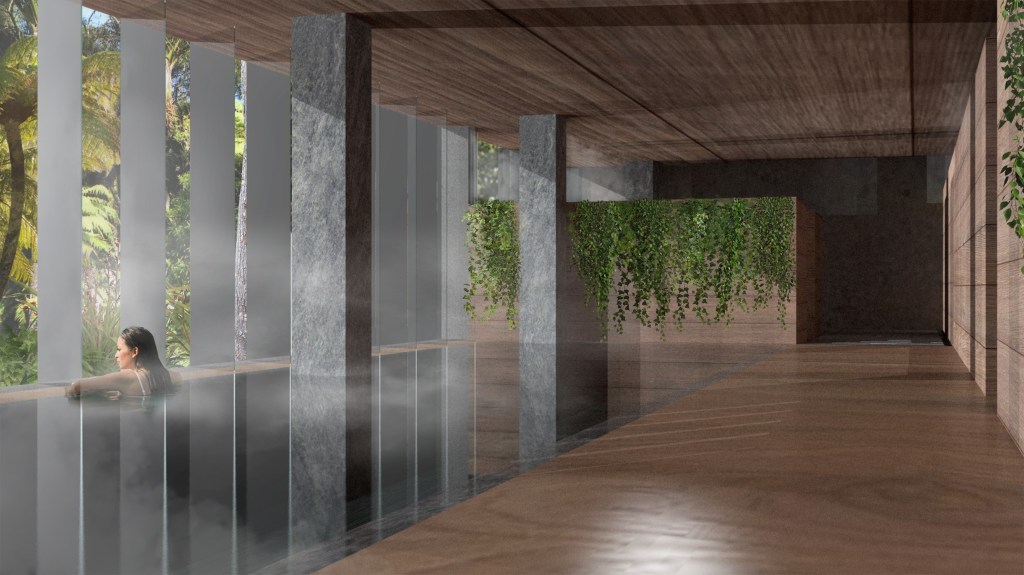
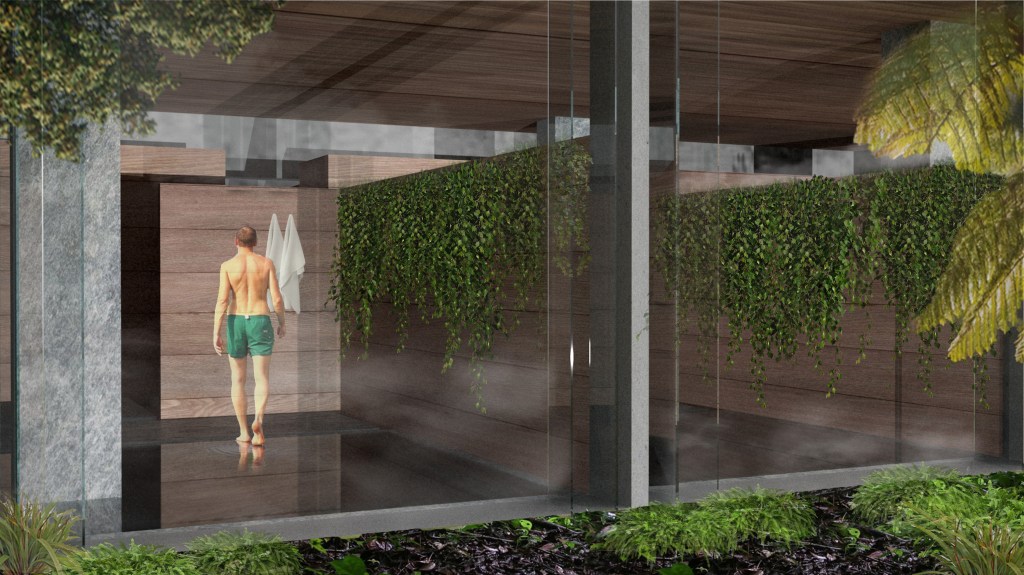
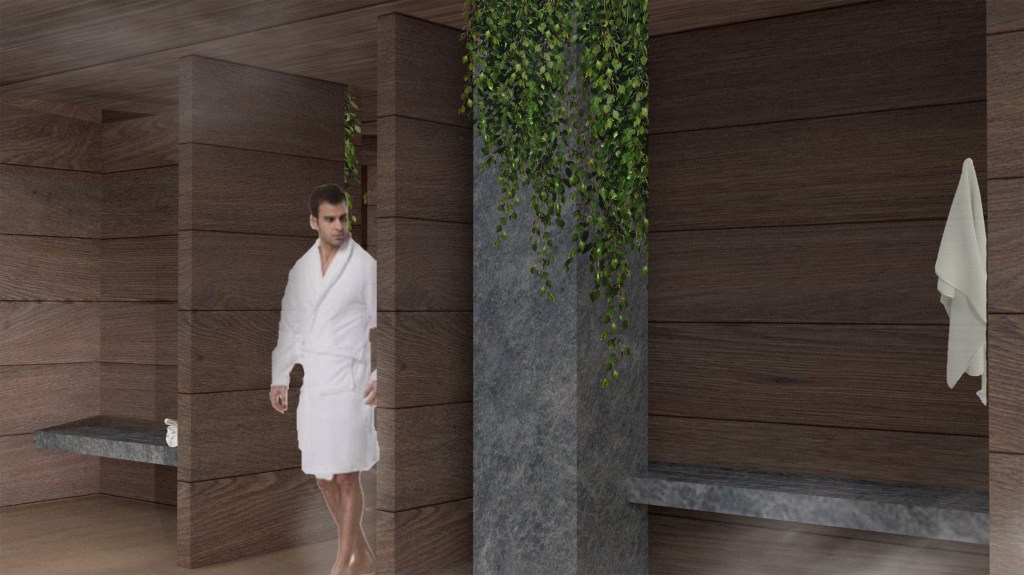
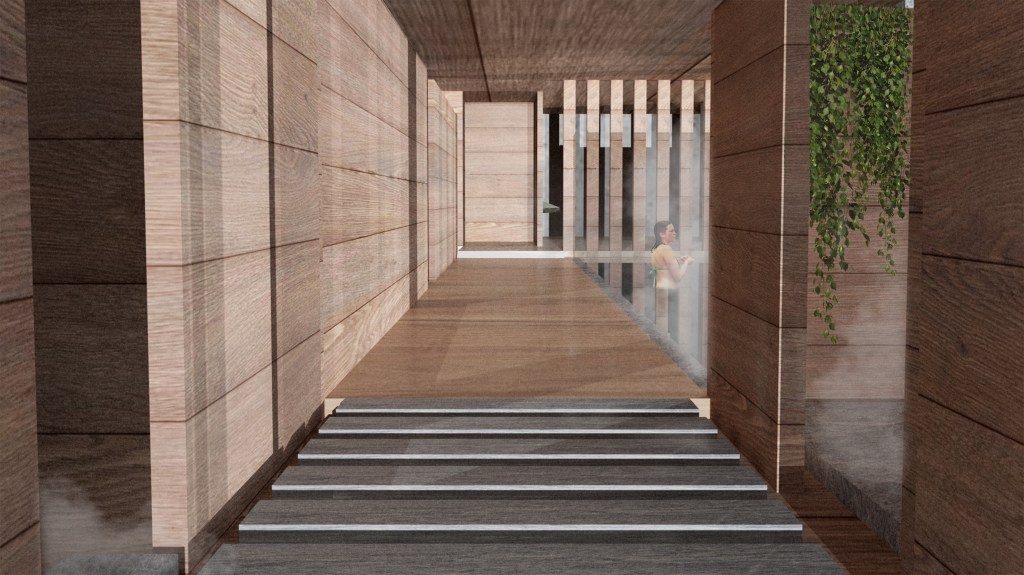
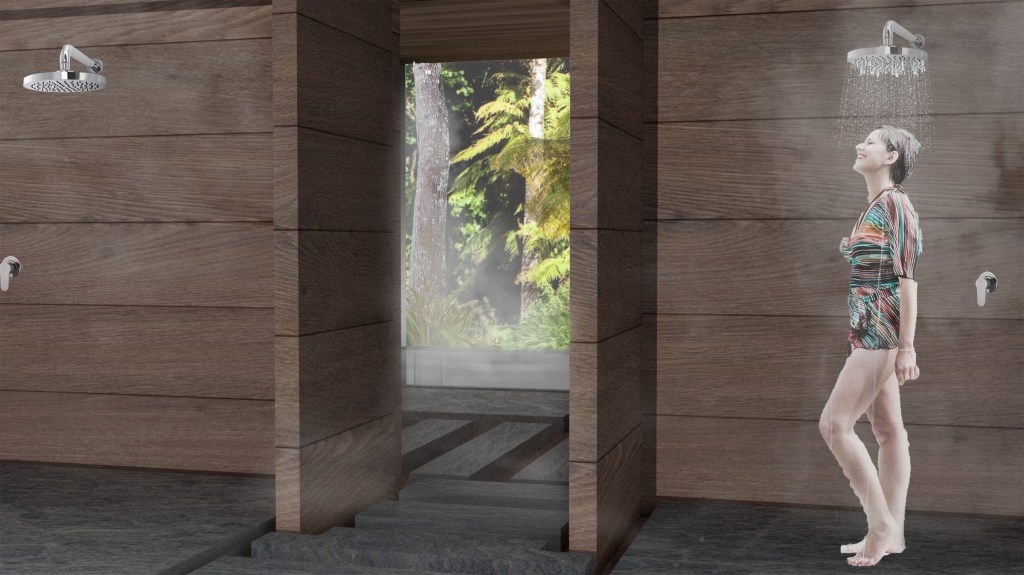
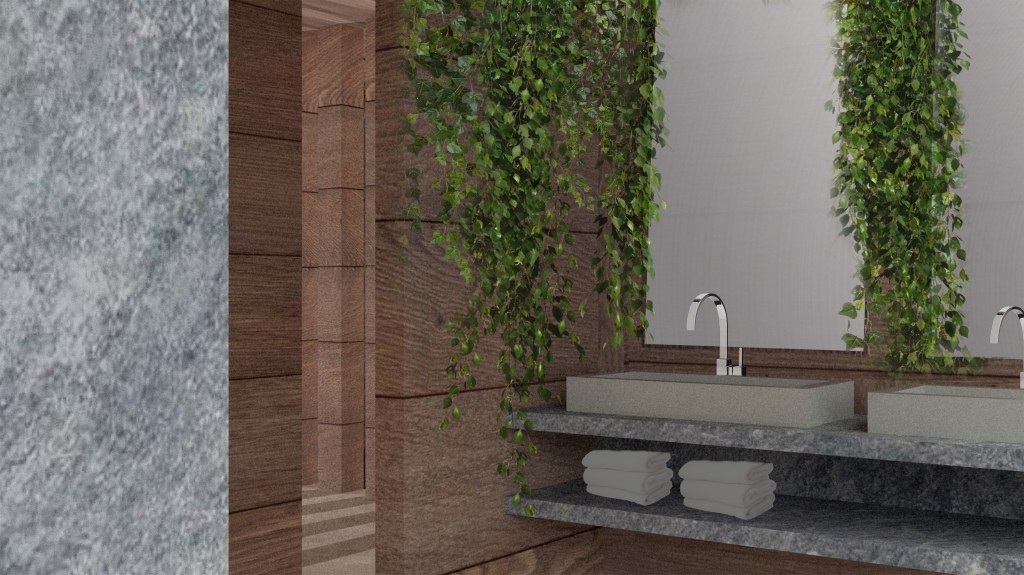
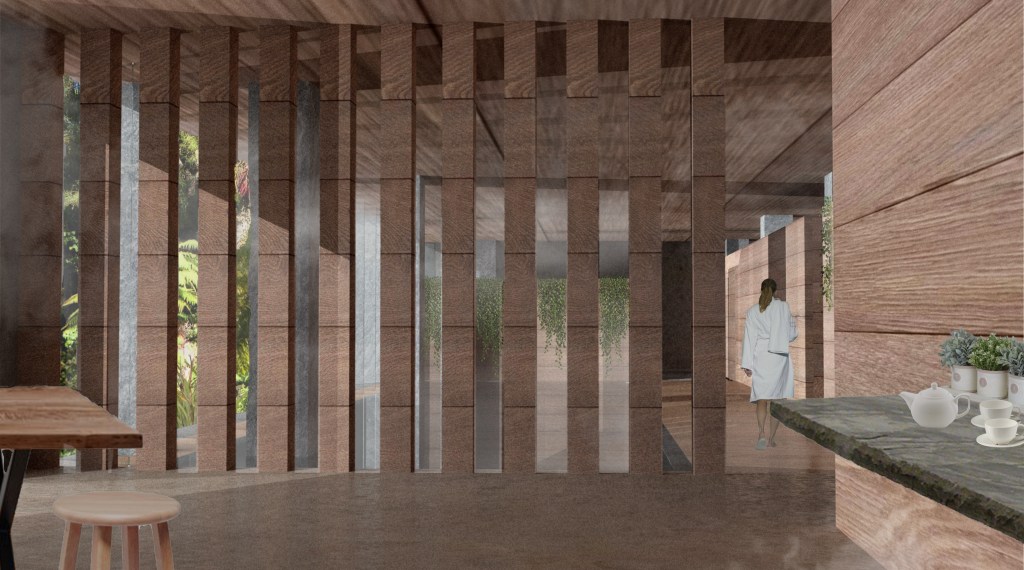
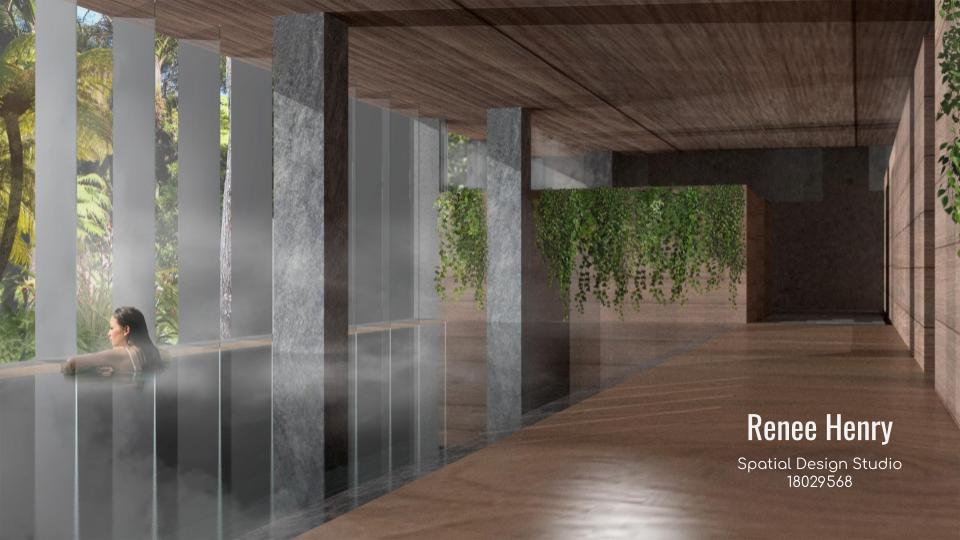
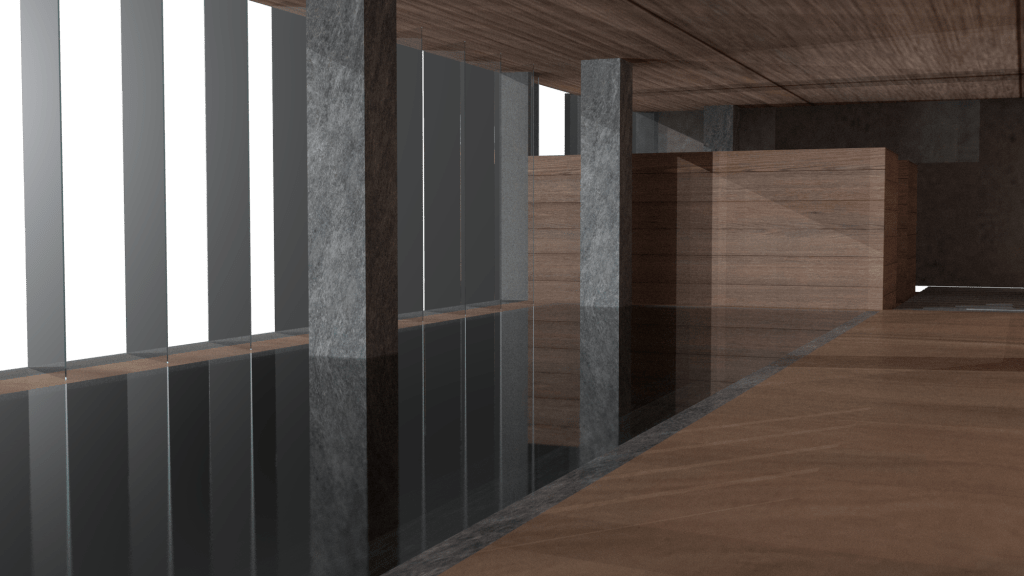
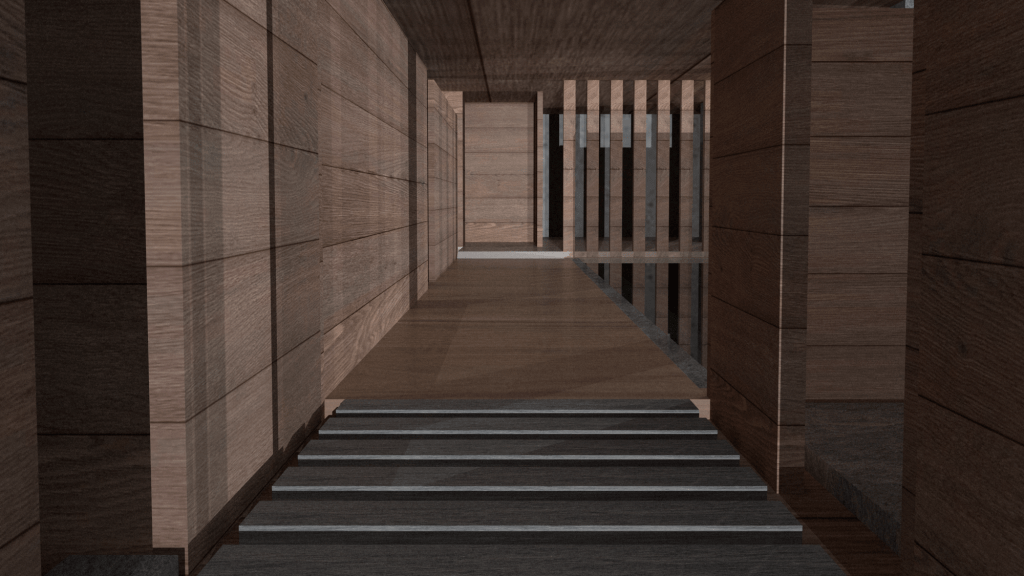
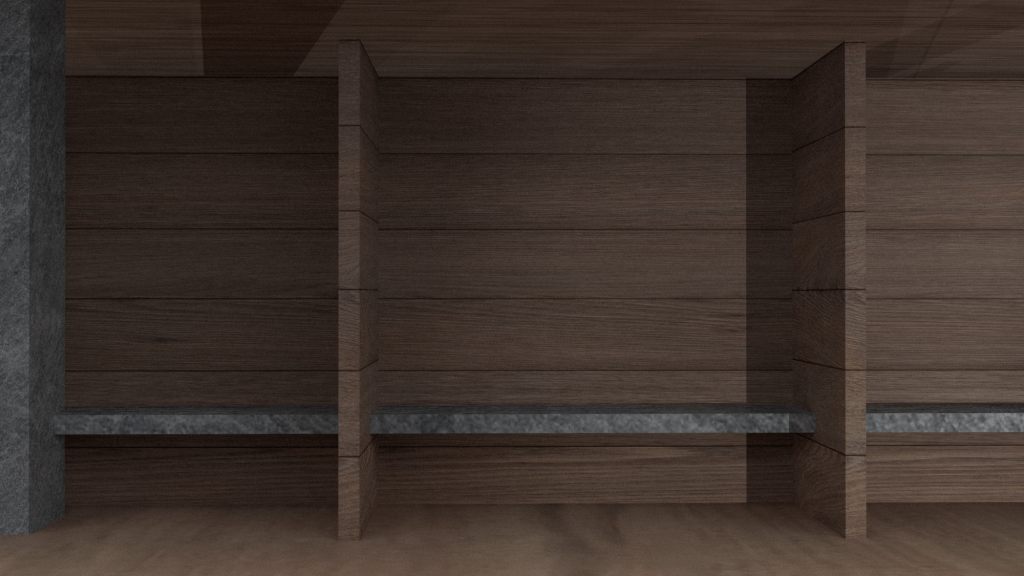
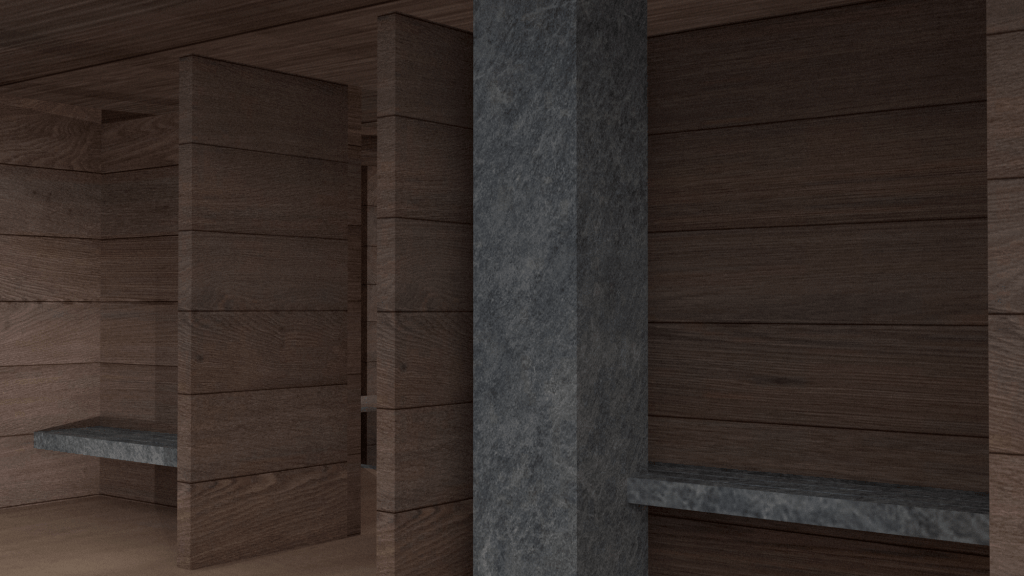
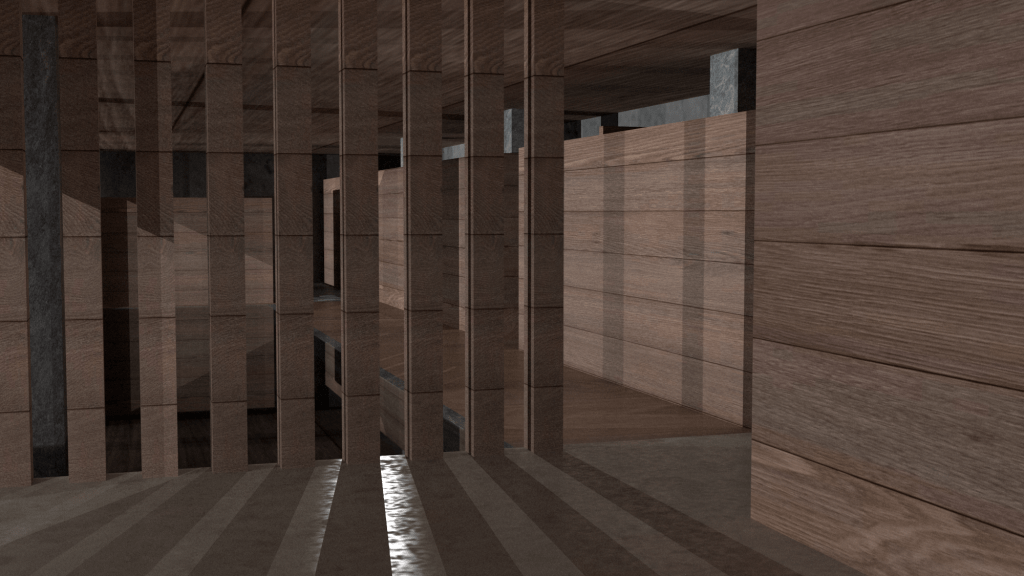
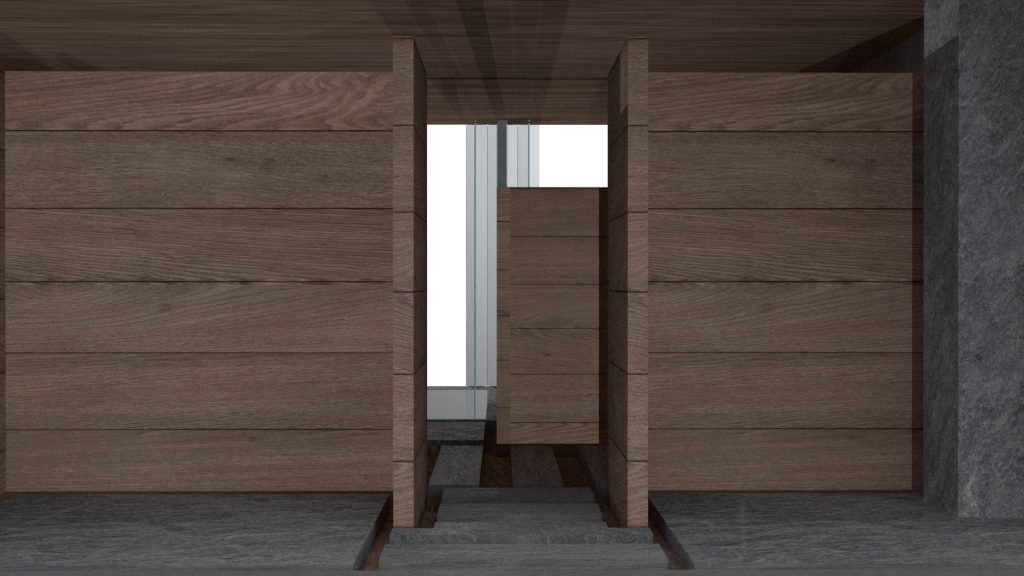
Week 12: Perspectives
Below are my 7 final edited perspective images, each showing different areas of the design as well the the atmosphere.